Bike Gearing Explained
Bike gearing lets you match cadence to terrain by combining chainrings and cassette cogs. You pick chain and cassette speed-compatible parts, match chain width, and use correct mounting (BCD or direct-mount). A smaller chainring or larger cog gives easier climbing; a bigger ring or smaller cog gives speed.
Keep cables and housings clean, routed smoothly, and indexed with barrel-adjuster tweaks so each click equals one cog. Follow simple tension checks and bolt torques for reliable, crisp shifts. Keep going to learn step-by-step fixes.
Quick Overview
- Gear systems change pedaling effort by altering gear ratio: chainring teeth ÷ cog teeth determines how far the wheel turns per crank revolution.
- Match chain and cassette speed: use the correct chain width for 9/10/11/12-speed systems to ensure reliable shifting and wear compatibility.
- Choose gear ratios for conditions: low ratios for climbing, mid for cruising, and high for sprints, based on target cadence and wheel circumference.
- Proper cable tension, housing condition, and correct indexing ensure crisp, one-click shifts across the cassette.
- Maintain parts and mounting: confirm chainring BCD/direct-mount fit; torque bolts to spec. Replace frayed cables and compressed housing regularly.
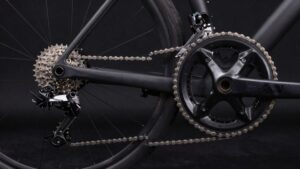
Chainring × Cog Comparison
How do you know whether a chainring will play nicely with a rear cog? You check drivetrain speed, BCD, mounting type and tooth profile. Match chain width to cassette speed; a 10-speed chain won’t work on 11- or 12-speed cassettes. Verify BCD and direct-mount compatibility before buying chainrings.
| Check | What to confirm |
|---|---|
| Speed | Chain/cassette match |
| Mounting | BCD or direct-mount |
Use a closing wrench to tighten chainring bolts to spec. Follow tool calibration for torque tools so you don’t warp the ring. Note narrow-wide rings suit 1x setups; multi-ring systems need standard tooth profiles. Brand quirks (Campagnolo, SRAM, Shimano) affect cross-compatibility; confirm specs to avoid misfit.
Optimal Gear Ratios Chart
Wondering which gear ratios will give you the best balance of climbing, cruising, and acceleration? Use an optimum gear ratios chart to match your riding goals to specific chainring × cog combinations. You’ll map target cadence to speed with simple cadence mapping: pick a comfortable rpm range and list ratios that hit that speed at typical wheel circumference.
Build the chart for climbs, flats, and sprints so shifts become intentional, not guesswork.
- Climbing: lower ratios that keep cadence steady without grinding.
- Cruising: mid-range ratios that sustain your preferred cadence on flats.
- Acceleration: higher ratios that let you zip up to speed without overspinning.
Keep entries numeric and contextual; avoid unrelated data and keep the chart actionable.
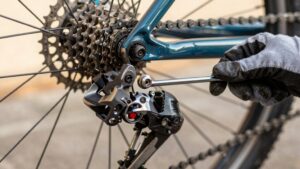
Cable Tension Troubleshooting
Start by checking that your shifter aligns with the derailleur clicks so each shift lands cleanly. Inspect the cable housing for kinks or corrosion. Then test tension by shifting through the cassette while watching derailleur movement and feeling for hesitation.
If shifts are sluggish, tweak the barrel adjuster; replace any frayed cable to restore crisp action.
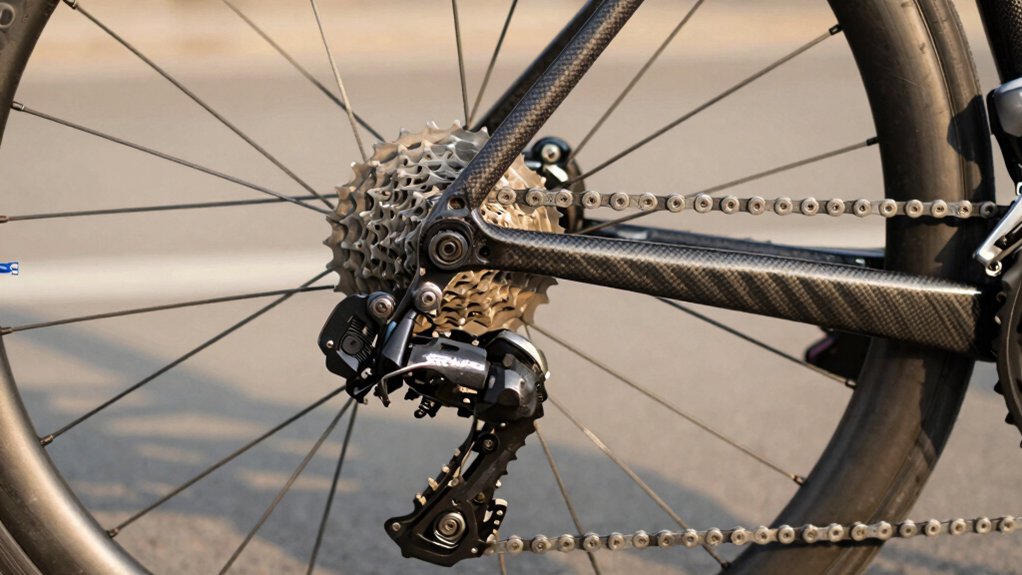
Check Shifter Alignment
Need a quick check? You’ll verify shifter alignment by sitting on the bike, pedaling slowly, and observing derailleur movement while shifting through the cassette.
Shift one gear at a time and watch for smooth, immediate jumps; hesitation or overshoot means cable tension needs tuning. Use the barrel adjuster: turn it out (counterclockwise) to add tension if the chain lags to a larger cog, or in (clockwise) to reduce tension if it skips to a smaller cog.
Fine-tune until each click matches a single cog without noise. Confirm gear indexing by counting shifts across the cassette; every click should equal one cog.
Re-check under light load to ensure alignment holds when you pedal harder.
Inspect Cable Housing
How does the cable housing affect shifting? You’ll inspect housing for kinks, crushed sections, and corrosion where insulation tubing has cracked or separated. Work the bars and watch the housing bend points; stiff or binding spots indicate internal fray or compression that alters cable travel.
Check ferrules for proper seating and replace any with visible housing wear or exposed strands. Run a clean rag along the housing while you shift: grit or metal flakes suggest contamination inside the liner. If housing compresses under light finger pressure, swap it; compressed housing reduces effective cable pull and leads to sluggish or inconsistent shifts.
Use fresh housing and clean cable, route without sharp bends, and secure housing stops so tension stays predictable and shifts remain crisp.
Test Tension With Shifts
Why does shifting feel sluggish or unpredictable? You need to test tension with shifts to pinpoint loose or binding cables. Shift through the gears while the bike is on a stand or with the rear wheel off the ground. Watch derailleur movement and listen for hesitation.
If shifts lag or skip toward larger cogs, add a click of tension at the shifter or use the inline barrel. If they hesitate toward smaller cogs, release a bit. Inspect cable housing for kinks, corrosion, or frayed ends; replace any sections that compress or bind. After each small adjustment, pedal and shift across the full cassette to confirm crisp engagement.
Finish by securing anchor bolts and trimming excess cable, leaving a neat housing length.
Adjust Barrel Adjuster
WONDERING WHERE TO START WITH FINICKY SHIFTING? FIRST, SHIFT TO A MIDDLE GEAR AND SPIN THE PEDALS WHILE YOU WATCH THE DERAILLEUR. IF THE CHAIN HESITATES TOWARD A LARGER COG, YOU NEED MORE CABLE TENSION; IF IT HESITATES TOWARD A SMALLER COG, YOU NEED LESS.
LOCATE THE BARREL ADJUSTER AT THE SHIFTER OR DERAILLEUR. TO ADJUST THE BARREL AND INCREASE CABLE TENSION, TURN IT COUNTERCLOCKWISE IN SMALL INCREMENTS (QUARTER TURNS); THEN TEST SHIFT. TO REDUCE CABLE TENSION, TURN IT CLOCKWISE. EACH TINY TURN CHANGES HOW THE DERAILLEUR ALIGNS WITH COGS: USE MINIMAL MOVEMENT AND RECHECK. IF THE ADJUSTER BOTTOMS OUT, YOU’LL NEED TO FREE OR REPLACE THE CABLE HOUSING INSTEAD.
PROPER BARREL ADJUSTMENTS MAKE SHIFTS CRISP WITHOUT TOUCHING LIMIT SCREWS.
Replace Frayed Cable
Noticing frayed strands at the shifter, housing stop, or where the cable exits the derailleur? Stop riding; a broken cable can strand you. To replace frayed cable, shift to the largest rear cog to release tension. Open the derailleur pinch bolt and pull the old cable free from shifter and housing.
Inspect housings and ferrules. Cut jagged ends and fit new ferrules. Thread a fresh, lubricated stainless cable through the shifter, housing, and derailleur. Then tension and secure at the pinch bolt. Trim excess and crimp an end cap.
Finally, check shifter alignment and index the gears with the barrel adjuster so shifts are crisp across the cassette. Test under light pedaling before returning to traffic.
Frequently Asked Questions
How Do Hub Gears Affect Cadence Compared to Derailleurs?
Hub gears give you more cadence consistency than derailleurs because their internal ratios stay fixed and shifts under load are smoother. You’ll hold a steady leg speed more easily. They use fixed gear indexing inside the hub; therefore, indexing feel at the lever is simpler and less subject to misalignment.
You’ll sacrifice some efficiency and weight for durability and easier maintenance; however, you’ll benefit from predictable, stable cadence control.
Can I Mix Chainring Tooth Counts From Different Brands?
Yes, you can mix chainring tooth counts from different brands, but check mix compatibility first. Brand variability affects ramp/pin placement, shifting ramps, and bolt circle diameter. You’ll want matching BCD or compatible spider adapters.
Stick to similar tooth-step profiles and chain widths. Test shifting under load, and avoid extreme tooth differences that cause chain rub. If you’re unsure, use brand-matched rings for best, most reliable shifting performance.
What Maintenance Do Internal-Gear Hubs Require Annually?
You should perform an annual inspection and basic servicing on internal-gear hubs. Check for smooth shifting, play, and oil leakage. Replace seals if brittle or leaking.
Drain and refill or replace hub oil/grease per manufacturer intervals. Inspect pawls/gears for wear and tighten mounting hardware. If you spot corrosion, noise, or skipping, strip and overhaul or send to a specialist.
Keep records of service dates and parts replaced.
How Does Crank Length Influence Effective Gearing?
Crank length changes effective gearing by altering leverage: longer cranks increase torque for the same gear ratio. So, you’ll feel easier climbs but slower cadence at high speed. Shorter cranks reduce torque, letting you spin higher cadences.
When you change crank length, your effective gearing shifts biomechanically even if teeth counts stay constant. Choose crank length to match leg length, pedaling style, and terrain for optimal power and comfort.
Are Electronic Shifters Worth Upgrading for Casual Riders?
Yes, you’ll notice smoother, faster shifts, especially if you ride electric bikes or push high speeds where wind resistance magnifies small inefficiencies. You’ll get cleaner gear changes, less maintenance and programmable shift patterns that suit your riding.
For casual riders on short, low-effort trips, it’s often overkill; weigh cost versus convenience. If you value quiet, consistent shifting and plan longer rides, the upgrade’s worth it.
Conclusion
You’ve learned how chainring and cog combinations affect cadence and effort. You have also learned How to read an optimal gear chart and How to troubleshoot cable tension.
Now check shifter alignment, inspect housing for damage, and test tension by shifting through the cassette. Use the barrel adjuster for fine tweaks and replace any frayed cable immediately.
Follow these practical checks and adjustments, and you’ll keep shifts crisp. You will also reduce wear and enjoy safer, more efficient rides.
Related: Cycling Gear Ratio Calculator
Related: Cycling Speed and Cadence Calculator
Related: Road Bike Upgrade Priority Guide