Tire Pressure Calculator for Cycling
Use a simple calculator to set starting tire pressures from your weight, bike weight, and tire width so you get consistent rolling, comfort, and safety.
Calculate wheel loads (typically 45/55 or 40/60 front/rear); apply a baseline for a 70 kg rider plus 12 kg bike.
Then adjust about 1% per 10 kg difference and check tire-width targets: narrow = higher PSI, wide = lower PSI.
Test ±5 PSI around the breakpoint and confirm valve and pump compatibility to finalize. More practical setup tips follow.
Quick Overview
- Use tire width, rider + bike weight, and wheel load distribution (front/back) to compute target PSI per wheel.
- Start with width-based baseline: narrow 23–28 mm = higher PSI; 30–38 mm = moderate; 40+ mm = lower PSI.
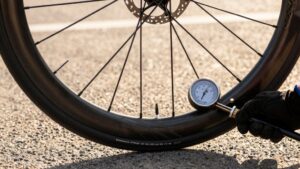
- Adjust baseline about 1% in pressure per 10 kg difference from a 70 kg rider + 12 kg bike. Fine-tune on-road in ±5 PSI steps and read the 15% tire drop breakpoint for comfort and rolling resistance.
- Verify valve type, pump head fit, and tire/rim maximum pressure before inflating.
Pressure vs Rider Weight
How much pressure do you need? You’ll base PSI on wheel loads, not total mass, measuring each wheel with rider in position. Adjust about 1% per 10 kg from a 70 kg rider + 12 kg bike baseline.
Avoid unrelated topics or random tangents; stay methodical: compute total, apply 45/55% or 40/60% distribution, get wheel load, then read breakpoint (15% tire drop) from chart and test ±5 PSI.
| Wheel Load (kg) | Example PSI (28mm) | Note |
|---|---|---|
| 30 | 90 | light load |
| 45 | 110 | baseline |
| 55 | 125 | heavy load |
| 70 | 155 | narrow tire risk |
Test incrementally; cap at rim/tire max.
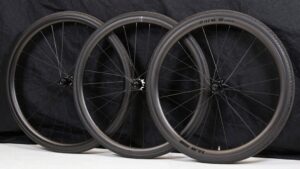
Tire PSI by Width
Why select a specific PSI for a given tire width? You align tire width with pressure targets because width governs contact patch and deformation. Incorrect PSI increases rolling resistance or risks pinch flats. Use width as a primary input; then fine-tune for rider weight and surface.
- Narrow (23–28 mm): higher PSI, low deformation, best for smooth roads and minimal rolling resistance.
- Medium (30–38 mm): moderate PSI, balanced comfort and speed on mixed surfaces.
- Wide (40+ mm): lower PSI, increased traction and compliance on rough or loose terrain.
Begin with calculator pressure targets for your width. Then test in 5 PSI increments. Record system weight and surface to lock in the optimal PSI for performance and safety.
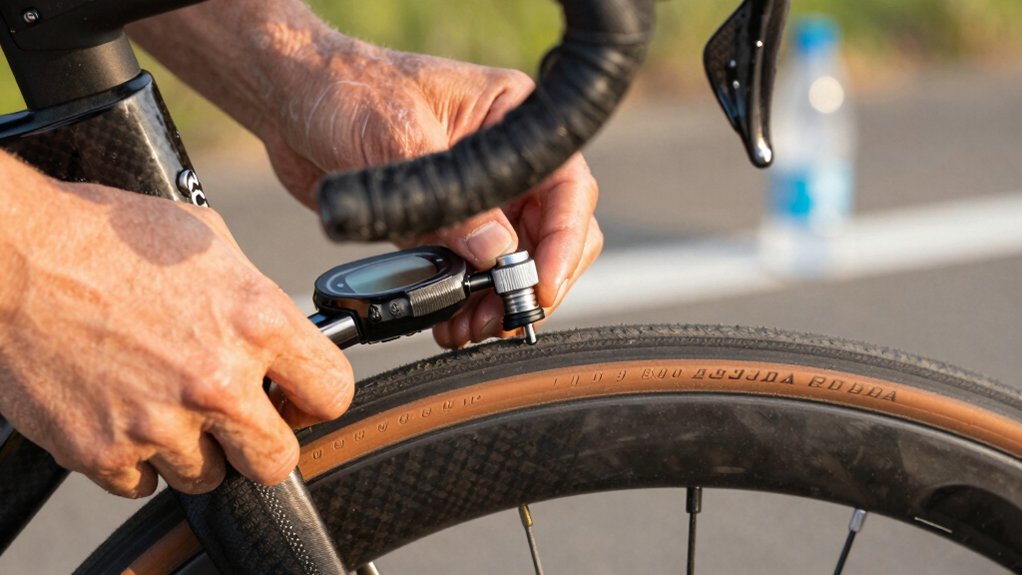
Valve Type Compatibility
Check your valve type before applying any pressure recommendations, because Presta, Schrader, and tubeless valves have different cores, diameters, and sealing behaviors that affect achievable PSI and pump compatibility. You’ll want to know when an adapter or specific pump head is required and whether removable cores or tubeless valves need sealing or torque adjustments.
Confirm pump-head fit and rim valve clearance to avoid inaccurate inflation or damage when you test pressures.
Valve Type Overview
Which valve fits your wheels and pump matters more than you might think: valve type dictates compatibility with your rim, the available pump head, and the maximum safe pressure you can reliably measure and maintain.
You’ll encounter Presta and Schrader standards, each with distinct valve thread dimensions and stem diameters. Match those to rim compatibility before buying pumps or extenders. Tubeless setups add removable cores and sealing considerations; core type affects bleed and top-off efficiency. Check whether your rim requires a specific valve length for deep-section profiles.
For high-pressure road systems, confirm pump gauge accuracy and head sealing on the chosen valve. In practice, verify valve thread pitch, stem length, and core design to ensure leak-free inflation and consistent measurements for your pressure calculations.
Presta Vs Schrader
WONDERING WHICH VALVE YOU SHOULD USE FOR YOUR WHEELS AND PUMP? YOU’LL CHOOSE BASED ON RIM DRILL SIZE, PUMP HEAD INTERFACE, AND INTENDED PRESSURE RANGE. Presta vs Schrader decisions matter: Presta fits narrow road rims and high-pressure road setups. Schrader uses larger holes common on MTB and lower-pressure tires.
Valve type compatibility requires you to match pump adapters or use an insert/adapter when switching wheels. Presta’s threaded stem and removable core let you add sealant or use a pressure gauge on the core. Schrader’s robust spring valve suits standard car-type pumps and gas-station compressors.
When calculating tire pressure, confirm valve compatibility to ensure accurate inflation, proper sealing, and safe maximum pressure for your rims.
Tubeless Valve Notes
If you’ve settled on Presta for rim compatibility and pressure control, tubeless valves add a few more specifications to confirm before you install tires. You’ll check valve stem length, core type (removable vs fixed), and rubber base diameter to match your rim hole and ensure airtight seating.
Use a valve with a removable core if you plan to inject sealant easily or run high-flow compressors. Note thread pitch and the presence of a valve nut to secure the stem against rim flex. Pay attention to corrosion-resistant materials for salt or wet climates.
These tubeless valve notes help you predict valve behavior during inflation, sealant top-ups, and repeated pressure cycles; this way, the system stays reliable and serviceable.
Adapter And Compatibility
Because valve standards and adapter options vary widely, you’ll want to confirm compatibility before fitting tubeless valves or using adapters so you don’t compromise seal integrity or pressure control.
Check valve stem diameter (Presta vs Schrader), valve length for rim depth, and core type (removable vs fixed). Use purpose-built tubeless valves for airtight seats; avoid generic adapters that can distort seals. Verify thread pitch and nut fit to prevent spoke-hole leaks.
When measuring pressures, confirm your pump or gauge mates properly to the valve without requiring jury-rigged parts. Don’t let irrelevant discussion or off topic debate distract you from torque specs, core torque, and seating procedures.
Accurate compatibility checks preserve predictable pressure behavior and reduce seal failures during testing.
Pump Head Fit
Having confirmed valve dimensions and core types, next check how your pump head mates with those valves to avoid leaks or damaged stems. You’ll inspect head geometry, chuck seal type, and clamping mechanism for consistent valve compatibility.
Presta, Schrader, and tubeless valves require different interfaces: use a dedicated Presta chuck or an adaptor. Ensure removal or engagement of removable cores won’t loosen during inflation. Verify material hardness and seal profile to prevent pinching rubber stems on high-pressure pumps.
For gauges, confirm bleed valves and vacuum fittings don’t alter readings. If you use an adapter or multi-head, test at low pressure to confirm no leakage before final inflation. Proper pump head fit protects stems, improves accuracy, and speeds inflation.
Frequently Asked Questions
How Do Tire Inserts Affect Recommended Pressure?
Tire inserts raise recommended pressure modestly because they alter tire insert pressure impact by reducing collapse and changing deformation. You’ll usually add 2–8 PSI.
You should check rim tape and tubeless compatibility before fitting inserts, since some inserts interfere with sealant or require specific rim tape width. Test incrementally around the new baseline, keeping system weight constant. Watch for increased firmness, grip changes, and pinch-flat protection trade-offs.
Should I Lower Pressure for Wet Conditions?
Yes, you should usually lower pressure for wet conditions to boost traction and compliance. Ignore discussion ideas we don’t need, like broad anecdotes. Focus on measurable changes: drop 5–10% from your dry baseline. Test in 5 PSI steps and watch for pinch-flat risk.
Topics to ignore include irrelevant tool marketing. Maintain consistent system weight during tests. Prioritize grip on slick surfaces while validating performance on representative routes.
Can Tubeless Sealant Change Optimal PSI?
Yes, tubeless sealant can nudge optimal psi. In a tubeless setup, sealant adds slight internal damping and mass. This allows you to run a few psi lower without immediate seal risk. It also helps seal small punctures at lower pressures.
Factor the sealant’s weight and cushioning into your baseline. Then, test in 2–5 PSI steps. Do not rely solely on sealant for protection; maintain proper pressure for rim and tire limits.
How Does E-Bike Torque Change Tire Pressure Needs?
E-bike torque increases peak forces on your tires, so you’ll need higher pressure to prevent excessive deformation and pinch flats while retaining traction. Increase PSI modestly based on added motor torque and total weight; test in 3–5 PSI steps around your baseline.
Heavier riders or high-torque motors typically require a larger bump. Always confirm rim and tire max pressures and adjust for terrain and ride feel.
What’s the Max Safe PSI for Hookless Rims?
Max safe psi for hookless rims is generally 73 PSI (5 bar) unless the rim maker specifies otherwise. You should choose pressure based on rim compatibility, tire size, rider and system weight, and intended surface.
Start at the manufacturer’s limit; then test in 5 PSI steps around the breakpoint pressure to balance comfort, grip, and rolling resistance. Don’t exceed specified rim/tire ratings to avoid bead or structural failure.
Conclusion
You now know how rider weight, tire width, and riding style determine ideal PSI. Match that target with the correct valve type and pump head to avoid leaks or inaccurate pressure. If you run tubeless, factor in sealant and lower pressures safely.
Carry a Presta–Schrader adapter only if needed and check compatibility before fitting. Use a calibrated gauge for repeatable results and adjust pressure incrementally to fine-tune comfort and rolling resistance.
Related: Road Ride Preparation Checklist
Related: How to Find the Right Tire
Related: Trainer Tire Pressure Reference
Related: Fat Bike Tire Pressure
Related: Pre-Ride Bike Safety Checklist