Cycling Gear Ratio Calculator
Use a cycling gear ratio calculator to convert your chainring and cog teeth, wheel circumference and cadence into gear inches, meters of development and real speed. Enter accurate wheel circumference (or roll the wheel) to reflect tire size and pressure. Pick cassette sprockets that match your terrain and derailleur capacity; confirm chainring BCD for replacements.
The tool helps you choose tooth counts, anticipate cadence at given speeds, and troubleshoot compatibility. Keep going for practical measurement and setup tips.
Quick Overview
- A gear ratio calculator converts chainring and sprocket teeth into gear inches, development (meters per crank), or gain ratio for speed prediction.
- Enter chainring teeth, rear cog teeth, crank arm length, and wheel circumference (measured or chosen from tire size table) for accurate development.
- Wheel circumference varies by rim, tire size, and pressure. Use measured rollout or correct circumference range for 700C, 650B, or 29″ wheels.
- Include cassette tooth counts and derailleur capacity to ensure selectable gears and proper shifting across wide-range cassettes.
- For chainring swaps, confirm BCD, bolt pattern, and chainline compatibility. Adapters or wrong BCDs can break fit or shift quality.
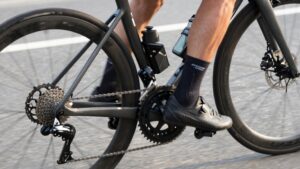
Wheel Circumference Comparison
Why does wheel circumference matter? You use it to turn gear ratios into real distance per crank. Wheel diameter differences from 700C to 650B to 29″ change travel per pedal; so a given chainring/cog gives different speeds. Tire inflation alters actual rollout: lower pressure shrinks circumference; higher pressure expands it slightly.
Measure rim diameter (ETRTO) and tire width. Then check circumference tables or roll the wheel to get precise numbers. Pick the correct circumference range for your bike type when calculating gear inches, gain ratio, or meters of development.
| Wheel type | Typical circumference (mm) |
|---|---|
| 700C road | 2105–2298 |
| 29″ MTB / 650B | 1938–2355 |
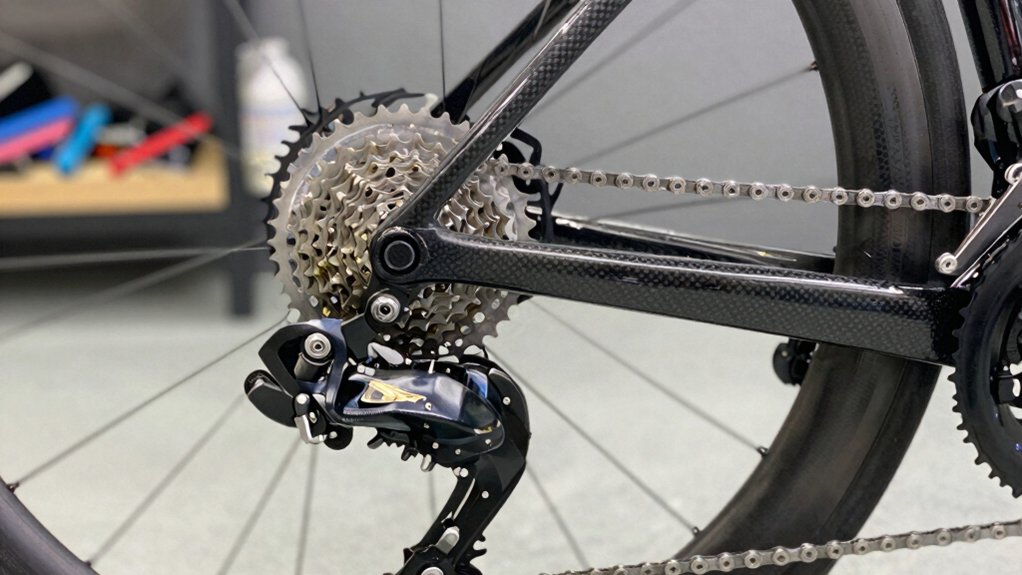
Cassette Sprocket Tooth Counts
How many teeth should each sprocket on your cassette have depends on the terrain you ride and the cadence range you prefer. You’ll pick tighter steps for fast, steady roads and wider jumps for climbs or mixed terrain. Check cassette compatibility with your derailleur and hub before changing sprocket counts; spacing and sprocket tolerance affect shift quality.
Use small tooth jumps (1–2T) for racing or high-cadence riding. Opt for larger jumps (3–5T or more) when you need low gears for steep climbs. Consider a wide-range cassette (e.g., 11–32T or 10–50T) for versatility. Match sprocket tolerance to chain width and shifter indexing to avoid mis-shifts.
Balance step sizes to maintain a usable cadence range without compromising reliability.
Chainring Bolt Circle Diameter
You’ll want to check the chainring bolt circle diameter (BCD) because it determines which chainrings will physically fit your crankset and which bolt patterns or adapters you might need. Measure BCD accurately: either by measuring center-to-center between bolts or using standard tables for 4- and 5-bolt patterns to avoid ordering incompatible rings.
Knowing common BCD variations and adapter options helps you match tooth counts to your desired gear range without surprises.
Bolt Circle Basics
Wondering how your chainring will bolt to the crank? You need to understand the bolt circle: the imaginary circle passing through the centers of the chainring bolts.
Bolt circle diameter (BCD) defines compatibility for chainring mounting and dictates which rings fit your crank spider. Common BCDs are standardized, so you’ll match bolt count and diameter when replacing rings.
Smaller BCDs allow smaller inner chainrings; larger ones suit big chainrings. When selecting a chainring, check both bolt circle and bolt pattern (4- or 5-bolt) to ensure proper mounting and chainline.
Knowing BCD prevents wasted purchases and ensures optimal gearing choices for your gear ratio goals without guessing or forcing mismatched parts.
Measuring BCD Accurately
Want to fit a replacement chainring without guessing? Measure BCD accurately to ensure bolt holes match. You’ll need calipers or a ruler, the number of bolts, and a simple formula: for 4-bolt rings, measure center-to-center of opposite bolts. For 5-bolt, measure center-to-center of any adjacent bolts and apply the 5-bolt formula (BCD = distance ÷ sin(36°)).
Clean the ring, measure twice, and average. Avoid assuming sizes from bolt count alone; that’s an unrelated topic for later. Don’t use stray terminology like “pitch circle” interchangeably unless you confirm definitions. Record BCD in millimeters, note bolt count and offset, and verify against manufacturer specs before buying a replacement to save time and avoid fitment errors.
BCD And Chainrings
How do you ensure a replacement chainring bolts up correctly? First, verify the bcd measurement of your crank: that’s the diameter of the circle through the chainring bolts. Measure center-to-center of opposing bolts or use a template; accurate bcd measurement prevents mismatched holes.
Next, confirm chainring compatibility with your crank’s bolt type (standard, direct-mount, or spider). Check recommended tooth counts and ramping for shift performance, since some chainrings only support specific drivetrain widths. When swapping sizes, ensure chainline and front derailleur capacity remain within spec.
Finally, inspect bolt length and torque to avoid loosening or interference. Doing these steps keeps shifting crisp and preserves drivetrain life while ensuring the chainring fits and functions as intended.
Bolt Patterns Variations
Which bolt circle diameter (BCD) fits your crankset will determine which chainrings will bolt up without modification. You should measure the bolt circle to confirm chainring compatibility before buying rings. Common BCDs (e.g., 110mm, 130mm, 104mm, 64mm) dictate available tooth counts and spacing. Compact and road cranks often use 110/130mm, while many MTB cranks use 104mm or 64mm for compact inner rings.
Smaller BCDs limit minimum chainring size; larger BCDs restrict very small rings. When you match bolt circle to a replacement ring, mounting holes align and chainline remains correct. Keep your crank model and BCD spec handy to avoid returns. Prioritize exact bolt circle matches for reliable shifting and safe installation.
Adapters And Compatibility
Curious about fitting a non‑matching chainring to your crankset? You’ll first check the chainring bolt circle diameter (BCD). Matching BCD or using a dedicated adapter ensures secure fit and correct gear ratio function.
Adapters compatibility depends on BCD size, number of bolts, and thickness; cheap spacers can misalign chainline and cause shifting problems. Measure from bolt center to center or opposite bolt to compute BCD. Then pick an adapter rated for that BCD.
Pay attention to crank to chainring alignment: axial and radial positions affect chain retention and wear. Install carefully, torque bolts to spec, and test shifting under load. Proper adapters compatibility preserves drivetrain efficiency and predictable gear ratios.
Frequently Asked Questions
How Does Crank Length Affect Gear Feel and Efficiency?
Crank length changes gear feel and efficiency impact by altering leverage and pedal cadence demands. Longer cranks give you more torque per pedal stroke; so climbs feel easier but you’ll spin slower for the same cadence. Shorter cranks raise optimal pedal cadence and can feel quicker, reducing knee strain and improving high-cadence efficiency.
You’ll trade raw leverage for smoother, higher-rev pedaling. Choose crank length to match your strength, cadence preference, and terrain.
Can I Use Oval Chainrings With the Calculator?
Yes, you can use oval chainrings with the calculator. Oval chainrings compatibility won’t change basic gear ratio, gear inches, or meters of development calculations because those use tooth counts and wheel size.
However, crank length effects become more relevant. Oval rings change pedal torque and effective leverage through the stroke, so pair results with your crank length to assess feel and cadence. Use measured rollout for highest accuracy.
How Do Gear Ratios Translate to Mountain Biking Cadence?
Gear ratios directly shape your cadence feel on climbs and flats. You’ll choose lower ratios to keep cadence high and recovery easy; higher ratios to push speed with lower cadence.
Match gear feel to trail demands: pick a cassette and chainring that let you spin comfortably on tech climbs and muscle up short pitches. Tune for efficiency vibes—maintain preferred cadence range (typically 60–90 rpm) for best power output.
What Gear Ratio Is Best for Tandem Bicycles?
For tandems, you’ll want lower overall ratios than singles so you can handle tandem steepness and heavy loads. Aim for a wide-range cassette (e.g., 11–34 or 11–36) with chainrings like 46/30 or 50/34.
You’ll target a touring cadence around 70–90 rpm for sustained comfort. That setup gives manageable climbing gears near or below 1.0 and high gears for flats; this keeps pedal effort steady for two riders.
How Does Tire Width Influence Actual Speed and Rollout?
Tire width affects actual speed by changing rollout and efficiency: wider tires usually increase rolling resistance but can lower deflection losses, altering rollout slightly.
You’ll see modest real-world speed differences. Wider tires at correct pressure can be as fast or faster than narrow ones. For precise comparisons, measure actual rollout (wheel circumference under load) and use that distance in speed calculations; efficiency and pressure matter more than width alone.
Conclusion
You’ve learned how wheel circumference, cassette teeth, and chainring BCD all change your effective gear ratios and shifting options. Measure BCD and sprockets carefully; note bolt patterns and match chainrings or use adapters when needed to keep chainline and shifting crisp.
When swapping parts, verify compatibility first. This step saves time and prevents poor performance. Use the right measurements and components, and your gearing will be efficient, predictable, and durable on every ride.