How to Adjust a Rear Derailleur
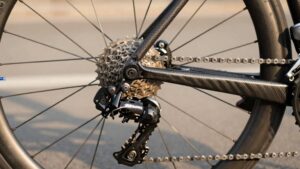
Set the B-gap first by putting the chain on the largest rear sprocket and adjusting the B-tension so the upper pulley sits the correct distance from the cog (typically ~5 mm for SRAM AXS; larger for wide-range cassettes).
Next, set the high and low limit screws from their seated positions; count turns and then fine-tune cable tension for crisp indexing across the cassette.
Torque the B-screw to spec, verify shifts through all gears, and follow further steps to perfect performance.
Quick Overview
- Set the B-gap (upper-pulley to largest cog) to the correct distance (typically ~5 mm for SRAM AXS road; 5–8 mm for wide-range cassettes).
- With the derailleur hanging, turn the B-screw clockwise to increase the gap and counterclockwise to decrease it, aiming for no rubbing or slack.
- Index the cable by shifting to a middle cog and using the barrel adjuster until each shift is crisp without overshooting.
- Use H and L limit screws from their seated positions to count turns and prevent the chain from overshooting small or large cogs.
- Torque the B-screw to manufacturer spec. Verify the pulley-to-cog gap on the largest sprocket, then test shifts across the full cassette.
Cassette-To-Jockey Gap Chart
Curious how close the upper jockey pulley should sit to your biggest cog? You set the B-gap to match cassette compatibility and derailleur angles: the largest cog and small front ring must be measured; the gap is critical. Use calipers or the specified hex as the table suggests for a rough mental model.
| Drivetrain | Largest Cog | Target B-gap (mm) |
|---|---|---|
| SRAM AXS Road (typical) | 33t | 5 |
| Shimano Road/GRX (varies) | Varies | As close as possible |
Turn clockwise to increase the gap; turn counterclockwise to decrease it. Wide-range cassettes and adapters need larger gaps of 5 to 8mm. Aim for the closest gap without noise, rubbing, or jamming. Then verify shifts through the cassette.
Limit Screw Max Turns
After you set the B-gap to match your cassette and derailleur geometry, check how many full turns your H and L limit screws have from their seated (fully clockwise) positions. This tells you how much adjustment range you actually have. Count turns to understand limit screw behavior: too few turns means tiny correction room; many turns indicate coarse range. Record counts before dialing stops.
- H-screw shows outer travel left; visualize small cog clearance.
- L-screw shows inner travel right; visualize largest cog clearance.
- Total available turns; visualize margin before hitting mechanical stop.
Use those numbers when setting derailleur limits to avoid under- or over-travel. If counts are extreme, inspect cable routing, hanger alignment, or consider a longer-sweep derailleur.
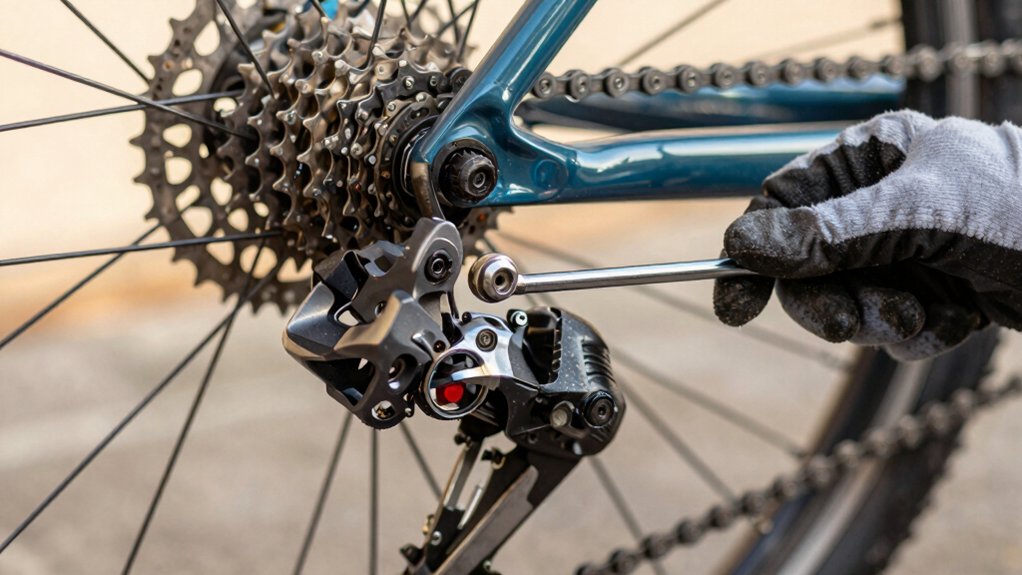
B-Tension Screw Torque Spec
The B-tension screw sets the derailleur body angle and upper-pulley gap. You will want the correct torque to keep shifting crisp. Use a torque wrench or a calibrated driver to target the manufacturer’s torque range (typically low Nm). Then follow step-by-step tightness and check procedures while observing pulley-to-cog clearance.
Watch for common errors. Over-tightening strips threads or limits spring action. Under-tightening lets the pulley contact the cog. Verify with a test shift and visual gap measurement.
B-Tension Screw Purpose
A properly set B-tension screw controls the derailleur body angle so the upper pulley sits at the correct gap from the largest cog. This prevents pulley rub or excessive clearance that harms shifting. You’ll want to tighten or loosen it precisely to maintain smooth indexing and avoid chain noise.
The B-tension screw lets you correct unclear alignment between pulley and cassette without altering cable tension. This way, you won’t disrupt indexing while fixing pulley-to-cog spacing. When the pulley rubs, tighten the screw incrementally to move the derailleur body away. When the gap is excessive, back it off to restore proper engagement.
After adjustment, shift through the largest sprockets and check for smooth, quiet transitions and correct chain tension under load.
Correct Torque Range
How tight should you set the B-tension screw? You want enough preload to hold the derailleur body and upper pulley in the correct position without overstressing threads or the derailleur mount.
Typical torque range for many rear derailleur B-screws is low; generally 2–5 Nm; but check your derailleur or hanger spec if available.
Tighten gradually: snug by hand, then use a torque driver to reach the lower end of the range. Shift to the largest sprocket, and verify the pulley-to-cog gap.
If the gap is correct, stop; if not, make small turns and stay within the torque range. Avoid excessive force; stripped threads or bent hangers compromise shifting and safety.
Torque Measurement Tools
Why check B-screw torque with a driver instead of guessing? You want consistent body tension and predictable upper-pulley gap. The subtopic relevance is that correct torque prevents pulley rubbing or excess clearance. Use a calibrated torque driver or small torque wrench with an appropriate bit to apply the specified value.
Learn basic torque terminology: torque (Nm), accuracy, and click vs. dial tools. Set the driver to the derailleur manufacturer’s B-screw torque spec. Seat the bit squarely and apply a steady, controlled turn until the tool indicates the set value. If you don’t have a torque driver, note the target and use cautious fingertip feel. Then acquire proper tools.
Record the value for future service and avoid over-torquing.
Adjustment Procedure Steps
You’ve already learned to set B-screw preload with a torque driver for consistent body tension. Now apply the specified torque during the adjustment procedure to lock that gap reliably. Use the manufacturer’s torque spec for the B-tension screw; this is typically low Nm. The upper pulley should sit close to the largest cog without rubbing.
With the chain on the largest rear sprocket, tighten to spec. Then check pulley gap and indexing. If shifting stays off, make small cable-tension and limit-screw tweaks; do not make large B-screw changes. Don’t confuse this with an irrelevant topic or treat clearance as an unrelated concept. Torque sets repeatable preload, while fine adjustments tune position.
Finish by shifting across the cassette to verify smooth, quiet operation.
Common Torque Errors
Wondering what happens if the B-tension screw is over- or under-torqued? If you over-torque it, the derailleur body will sit too far from the largest cog, increasing gap and causing sluggish shifts and tip overlap when moving to adjacent large sprockets. Over-tightening can also stress threads or strip the screw.
If you under-torque it, the upper pulley can contact the cog, producing drivetrain squeaks, rubbing, and potential chain derailment under load. Aim for firm hand-tight plus small turns: manufacturer torque specs vary, so use a torque driver when specified. After adjustment, shift through all cogs, test-ride, and listen for squeaks or skipping. Re-check torque if you see tip overlap or persistent noise.
Frequently Asked Questions
How Often Should I Replace Derailleur Pulleys?
You should inspect pulley wear every 1,000–3,000 miles and replace pulleys when you see noticeable tooth wear, sharp edges, or noisy rubbing. How often you change them depends on riding conditions, mileage, and maintenance: wet or gritty riding wears pulleys faster.
Replace pulleys roughly annually for regular riders or sooner if shifting degrades. Keep chain and cassette in good shape; worn chains accelerate pulley wear, so monitor both and swap parts together.
Can Worn Chainrings Affect Shifting Performance?
Yes, worn chainrings will degrade shifting performance. You’ll get sluggish, noisy shifts, chain skipping, and faster wear on cassette and pulleys because teeth lose their profile and do not guide the chain cleanly.
Inspect for hooked or shark-tooth teeth and replace chainrings when you replace a stretched chain or when shifting issues persist. Also, check chainline, limit screws, and cable tension after replacement to restore crisp, reliable shifting.
Is Clutch Derailleur Necessary for Single‑Chainring Setups?
You don’t strictly need a clutch derailleur for a single‑chainring setup, but it greatly improves single ring reliability. A clutch reduces chain slap, keeps tension consistent, and helps prevent drops over rough terrain.
Check clutch compatibility with your derailleur and frame before buying. If you ride off‑road, carry a clutch-equipped derailleur. If you mostly commute on smooth roads, a non‑clutch can still work fine.
How Do I Fix a Bent Derailleur Hanger?
You fix a bent derailleur by straightening or replacing it and checking hanger alignment. First, remove the rear wheel and inspect the bent derailleur hanger. If lightly bent, use a hanger alignment tool to bend it back until the hanger alignment is true.
Reinstall the wheel, mount the derailleur, and fine-tune limit screws, cable tension, and B-screw. If the hanger is severely damaged, replace it to ensure reliable shifting and prevent chain derailment.
Can Electronic Derailleurs Be Adjusted Without Tools?
Yes, many electronic derailleurs let you perform tool free adjustment for minor tweaks. You’ll use onboard buttons or a paired app to index shifts, adjust trim, and fine-tune cable-equivalent tension.
Major tasks, such as replacing cables, fixing bent hangers, or B-screw mechanical limits, still need tools. After tool free changes, you should test by shifting through all gears. Additionally, you should test-ride to confirm smooth, quiet operation without chain skipping.
Conclusion
You’ve now got the key specs and the step-by-step method to set cassette-to-jockey gap, limit screws, and B-tension correctly. Use the right torque range and a calibrated torque tool to avoid stripping threads or misalignment.
Make small, measured turns; test shifting under load; and recheck torque after a short ride. With careful adjustments and the correct tools, your derailleur will shift crisply and stay reliable. Don’t skip the torque checks.