How to Lube a Bike Derailleur for Crisp, Silent Shifting
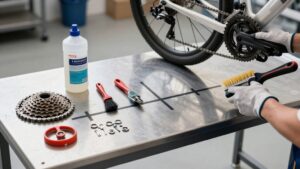
Shift to the smallest rear cog and secure the bike by its seatpost in a stand.
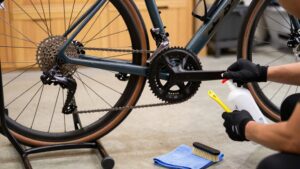
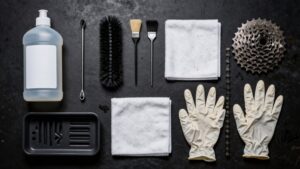
Lightly spray degreaser on the cage, pivots, and jockey wheels, brush away grime, then let it dry.
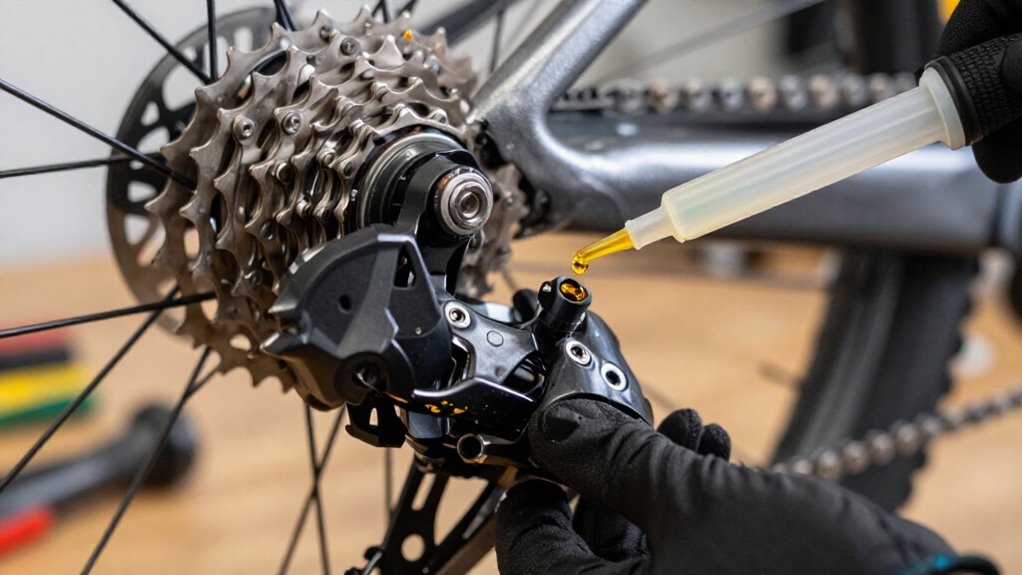
Use a precision drip lube: add one drop to each pivot and jockey-wheel bearing.
Wipe the cage clean, avoiding excess oil.
Pedal through every gear and return to the smallest cog.
Persistent skipping signals chain, cassette, or hanger wear; checks pinpoint it.
Easy, Silent Shifting, 15min
A 15-minute derailleur service can restore quiet, positive shifts if you clean and lubricate the moving points rather than coating the whole mechanism. Begin by lightly degreasing the derailleur with spray and a brush; don’t flood pivots or bearings. Scrape compacted residue from the cage’s inner faces and jockey-wheel area.
Inspect each jockey wheel’s tooth profile. Replace wheels whose formerly blunt, flat-topped teeth have become pointed spikes; they create noise and rough shifts.
Apply a minimal amount of suitable lubricant to the jockey wheels and each pivot: four on the rear derailleur and four on the front. Cycle the shifters immediately, letting the rear spring work lubricant into its joints. Keep lubricant off sprockets and chainrings, which otherwise collect abrasive dirt. Test shifts afterward.
Choose a Drip Lubricant
Choose a precision drip lubricant rather than a spray: it places a controlled film inside derailleur pivots and pulley bearings without risking overspray on rims, rotors, or pads. Match viscosity and residue to your riding conditions, and verify compatibility with plastics, seals, paint, and O-ring chains.
- Use wet, corrosion-inhibiting oil for rain, mud, salt, and intervals; its thicker film resists washout but collects dust.
- Choose dry or wax lube for dusty paved conditions; its carrier leaves a film, but you’ll reapply after water exposure.
- Consider PTFE, ceramic, or WS2 additives as secondary criteria; they may lower friction, yet formulation and maintenance determine results.
- Prefer a nozzle and volatility that lets each drop enter tight clearances and dry predictably with ventilation.
Step 1: Shift to Smallest Rear Cog
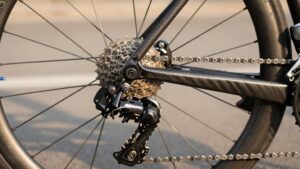
Shift the chain onto the smallest rear cog before lubricating the derailleur. This position places the rear derailleur’s pivots and spring mechanism where sticky friction most compromises movement toward the high gear. Confirm that the chain sits fully on the outermost cog, then inspect the derailleur for grime.
After degreasing and drying it, place a small squirt of lubricant directly at each jockey wheel and one drop on each of the four rear-derailleur pivots. Choose wet lube for wet riding and dry lube for dry, dusty conditions. Don’t flood the joints; excess lubricant captures dirt and can degrade shifting. Cycle the drivetrain through several gears, returning to the smallest cog, to distribute the lubricant and verify that the spring retracts the derailleur properly and quietly.
Step 2: Secure Bike in Repair Stand
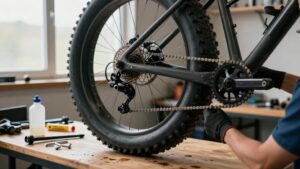
Secure the bike in a stable repair stand, clamping it by the seatpost when possible so the rear wheel and cranks turn freely. Set the clamp pressure only high enough to prevent rotation; overtightening can damage thin-walled or carbon seatposts. Raise the bike until the rear wheel clears the floor, then confirm the stand base sits level and its joints are locked.
Hold the frame and turn each crank arm slowly; the drivetrain must rotate without the bicycle shifting in the clamp. Steady the wheels before working near the derailleur, especially if you’re cleaning the jockey wheels.
With the bike secured, operate the shifter and rotate the cranks by hand through every gear. Note any hesitation, stiffness, or delayed movement for later.
Step 3: Spray Degreaser on Derailleur
With the derailleur still assembled, apply a moderate, controlled spray of bike-safe degreaser to the cage, jockey wheels, and grime-coated exterior surfaces. Hold a rag behind the mechanism to catch runoff, and keep the spray narrow and brief. Don’t flood openings, seals, or cavities: excess solvent can displace internal grease and leave moving parts insufficiently protected.
Let the degreaser loosen contamination for the product’s specified dwell time. Agitate the cage interior with a stiff brush, working around both jockey wheels and between cage plates. Lift compacted deposits from wheel teeth and cage edges carefully with a flat-head screwdriver. Keep the tool clear of seals and wheel surfaces. Wipe loosened residue with an old rag. Inspect for remaining buildup, then repeat sparingly only where necessary.
Step 4: Lubricate Derailleur Pivot Points
Apply one small drop of appropriate bike lubricant to each derailleur pivot—typically four on the rear mechanism and four on the front—aiming directly at the moving pin-and-link interfaces. Choose wet lube for rain and dry lube for dry, dusty conditions. Position the nozzle precisely; don’t coat sprockets, chainrings, or surfaces. Lubricate the rear parallelogram and cage pivots, plus each front-derailleur linkage, with enough fluid to wet—not flood—the joint.
Shift through the full gear range several times to work lubricant into every interface and the rear derailleur’s spring mechanism. Wipe all visible surplus with a clean rag. Excess lube attracts grit, becomes abrasive, and delivers only temporary smoothness. Dry or partially clogged pivots often cause reluctant shifts down the cassette or into the small chainring.
Step 5: Fine-Tune Cable Barrel Adjuster
Set the derailleur’s limits and basic indexing before using the barrel adjuster, which fine-tunes cable tension rather than correcting end-stop errors.
Back the adjuster off slightly to reduce tension, then retighten it in 1–2-turn increments while you pedal and shift through the cassette. Test each cog for prompt, clean engagement. If shifts toward larger cogs hesitate, add a small amount of tension; if shifts toward smaller cogs lag, ease tension by backing the adjuster out.
Repeat three to five shift-and-pedal cycles across the same two or three cogs. Stable, quiet indexing confirms the setting. If you need major barrel-adjuster changes, stop. Check cable routing, kink-free housing, and free-moving derailleur pivots; otherwise, the adjuster may mask friction or chain slack instead of correcting its source.
Step 6: Wipe Excess Lube From Cage
Wipe down the inside of the derailleur cage with a clean, lint-free rag immediately after lubricating its pivots. Fold the rag to a fresh section and wipe the inner cage plates, especially the tracks where the chain runs and changes direction around the jockey wheels. Remove visible oil from crevices, pulley-adjacent surfaces, and the lower cage area without disturbing the lubricant retained inside each pivot.
Hold the rag against these surfaces while you move the derailleur body by hand through its travel; this draws out residue carried into tight spaces. Use light pressure and repeat until the rag no longer picks up a wet film. Don’t leave the cage glossy: surplus lube collects grit, forms abrasive paste, and can make cage movement sticky. Finish.
Pedal Through Every Gear
Slowly pedal the drivetrain by hand and shift through every rear cog and front chainring, pausing briefly at each change so the fresh oil can work into the derailleur pivots and jockey-wheel bearings. Let the chain settle on each ratio before making the next shift. Watch the rear derailleur parallelogram and cage as they articulate; their movement should be prompt and silent.
Use only the lube already applied: don’t add oil to cassette sprockets or chainrings, where it collects dirt. If conditions are wet, use wet lube; for dry conditions, use dry lube. Confirm both derailleurs move cleanly when shifting down the cassette or into the small chainring. Persistent stickiness indicates friction at a pivot and calls for cleaning and relubrication before riding again.
Chain Skips: Worn Cassette
If the chain still skips under pedaling load after you’ve lubricated the derailleur, inspect the cassette and chain for wear rather than adding more oil. Lubricant frees pivots; it can’t restore tooth geometry. Examine each sprocket, especially the smaller cogs, for sharp, hooked teeth that let the chain climb and jump.
| Check | What it indicates |
|---|---|
| Chain gauge | Stretch requires chain replacement |
| Cassette teeth | Hooking requires cassette replacement |
| Jockey wheels | Blunt or spiked profiles require replacement |
Replace worn jockey wheels, too; their flattened profiles can progress to spikes and worsen skipping. Fit a compatible new chain with a worn cassette when inspection confirms both components are past service limits. Then retest under load. Don’t expect oil to cure chain slip caused by worn engagement surfaces.
Inspect Derailleur Hanger Alignment
Before adjusting cable tension again, inspect the derailleur hanger: it must sit in the same plane as the cassette for the derailleur to track each cog accurately.
First, clean area and confirm derailleur pivots move freely. Sight along the hanger, then measure its clearance to cassette points; the gap should be even. Shift to the smallest cog and smallest chainring. The chain should run cleanly without persistent inward or outward rub.
If indexing remains inconsistent after lubrication and adjustment, suspect a bent hanger rather than dirty pivots, worn jockey wheels. Use a derailleur-hanger alignment gauge or a straightedge to verify alignment and correct it. A bend makes the derailleur track off line under load, creating shifting faults that oil and cable adjustments can’t cure.
Conclusion
With the derailleur cleaned, lubricated, and cycled through its range, you’ve restored the conditions for crisp, quiet shifts. Keep lubricant off jockey-wheel side plates, pivots, rims, and rotors, then wipe every exposed surface dry.
If skipping persists after correct indexing, inspect cassette and chain wear, pulley condition, cable drag, and hanger alignment. Repeat this service whenever contamination appears or shifting noise increases. Consistent cleaning and measured lubrication prevent abrasive wear and preserve accurate derailleur movement.