The Fat Bike Seasonal Maintenance Routine You Need
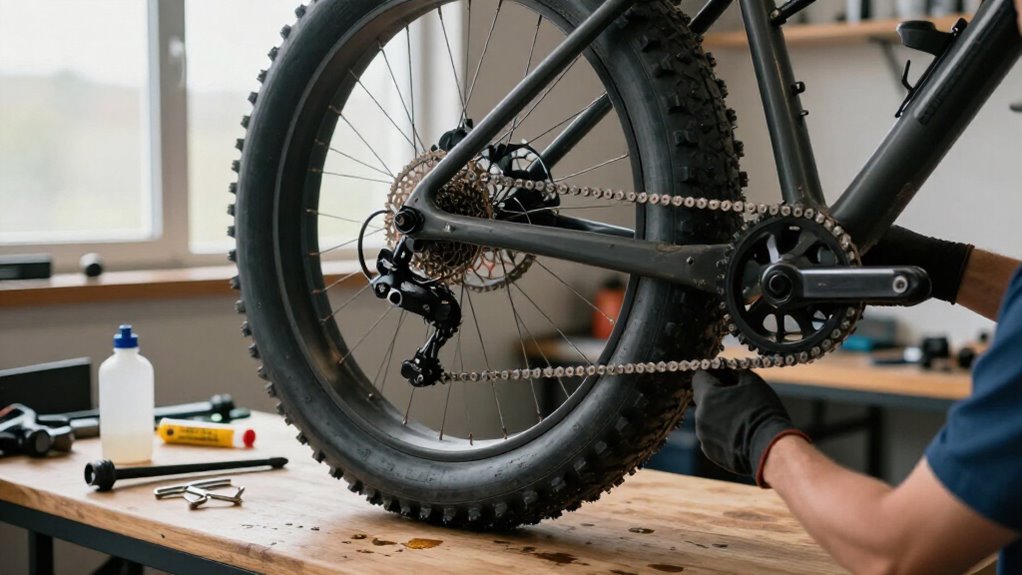
After every snowy ride, you’ll rinse your fat bike top-down with low-pressure water. Brush away salt, and dry it completely.
Keep water off seals, then clean and wet-lube the chain only after rotors are dry.
Check tyre pressure before each ride, starting near 6–10 psi for powder.
Monthly, inspect hub seals, wheel play, chain stretch, spokes, and bottom-bracket roughness.
Test brakes at low speed.
The steps below add safeguards against costly winter damage and failures.
Snow-and-Salt Protection for Fat Bikes
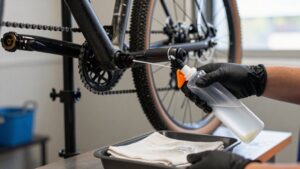
After every snowy ride, rinse your fat bike from the top down with moderate hose pressure, never a pressure washer, which can drive water and grit past seals into bearings and pivots. Pay attention to the underside of the downtube, bottom-bracket area, chain, and cassette, where salt brine and grit collect. Dry the bike completely, then clean the chain and apply winter-rated wet lube to limit rust.
Inspect pads and rotors frequently: salt can glaze pads, pit rotors, and reduce braking power or produce near-bar lever travel. Before the next ride, use a gauge to verify tyre pressure. Cold temperatures and snow can lower PSI, while salt spray may lodge debris in the tread and damage the casing. Confirm safe operation before you ride.
Tools: Soft Brush, Low-Pressure Sprayer
A soft-brush kit and adjustable low-pressure sprayer let you remove abrasive sand, salt, and mud without damaging paint or forcing water past bearings, seals, and electrical connections. Use a medium synthetic-bristle brush on the frame and fork, then a detail brush for tight areas and a cassette/spoke brush last. Nylon dries quickly and resists water; plastic-handled tools suit repeated wet cleaning.
- Set the nozzle to a wide fan or gentle stream; keep output below 40 PSI.
- Hold it 30–60 cm away and make short, sweeping passes; don’t concentrate spray on one location.
- Remove an e-bike battery, protect ports as directed, then wipe surfaces with microfiber and air-dry moving parts before lubrication.
Wash after wet, sandy, or salty rides, using mild soap and eye protection.
Check Hub Seals Monthly
Monthly hub-seal checks help prevent water and abrasive grit from reaching your fat bike’s bearings. Remove each wheel and inspect both hub ends for moisture, grime, or rusty staining at the seal/axle interface. Spin the wheel and feel for roughness, grinding, or drag; then gently rock the rim side to side to detect axle play.
| Check | Warning Sign | Action |
|---|---|---|
| Seal end | Moisture or rust | Book service |
| Wheel spin | Roughness or drag | Stop riding |
| Rim rock | Side play | Inspect hub |
| Axle area | Caked grit | Wipe clean |
After wet rides, wipe the hub shell and quick-release or thru-axle contact areas clean. Don’t force contaminated seals to work against packed grit. If wetness sits past a seal or the hub feels gritty, arrange professional service for seal replacement and bearing repacking or replacement.
Dry Rotors Before Lubing Chain
After washing, you must dry each disc rotor completely with a clean microfiber cloth before lubricating the chain, because moisture or lube contamination can reduce braking bite.
Keep lubricant off the braking track by applying it directly to the chain rollers while backpedaling, then wipe away excess and inspect pads and rotors for residue. Spin each wheel and perform a low-speed brake test; the lever shouldn’t approach the bar, and braking should feel firm and quiet.
Why Rotor Drying Matters
Why dry the rotors before servicing the chain? Water left on a fat-bike rotor compromises the braking surface when you’re about to introduce lubricant nearby. A wet rotor can squeal, reduce initial pad bite, and carry residue across its braking track.
Chain-lube droplets or airborne oil mist can also adhere to moisture and contaminate the rotor and pads.
Use a disciplined service order: complete general drying work, confirm both rotor braking tracks are water-free, then clean and lubricate the chain. This separation limits cross-contamination during backpedaling and excess-lube removal. If oil reaches a rotor, braking may grab inconsistently or feel spongy until you clean the system.
Drying first protects predictable brake response, avoids unnecessary degreasing, and gives you a final inspection point before riding.
Safe Rotor Drying Methods
A safe post-wash sequence starts with fully drying both disc rotors before you service the chain. First, wipe each rotor’s braking track with a clean, lint-free microfibre cloth, then allow remaining moisture to air-dry. For faster drying after heavy rain or salty winter riding, dampen a cloth with isopropyl alcohol and wipe the rotor track; don’t spray alcohol onto the pads.
If water remains, lift the wheel or spin it freely and apply several brief, light lever squeezes. This transfers moisture from the rotor faces without generating enough heat to glaze the pads. Next, spin each wheel and squeeze its lever to confirm firm, normal brake feel and no dragging. Don’t lubricate the chain, or wipe it nearby, until both rotors are completely dry.
Preventing Lube Overspray
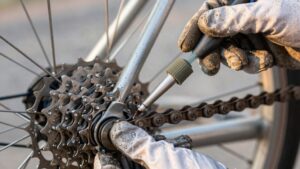
With both rotors fully dry, keep them oil-free before you lubricate the chain: wipe each cool disc with isopropyl alcohol on a clean, lint-free cloth if there’s any doubt. Position the bike so the wheel can spin freely, and keep the brakes disengaged throughout lubrication. Hold a clean rag close to the lower chain run, then backpedal slowly.
Apply one drop of chain lube to each roller; don’t spray or flood the links. The rag catches sling while precise application keeps lubricant inside the chain rather than on braking surfaces. When you’ve covered the chain, continue backpedalling to distribute lube. Then wipe chain exterior thoroughly with a fresh rag. Remove visible wet excess; it can migrate, film a rotor, reduce bite, or create squeal.
Checking Pads And Rotors
Before you lube the chain, check that both disc rotors are cool, dry, and free of residue. Inspect each rotor’s braking track in good light. If you see glazing or contamination, clean it with appropriate rotor cleaner and let it dry completely before applying chain lubricant.
Look through the top of each caliper to confirm visible pad material remains. Replace pads when friction material measures about 1–1.5 mm, or when wear grooves approach their limit. With rotors cool, lightly run a finger along each braking surface; feel for deep scoring or a pronounced edge lip, both signs replacement may be needed.
Finally, squeeze each brake lever. It should engage firmly well before the bar; correct any spongy feel before continuing with chain lubrication work.
Spin Test Before Riding
Always spin each wheel before riding to confirm the rotor runs dry and true through the caliper. Listen for squeal, feel for drag, and watch for smooth rotation. With the wheel cool, run a finger along the braking track; stop if you find grit, deep scoring, or a pronounced lip. These faults can reduce braking consistency or cause vibration.
If the rotor feels wet or contaminated, wipe it with a clean cloth before touching the drivetrain. Don’t lube the chain near a damp or dirty rotor: contamination weakens braking and can produce uneven pad transfer.
Once the rotor is dry, apply the condition-appropriate chain lube, wet lube for autumn and winter riding, and wipe away excess drops. Re-spin both wheels afterward; confirm no new caliper rub.
Lower Tyre Pressure for Powder
Lowering pressure spreads the tyre’s tread and sidewalls, helping you float over powder rather than burrow into it. Start around 6–10 psi (0.4–0.7 bar), using a gauge before every ride because cold weather and tubeless leakage can reduce pressure.
Fine-tune gradually: lower it if you’re sinking, but raise it if the tyres roll in corners or risk rim and sidewall damage.
Why Pressure Matters
Think of tyre pressure as your primary traction setting in powder: reducing it increases the tyre’s contact patch, helping the bike float over snow rather than cut into it. That larger footprint distributes weight, improving grip and limiting wheel slip on loose or uneven snow. Lower pressure also lets casing conform to ruts and bumps, reducing harsh impacts that can unweight tyre and break traction.
Make adjustments gradually from normal setting. Too-low pressure brings the rim closer to the surface, increases sidewall flex, and raises pinch-flat or tyre-damage risk. Cold air can lower pressure, so check it with an accurate gauge before every ride and restore your selected setting. Tubeless sealant may close small punctures, but it won’t prevent damage caused by excessive deflection.
Powder Pressure Starting Points
Use a cold, accurate gauge and begin powder riding at about 5–8 psi (0.35–0.55 bar), staying within the tyre and rim manufacturer’s stated pressure limits. Check both tyres before departure, and record the baseline.
Cold measurements matter: riding warms air, raises indicated pressure, and makes comparisons unreliable. Treat manufacturer’s min and max markings as non-negotiable boundaries; casing construction, bead retention, and rim profiles differ between models. Low pressure enlarges contact patch and helps tyre float, but excessive reduction can bottom the casing against rim and increase pinch-flat risk.
Inspect rim tape, bead seating, and tyre sidewalls before departure. Carry a reliable pump, gauge, tube or tubeless repair supplies, and inflation backup. After snow, inspect for debris or cuts, then reinflate for hard ground.
Fine-Tune For Conditions
For loose powder, set tyre pressure near the low end of your tyre’s approved range, often about 4–8 psi, so the casing spreads its tread and floats instead of cutting into the snow. Begin 2–3 psi below your normal pressure, then ride for minutes on representative terrain. Adjust only 0.5–1 psi at a time.
If the bike sinks and struggles to track, lower pressure slightly. If you feel sharp rim impacts, sidewall squirm, or an overly expanded casing, add air immediately to reduce pinch-flat and rim-strike risk. Check both tyres with an accurate low-pressure gauge after major temperature changes; cold weather can reduce pressure, and snow consistency changes daily.
After the ride, remove slush, let tyres dry, and verify pressure before storage. Prevents corrosion and ensures safe setup.
No Salt Crust Under Calipers
After every wet or road-salt ride, rinse your fat bike thoroughly with low-pressure water, avoiding pressure washers that can drive moisture past caliper seals and into bearings. Dry the rotor and caliper fully. Remove the wheel and inspect the rotor and pad backing plates for gritty buildup.
If you find crust, soften it with warm water for 1–2 minutes, brush with a soft toothbrush, and wipe it clean. Don’t scrape rotor faces aggressively. Reinstall the wheel, pump the lever times while stationary, then spin it to check for drag or uneven contact.
Inspect pad thickness through the caliper window and replace pads at approximately 1–1.5 mm. Salt residue can restrict pad movement, hasten wear, and reduce braking consistency. Correct sticking before your next ride.
Grinding Bottom Bracket Noises
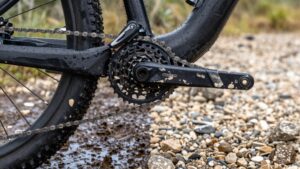
A grinding sound from the bottom bracket demands attention before your next ride, especially after wet, sandy, or muddy conditions. Rinse top-down without a pressure washer; let caked mud soak, then brush it away gently. Fully dry the bottom-bracket area before applying specified lubricant.
Grip each crank arm and test for lateral and vertical movement. Spin the cranks slowly: roughness, binding, or play indicates worn bearings or a loose, incorrectly torqued unit. If noise occurs only under pedaling load and disappears while free-spinning, suspect bearing damage or poor shell-bearing fit, not chain noise.
Don’t ride if grinding persists after cleaning and lubrication. Replace the bearing assembly, or have a qualified technician service it, using the correct threaded or press-fit bottom-bracket standard for your frame.
Overtightened Spoke Nipples
Wheel problems can also mimic bottom-bracket noise, particularly when overtightened spoke nipples creak or transmit harsh vibration through the frame. They may feel tight, but excessive preload accelerates spoke fatigue and can cause breakage under winter chatter or heavy loads. Check tension with a tensiometer and follow your rim and hub manufacturer’s target; many fat-bike wheels fall near 90–130 kgf.
- Use small quarter-turns, then stress the wheel by spinning it and applying a light load.
- Recheck tension and balance after every adjustment; don’t tighten one area by feel.
- If nipples look buried, rim seams appear stressed, or individual spokes keep creaking after riding, back tension off to specification.
Stop riding distorted wheels; have a wheel builder inspect them. Overtension deforms rims and causes failures.
Measure Chain Stretch Monthly
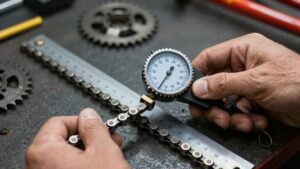
Measure chain wear monthly to catch elongation before it damages the cassette and chainrings. Clean the chain first: wipe away mud, sand, and old lube, then let it dry so contamination doesn’t mask wear or distort readings. Place a chain-wear gauge on the chain and compare its reading with the specified limit.
Replace it at the threshold, commonly around 0.5mm of elongation or 0.5% to 1%, depending on the gauge and drivetrain. Without a gauge, measure 12 full links (24 half-links) with a ruler and compare them against a reference. If length exceeds the replacement limit, install a new chain before you ride. Recheck after cleaning and lubrication, and after wet, gritty rides; snow and sand accelerate abrasion, and a worn chain can skip under load.
Conclusion
Your fat bike will last longer when you treat winter maintenance as a scheduled safety task. After every salty ride, rinse gently, brush contamination away, and dry the drivetrain and rotors before lubrication.
Each month, inspect hub seals, chain wear, bottom bracket noise, caliper clearance, and spoke tension. Set tyre pressure for surface conditions, not guesswork.
Don’t ignore grinding, salt crust, or loose components; correct them before your next ride to protect control and prevent damage.