Bike Drivetrain Maintenance Schedule: What to Do and When
Maintain your drivetrain on mileage and condition, not mileage alone.
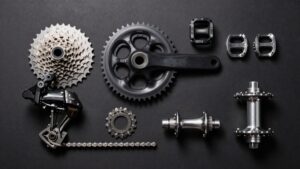
Every 150 miles, wipe and clean the chain, cassette, chainrings, and jockey wheels; dry them, then apply sparing chain lube and wipe excess.
After wet, muddy, or dusty rides, clean, inspect for grit and rust, and relubricate immediately.
Check shifting across gears at service intervals, measure chain wear against manufacturer limits, and replace worn parts before skipping occurs.
Use the steps below to set intervals.
Prevent Premature Chain Wear
Prevent premature chain wear by keeping the drivetrain clean, correctly adjusted, and routinely inspected. After wet, muddy, or dusty rides, wipe contamination from the chain, cassette, and chainrings before grit can act as an abrasive. At scheduled service intervals, confirm indexing across every gear. A hesitant shift, noise, or chain rub indicates adjustment is needed; don’t continue riding under heavy load until shifting tracks cleanly on each sprocket.
Replace the chain at the recommended wear limit rather than waiting for skipping or visible damage. An elongated chain damages cassette and chainring teeth, increasing repair cost and risking unreliable drive engagement. Inspect links, sprockets, cables, and derailleur components for rust, stiffness, hooked teeth, or fatigue. Record mileage and service work. Choose one you can maintain.
Assemble Degreaser and Chain Gauge
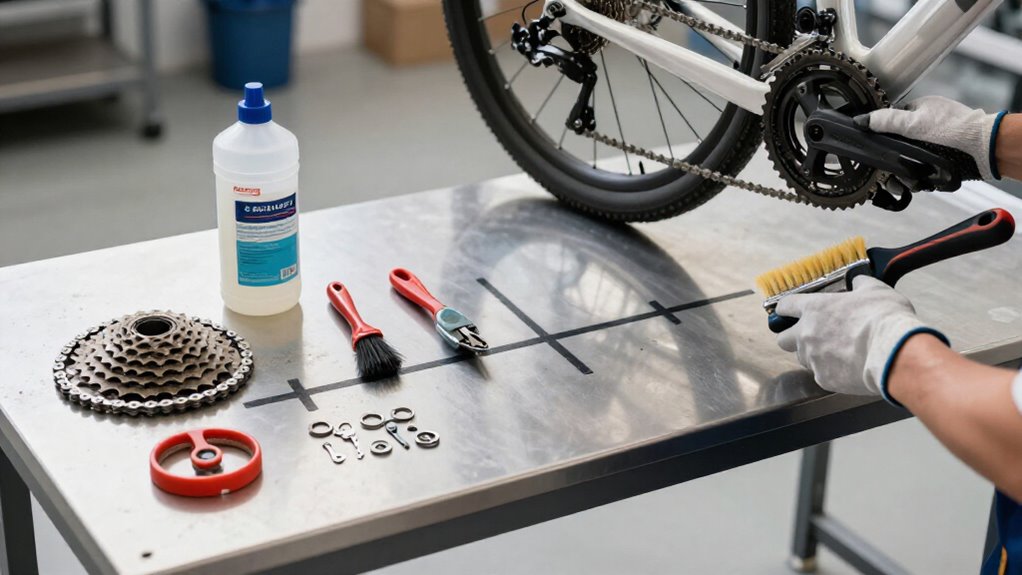
Before cleaning or measuring the drivetrain, assemble a bike-specific, preferably biodegradable, degreaser and a chain-wear gauge. Avoid kerosene and turpentine; they can harm finishes and create unnecessary hazards. Set up in a ventilated workspace, away from ignition sources, and contain runoff.
- Place a disposable tray or mat beneath the bike, then set out chemical-resistant gloves, eye protection, lint-free rags, and a warm-water, mild-detergent bucket.
- Add stiff cassette brushes and a toothbrush-size pulley brush. Include an optional chain-cleaning device if the chain is heavily soiled.
- Confirm the degreaser’s dwell-time and disposal instructions. You’ll apply it sparingly and keep it off painted or anodized surfaces.
- Select a compatible two-pin gauge, ruler tool, or digital checker. Verify its thresholds, record results, and compare readings with your drivetrain manufacturer’s replacement guidance.
Clean Chain Every 150 Miles
Clean the chain at roughly 150-mile intervals to remove abrasive grit from the rollers and pins before it accelerates chain and cassette wear.
Log mileage and schedule this service before grime becomes visibly heavy. That routine protects shifting quality because contamination embeds around roller pins and raises friction. Secure your bike in a stable stand and keep degreaser away from brake rotors and pads. Shorten the interval whenever rain, mud, or dust coats the drivetrain.
| Riding | Trigger | Action |
|---|---|---|
| Dry | 150 miles | Scheduled clean |
| Wet/dusty | Before 150 | Earlier clean |
After each scheduled cleaning, restore correct chain lubrication to support smooth power transfer and limit friction. Don’t wait for black buildup or noisy shifting; both signal that contaminants may already be increasing component deterioration rapidly.
Backpedal, Brush, Dry, Then Lube
Backpedal the cranks to inspect chain movement, then brush grit from the chain, cogs, and derailleur area. Dry every component completely before you apply lube to the inner chain links.
Let it settle, wipe away excess, and backpedal again to confirm quiet, smooth operation.
Backpedal the Cranks
With the bike supported securely, rotate the cranks backward and listen and feel for grinding, tight links, or gritty drag that can signal contamination in the chain, jockey wheels, cassette, or chainrings.
Keep your fingers, clothing, and tools clear of the chain and sprockets while they move. Turn slowly through several revolutions, watching each chain link enter and leave the jockey wheels and teeth. Stop immediately if a link binds, skips, or rides unevenly; don’t force the drivetrain. Note where resistance occurs and inspect that location once rotation stops.
Backpedaling exposes loose road grime and helps you identify areas needing attention before further cleaning. Perform this check after wet or dusty rides and during scheduled drivetrain service. If roughness persists, stop and inspect it.
Brush Chain and Cogs
Brush the chain and cassette before lubricating: hold a drivetrain-safe brush against the chain and cog teeth, then slowly turn the cranks backward to expose every roller, link plate, and sprocket surface. Keep fingers, loose sleeves, and the brush clear of the chainring and derailleur pulley path while you rotate only by hand. Work from outer cassette cogs inward, using short, controlled strokes to dislodge packed mud and abrasive dust from tooth valleys and chain rollers.
Stop rotation before repositioning the brush or shifting gears. Repeat this quick backpedal-and-brush procedure after wet or dusty rides; removing contamination early limits accelerated chain and sprocket wear. After residue clears, apply dry lube when chain is dry, sparingly, avoiding excess that attracts grit or drips onto cogs.
Dry Every Component
After wet-road or rain rides, remove loose grime before drying the drivetrain: turn the cranks backward by hand and use a drivetrain-safe brush on the chain and cassette. Keep fingers clear of chainrings and sprockets while backpedaling, and secure the bicycle. Wipe the chain, cassette, chainrings, and jockey wheels with a clean, dry rag or paper towel.
Rotate the cranks slowly to reach each section. Make another brief brushing pass, targeting grit between chain links and sprocket teeth. Inspect crevices for trapped water, then allow parts to air-dry completely.
Don’t continue while droplets or damp residue remain; moisture in rollers and on teeth promotes rust, holds contamination, and accelerates wear. Repeat this routine after wet-road or rain rides to limit corrosion and maintain shifting.
Apply Chain Lubricant
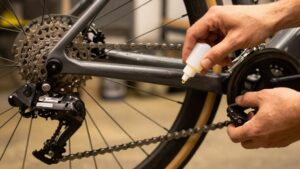
Once the chain, cassette, and jockey wheels are completely dry, lubricate the chain before riding. Shift to a stable gear, keep fingers clear of chainrings and jockey wheels, and backpedal slowly. Place the applicator over the inner run of the chain and deliver a small drop to each link. Pedaling carries lubricant into the roller and bushing interfaces, where it reduces friction and wear.
Use dry lube for dry, dusty routes because it attracts less grit. Choose wet or all-weather lube for rain, puddles, and wet roads. Apply only a thin film; soaking the chain causes lubricant to fling onto nearby parts and combine with contamination. Re-lube after wet or muddy rides, or when inspection shows a dry-looking chain or you hear drivetrain noise.
Wipe Away Excess
Finish each ride by backpedaling the chain through a clean section of rag, then use a brush to dislodge loose grit from the links, cassette, and derailleur pulleys. Wipe the chain again with a dry rag, removing surface lubricant from its outer plates and any visible drips at the pulleys. If water was used, let the chain dry completely before lubricating.
Apply only a minimal amount of suitable lube after brushing and drying; excess oil attracts dirt and forms abrasive paste. Keep fingers, rags, and brushes clear of chainrings and pulleys while turning the cranks, and don’t pedal forward during cleaning. Repeat this brush, dry, lube sequence whenever the chain looks dark or feels gritty. Inspect for stuck debris before your next ride starts.
Shorten Intervals After Wet Rides
After a wet ride, clean the drivetrain immediately and inspect the chain, chainrings, and jockey wheels for embedded grit. Dry all components fully, then apply the correct lubricant sparingly to the chain.
Recheck shifting before your next ride, since contamination can impair indexing and increase component wear.
Clean Drivetrain Immediately
Clean the drivetrain promptly after any wet ride, especially if you’ve ridden through rain, mud, or puddles. Moisture carries grit into the chain, cassette, chainrings, and derailleur pulleys, where it can dry, harden, and accelerate abrasive wear. Before your next ride, secure the bike so the drivetrain cannot move unexpectedly. Wipe the chain thoroughly, then remove debris from the cassette and jockey wheels with brushes and drivetrain-safe cleaner.
Keep cleaning products away from brake rotors, pads, rims, and tires; contamination can reduce braking performance. Turn the cranks only by hand and keep fingers clear of sprocket teeth and pulley gaps. Inspect for packed mud, rust, stiff links, and damaged teeth while cleaning. Wet rides require more frequent cleaning than dry rides, preserving smooth shifting and accurate gear indexing.
Relubricate After Drying
Once the drivetrain has dried, relubricate the chain promptly because rain and wash water can displace its protective film and promote corrosion. Shorten your lubrication interval after a wet ride, even if mileage alone wouldn’t call for service.
This prevents metal-on-metal contact and helps preserve smooth, reliable shifting.
Select a wet-condition chain lube when rain riding is likely. Backpedal the crank and apply a drop to each roller, allowing the chain to carry lubricant through the cassette and derailleur pulleys. Keep lubricant off brake rotors, pads, rims, and tires; contamination can reduce braking performance.
Wipe the chain’s outer plates with a rag after application. If you hear squeaking, feel rough operation, or notice hesitant shifts following wet/dry cycles, relubricate rather than waiting for your schedule.
Inspect For Grit
Following any wet ride, inspect the chain, cassette, and chainrings for gritty residue before the next ride. Run a clean finger carefully along the tooth surfaces and chain contact areas; contamination often feels like sand. Focus on the smallest chainring and its engagement zone, where mud and abrasive particles commonly lodge. Don’t rotate the cranks with fingers near the chainrings or cassette.
If you find residue, shorten your normal maintenance interval rather than waiting for the next scheduled service. Wipe the chain, sprockets, and rings promptly with a clean rag to stop caked dirt from grinding through subsequent rides. For heavy grit, clean the drivetrain thoroughly, dry it, and apply the lubricant before riding. Then inspect again to verify no abrasive material remains.
Quiet Shifts Under Load
Quiet shifts under load depend on precise derailleur indexing, a clean lightly lubricated chain, and controlled pedaling technique. Before riding, shift through every cog and confirm that each click produces a prompt, rub-free shift. If the chain hesitates or chatters, fine-tune cable tension and inspect routing; your frame’s intended top-pull or bottom-pull arrangement must match derailleur actuation.
Clean the chain, jockey wheels, and cassette at intervals, then apply only enough lube to leave the rollers protected, not coated in grime. When shifting while climbing or accelerating, ease pedal pressure for a half-second; don’t force a change at maximum torque. On triple cranksets, verify the front derailleur reliably reaches the smallest ring and avoid cross-chaining. Stop and correct noise before it causes a chain drop.
Stop Riding Cracked Chainrings
A cracked chainring is a stop-pedal defect: continued pedaling can propagate the crack, shear teeth, and damage the chain or other drivetrain parts. Stop riding immediately. Inspect each ring under light, focusing on bolt holes, ramps, and spaces between teeth.
Any visible crack requires replacement; don’t sand, file, or reuse the ring: damaged metal won’t recover its designed strength.
Before fitting replacements, identify contributing causes. If one ring, especially the smallest ring on a triple, cracks repeatedly, verify clean shifts into it and ensure the chain isn’t grinding from poor indexing. Install chainrings and tighten bolts to manufacturer-specified torque. Then check limit and cable adjustment. Test shifting on a stand; confirm the chain seats and doesn’t climb, derail, or ride off the new ring.
Avoid Degreaser on Disc Rotors
Keep drivetrain degreaser off disc rotors: its oils and solvents can leave residues that contaminate pads, reduce friction, cause squealing, and weaken braking performance. Treat contamination as a safety issue, not a cosmetic one.
During drivetrain work:
- Apply degreaser only to the chain, cassette, and chainrings. Use controlled spray or a rag, then wipe components thoroughly to prevent splatter.
- Keep rotor-side cleaning limited to wheel and axle surfaces. Don’t touch rotors or pads with oily gloves or rags.
- If degreaser contacts a rotor, clean it thoroughly with brake-cleaning isopropyl alcohol.
- Let the rotor dry completely, then verify firm, quiet brake bite before riding.
Use clean gloves or washed hands whenever you handle the rotor. Even invisible finger oils can degrade braking consistency under load.
Measure Chain Stretch at 0.5%
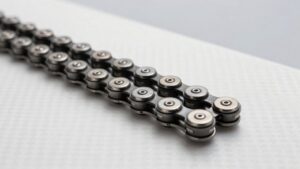
With the drivetrain clean and brake components protected, check chain wear with a chain checker before wear damages the cassette or chainrings. Place the chain straight, seat the gauge correctly, and test several link sections. Focus on the tightest, most-worn area, since elongation isn’t always uniform.
Compare the gauge’s reading with its 0.5% mark. This threshold equals roughly 5 mm of elongation across a 1,000 mm reference length. If the 0.5% indicator drops fully into place, or the reading exceeds it, stop riding and replace the chain before it accelerates cassette and chainring wear. Don’t force the tool; incorrect seating produces misleading results.
If the gauge remains below 0.5%, you can continue riding, but log the inspection and recheck periodically. Check more often after wet, gritty rides or extended cleaning intervals.
Conclusion
Follow this schedule to protect your drivetrain and prevent avoidable failures. You’ll clean and lubricate the chain at 150-mile intervals, shorten that interval after wet rides, and measure wear at 0.5%.
Use degreaser carefully, keeping it off disc rotors, and inspect chainrings for cracks before every ride. Backpedal during cleaning, dry components fully, then apply lubricant sparingly.
If shifts grow noisy under load, service the system immediately. Don’t ride damaged parts. Replace worn parts promptly.