How to Prevent Knee Pain From Cycling
You can prevent most cycling knee pain by systematically optimizing saddle height, cleat fore-aft, lateral placement and rotation, and pedal technique with small measured changes. Measure inseam barefoot and use LeMond (0.883×inseam) as a baseline. Aim for ~30–35° knee flexion at the bottom of the stroke. Test adjustments in short rides while filming or using a goniometer.
Move cleats in 2–4 mm or 2–3° steps; document effects. If problems persist, you’ll find step-by-step checks and troubleshooting ahead.
Quick Overview
- Set saddle height using LeMond (0.883 × inseam) and aim for ~25–35° knee flexion at the bottom of the pedal stroke.
- Position cleats so the ball of the foot sits over the pedal spindle and adjust fore-aft in 2–4 mm increments.
- Align cleat rotation and lateral position to your natural foot angle. Check knee tracking dynamically at low cadence.
- Test changes with short rides at normal cadence (80–95 rpm) and document pain timing and effects of each tweak.
- If pain persists after small, systematic adjustments to saddle and cleats, consult a bike fitter or clinician.
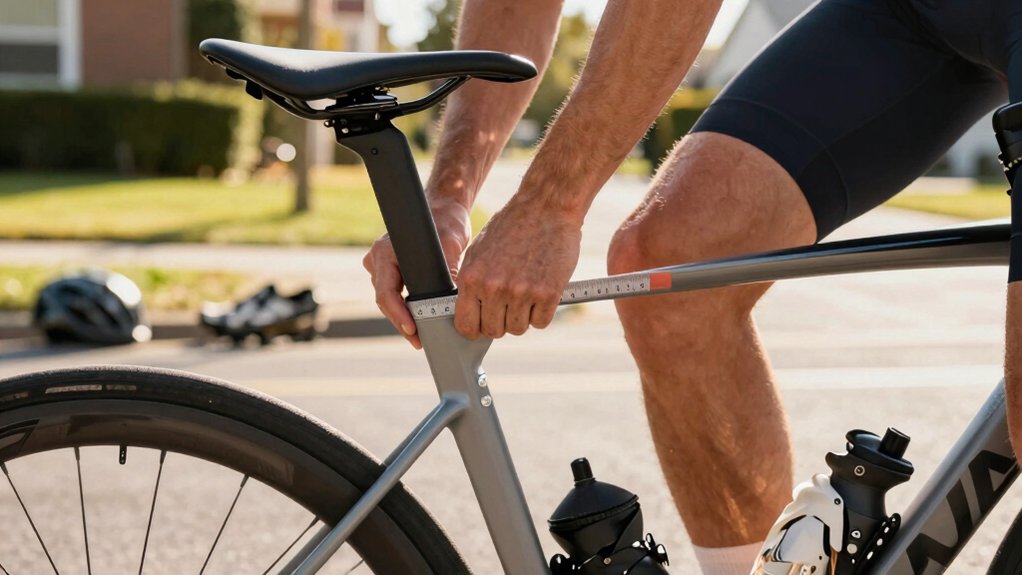
Saddle Height Measurement Chart
Wondering how high your saddle should be? Use measured methods to reduce knee pain: start with the LeMond formula (0.883 × inseam) as a reliable baseline. Then adjust for cleat/pedal stack, crank length, and comfort cues. Measure inseam barefoot against a wall with a book, average three trials, and calculate.
The Hamley method (1.09 × inseam to pedal surface) gives a comparable reference if you account for crank position. Both are starting points; fine-tune on the bike until you reach about 96% leg extension without overextending knees. Check saddle fore-aft after height changes and reassess if you change cranks, shoes, or suspension.
| Method | Quick use |
|---|---|
| LeMond | Baseline for road |
| Hamley | Use for crank-aware setup |
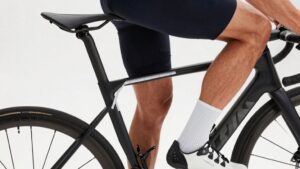
Knee Angle Checklist
Because knee angle directly affects joint load and pedaling efficiency, you should check it whenever you change saddle height, pedals, or crank length. Use a basic goniometer or a photo to measure knee angle at the bottom of the pedal stroke. Ideal ranges reduce excessive flexion or extension and improve knee angle mechanics and pedal stroke efficiency. Follow this checklist:
- Seated with heel on pedal at bottom, knee ~25–35° flexion; adjust saddle if outside range.
- Stand over bike: ensure comfortable extension without locking or hyperextension.
- Test at normal cadence (~80–95 rpm) to confirm dynamic alignment and smooth pedal stroke efficiency.
- Reassess after equipment changes or pain onset. Consult a fitter or clinician if persistent discomfort.
Cleat Positioning Guidelines
Now that your knee angle is set, check cleat position carefully because fore-aft placement, lateral alignment, and rotation all affect knee tracking and load.
You’ll want to test small incremental adjustments and note how changes interact with saddle height to avoid shifting strain elsewhere. Use objective cues (comfort, pain-free pedaling, and pedal stroke smoothness) and make one change at a time.
Forefoot Fore-Aft Placement
Where should your cleat sit under the forefoot to protect your knee and maximize power? Place the cleat so the ball of your foot (metatarsal heads) is near the pedal spindle, not dramatically behind it. This foothold balance reduces excessive knee loading while preserving effective pedal stroke dynamics for torque transfer.
Move cleats slightly fore if you feel lost power or behind if you get forefoot numbness. Test adjustments in short rides. After each change, note knee comfort through the first 10–20 minutes and check for new hotspots. Use small, repeatable increments (2–4 mm) and document position.
If pain persists, combine fore-aft tweaks with seat-height and crank-length checks or see a professional bike fit to avoid compensatory issues.
Lateral Cleat Alignment
How should your cleats sit side-to-side to protect your knees and improve comfort? Position them so your foot tracks naturally over the pedal spindle: avoid having the cleat too far medially or laterally, which can force the knee inward or outward and increase joint stress. Use lateral cleat alignment to align the ball of your foot with your pedal spindle and maintain a neutral tracking line.
Check alignment dynamically: clip in and pedal slowly while observing knee motion or filming a few revolutions. Use a knee angle checklist; ensure the knee moves vertically over the pedal without excessive valgus or varus deviation. Make small lateral shifts, retest, and prefer gradual adjustments rather than large jumps to reduce irritation.
Cleat Rotation Angle
After you’ve set lateral alignment so your knee tracks neutrally, check cleat rotation (the toe-in/toe-out angle) to match your natural foot angle on the ground. Small deviations in cleat rotation change knee angle through the pedal stroke. If your toes point outward on the bike as they do standing, you reduce torsion at the knee.
Start with neutral cleats. Then rotate a few degrees toward your habitual foot position and ride short tests, noting any medial or lateral knee discomfort. Use incremental adjustments (2–3°) and document changes. If pain persists despite correct cleat rotation and knee angle alignment, consult a professional bike fitter or physiotherapist to assess dynamic movement and rule out strength or flexibility deficits.
Saddle Height Interaction
Want to know why cleat position and saddle height must be set together? Because they jointly determine your knee tracking and load distribution. Use a saddle height interaction approach: raise or lower the saddle only after checking cleat fore-aft and rotation. Moving one changes effective knee angle at top and bottom of stroke.
Follow a knee angle checklist: at 30–35° flexion at the bottom of the pedal stroke is typical; confirm with a goniometer or video. If your knee drifts medially or you feel anterior pain, adjust cleat placement first. Then fine-tune saddle height to restore target knee angle.
Reassess comfort and pedaling efficiency after each paired change. Repeat bike fit after equipment swaps or injury.
Small Increment Adjustments
Where should you start when fine-tuning cleat position? Begin with small increment adjustments: move cleats 1–2 mm at a time fore-aft or laterally and test for several rides. Aim to keep the ball of your foot over the pedal spindle and avoid excessive toe-in or toe-out.
Use a measurable baseline: mark current position so you can return if pain appears. Check symmetry between left and right; even minor discrepancies create knee torque. If discomfort persists after incremental changes, re-evaluate saddle height and pedal spindle alignment first.
Document each adjustment and note pain location and timing during the pedal stroke. Two word ideas: Subtopic irrelevant, but follow progressive, evidence-based tweaks and seek professional bike-fit if small changes do not resolve symptoms.
Frequently Asked Questions
How Soon Can I Return to Cycling After Knee Pain Starts?
You can often return to ride timelines within 1–2 weeks for mild knee pain if pain improves with rest and simple care. For moderate pain, expect 3–6 weeks; see a clinician for severe or worsening symptoms.
Use early ride strategies: short, low-resistance rides, high cadence, good bike fit, and ice after sessions. Progress mileage gradually, monitor pain, keep strength work, and stop if pain increases or swelling appears.
Should I Change Shoes if My Knees Hurt While Riding?
Yes, if your knees hurt while riding, you should consider changing shoes. Poor shoe fit alters foot position and pedal stroke, increasing knee stress. Choose supportive, well-fitted cycling shoes with proper cleat placement and stiffness to stabilize your foot.
Test adjustments gradually and monitor pain. Pair changes with pedal stroke refinement and a bike fit. If pain persists, stop and consult a clinician or bike-fit specialist for targeted fixes.
Can Cadence Training Reduce Knee Pain Long-Term?
Yes, cadence training can reduce knee pain long-term by lowering joint loads and improving muscle timing. You’ll target smoother, higher-cadence pedaling (around 85–95 rpm) and gradually build tolerance with intervals and strength work.
Combine cadence training with proper bike fit, progressive mileage, and VMO/glute strengthening to balance forces. Track symptoms, progress slowly, and consult a bike fitter or clinician if pain persists despite consistent cadence-focused rehab.
Are Certain Bike Types Worse for Knee Pain?
Some bike types can aggravate knee pain if they force poor bike fit or saddle position. Bikes with very long reach, aggressive road geometry, or heavy upright cruisers can alter knee tracking and increase strain if you don’t adjust fit.
You’ll reduce risk by prioritizing a proper bike fit, adjusting saddle position and cleats, choosing appropriate crank length, and selecting a frame geometry that suits your flexibility and riding posture.
When Should I See a Doctor or Physiotherapist?
See a doctor visit if your knee has severe swelling, deformity, inability to bear weight, fever, or worsening pain despite rest for 48 to 72 hours.
Ask for a physiotherapist referral when pain limits cycling form, persists beyond a few weeks, or you have recurring instability or grinding. A clinician can rule out fractures or meniscal tears. A physiotherapist will assess movement, prescribe targeted rehab, and advise bike-fit changes to prevent recurrence.
Conclusion
You can prevent most cycling-related knee pain by dialing in saddle height, cleat placement, and pedal mechanics with small, evidence-based tweaks. Check that your knee angle and fore-aft saddle position match recommended ranges. Set cleats for neutral lateral alignment and modest rotation. Move adjustments in small increments while tracking symptoms.
If pain persists despite careful fitting, see a clinician or bike fitter to assess biomechanics, flexibility, and training load before making bigger changes.