Bike Drivetrain Terminology Glossary for Every Rider
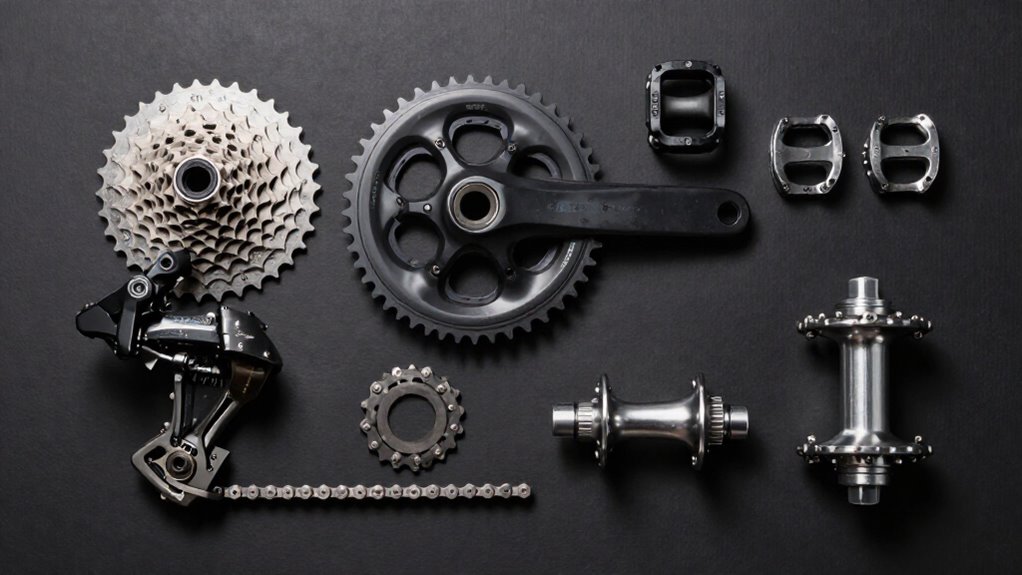
Your drivetrain turns pedal force into wheel motion: cranks and chainrings pull the chain, the derailleur guides it across cassette sprockets, and the freehub engages when you pedal while allowing coasting.
Larger cogs ease climbs; smaller cogs raise speed. Your shell standard determines bearing and crank compatibility.
Chainline affects shift quality and wear, while Q-factor affects stance comfort. Diagnose skipping under load, torque crank bolts correctly, and match derailleur cage length to cassette capacity.
Continue for setup details.
Follow Pedals to Cassette
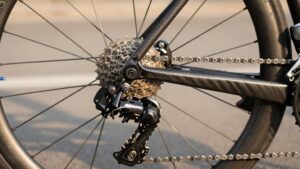
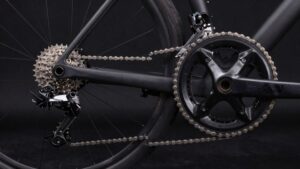
Follow the power path from your pedals to the cassette: pedal pressure turns the crank arms and chainrings, the chain carries that rotation rearward, and the cassette drives the rear wheel forward. Your right shifter controls the rear derailleur on most bikes. It positions the chain over a cassette sprocket, changing gear ratio.
A cassette carries seven to thirteen sprockets; an 11–32T label identifies the smallest and largest cog counts. Choose a larger cog for climbing or a smaller cog for a higher ratio. Shift while turning the cranks with light, steady pressure. The derailleur’s jockey wheel guides the moving chain onto the next sprocket.
Keep pedaling after a shift so the chain seats fully. For shifting, inspect derailleur alignment, cable adjustment, and chain cleanliness.
Freehub Engagement and Cassette
Behind the cassette, the freehub provides the one-way connection that turns pedal torque into wheel drive while letting you coast. Its splined body carries the cassette, while internal pawls and springs, or a ratchet ring or sprag clutch, lock under load and release during coasting. Engagement points determine how far you rotate the cranks before drive begins: more points mean a smaller engagement angle and less felt slack. Don’t confuse this with a threaded freewheel, which combines cogs and ratchet as one unit.
| Term | Practical meaning |
|---|---|
| Cassette | Splined cog cluster |
| Pawls | Spring-loaded drive catchers |
| Engagement angle | Crank rotation before drive |
| Freewheel | Threaded, self-contained cog-and-ratchet unit |
High engagement helps when you restart pedaling over technical terrain, but it doesn’t increase gear range or eliminate your routine maintenance.
Bottom Bracket Shell Standards
Your frame’s bottom bracket shell standard determines which bearings, cups, and crank spindle you can use. You’ll encounter threaded systems such as BSA and T47, plus press-fit designs that rely on accurately machined bearing bores.
Compare shell width and bore diameter carefully: BB30, for example, uses a 42 mm bore and a 68 mm road or 73 mm MTB shell width.
Threaded Shell Standards
A threaded bottom bracket shell forms the frame’s bearing interface, using internal threads to secure the bottom bracket that supports the crank spindle.
Before you order a cartridge, identify shell’s thread diameter, pitch, and width. BSA, or English, commonly measures 1.37 inches by 24 TPI and appears on older road and steel frames. Italian shells may share that diameter and pitch, yet differ in dimensions and compatibility; don’t treat them as interchangeable.
Measure shell width—often 68 to 73 mm—and select a cartridge with correct axle length or bearing spacing. A mismatch shifts chainline and impairs shifting. Use the correct bottom-bracket wrench for installation and removal.
Note thread direction: one cup may use left-hand threads, depending on the standard, so pedaling torque doesn’t loosen it.
Press-Fit Shell Standards
Unlike threaded shells, press-fit bottom bracket shells hold bearing cups by interference fit in a precisely sized frame bore rather than by threads. You press the cups directly into the shell, so bore diameter, shell width, and alignment determine bearing fit and service life.
Many road systems use a 41 mm bearing seat, with shell widths 86.5 mm on road variants or 90.5 mm on road and fitness frames. Mountain-bike shells measure 92 mm or 73 mm, depending on frame geometry.
Before buying replacements, identify three dimensions: shell width, bearing-seat diameter, and crank spindle interface. Your bottom bracket must suit its 24 mm or 30 mm axle. Use drifts and a press; cocked cups can create creaks, roughness, bore damage, and premature bearing wear.
BSA Bottom Brackets
BSA bottom brackets use a threaded shell with a 1.37-inch (44 mm) diameter and 24 threads per inch, a standard found on many road, gravel, and hybrid frames.
You must match the bottom-bracket unit and crank to the shell’s width, typically 68 or 73 mm. A correct BSA unit threads into the shell and supports the crank’s spindle through its bearings.
Check both cups before installation: the drive-side cup uses a right-hand thread, while the non-drive-side cup uses a left-hand thread. This opposing arrangement helps keep the cups secure under pedaling loads.
Confirm the frame’s BSA designation and its exact width before ordering parts. Don’t substitute an Italian unit or a mismatched width; improper fit misaligns bearings and prevents correct crank installation and function.
T47 Threaded Shells
T47 threaded shells extend the serviceability of a threaded bottom bracket while providing a 47 mm shell diameter for larger bearing options and increased drivetrain stiffness. You install cups that screw into the frame’s externally threaded shell, combining a broad shell with the retention and straightforward replacement associated with threaded systems. The design supports larger bearings than older BSA-style shells and helps them remain securely seated under pedaling loads.
When you service or replace a T47 bottom bracket, identify the exact shell variant, including its width, thread pitch, and handedness. Then match the correct cup and bearing assembly to your crank’s spindle diameter and axle length. Don’t assume similarly sized threaded parts interchange. An incorrect combination can preload bearings improperly, misalign crankset, compromise chainline.
BB30 Shell Dimensions
BB30 uses a 30 mm-diameter frame-shell bore as the direct press-fit seat for its bearings, rather than threaded cups. Its dimensions define the frame’s bearing interface, not complete crank compatibility. A genuine BB30 shell lets you press the correct bearings directly into the frame, so you normally don’t need adapters.
Before ordering parts, confirm the frame marking, bearing specification, and crankset together. Your crank’s axle diameter, commonly within the 24–30 mm range, must match the installed bearing stack or approved adapter. A nominally correct shell cannot compensate for mismatched axle dimensions or bearing geometry.
Measure or verify the shell before installation; don’t assume a 30 mm label identifies every associated part. Correct matching prevents poor fit, premature bearing wear, and crank installation problems later.
PF30 Shell Compatibility
PF30 uses a large-diameter press-fit interface: its bearings or bearing cups press into the frame’s typically 68 mm-wide shell instead of threading into it. Because PF30 compatibility depends on shell diameter, shell width, bearing style, and crank spindle dimensions, identify each part before installation. The frame requires PF30-specific bearings or cups that match its internal geometry.
Don’t force a non-PF30 unit or a mismatched adapter: poor alignment can create drag, noise, and accelerated bearing wear. You can adapt some PF30 shells for systems such as BB30, but the adapter must fit the shell bore and mate correctly with the bearing cups and crank axle. During service, confirm press depth, smooth rotation, and the crankset’s specified spindle diameter. Correct preload and no side play matter.
BB86 And BB92
BB86 and BB92 are press-fit bottom bracket shell standards defined primarily by shell width: BB86 measures 86 mm, while BB92 measures 92 mm. Both place bearing assemblies directly in the frame rather than threading a cup into it. The standards aren’t interchangeable: a bottom bracket intended for BB86 generally won’t correctly install in a BB92 frame without components specified for that frame.
When you replace bearings or choose a crankset, confirm the frame’s BB86 or BB92 designation, your crank’s spindle type, and the required bearing or adapter part number. Don’t assume a road or gravel crank automatically fits. BB92’s wider platform can let a manufacturer use different bearing arrangements, potentially supporting stiffness or bearing life, but the result depends on the system. Check documentation.
Shell Width And Diameter
The bottom bracket shell is the frame housing that supports the crank bearings, and its width, bore or thread dimensions, and interface type determine which bottom bracket fits. For threaded frames, identify both shell width and thread specification before ordering parts. Many road shells measure 68 mm, while some use 70 mm; many modern mountain bike frames use 73 mm.
A common BSA shell uses 1.37-inch threads at 24 TPI, and appears on many English-thread road and mountain bikes. Italian systems can share that diameter and pitch yet use a different shell width. Don’t match threads alone: an incorrect width misplaces bearings and compromises chainline. Confirm whether your frame is threaded or press-fit, then measure its width and verify diameter and TPI before buying.
Chainline Versus Q-Factor
Chainline describes the chain’s lateral alignment between the chainring and cassette, while Q-factor measures the distance between your crank arms. You need correct chainline for efficient, reliable shifting and reduced cross-chaining wear, but Q-factor sets your pedal stance and influences knee tracking.
When choosing cranks, bottom brackets, and chainrings, confirm that their spacing preserves both drivetrain alignment and a comfortable stance.
Defining Chainline and Q-Factor
Although both measurements affect drivetrain setup, chainline and Q-factor describe different alignments. Chainline is the lateral position, usually in millimeters, of the chainring or chainset relative to the cassette. It describes how directly the chain runs between front and rear sprockets. A suitable chainline limits cross-chaining and reduces friction and wear on the chain, cassette, and chainrings.
Q-factor measures the distance, in millimeters, between the outer faces of your crank arms at the pedal interfaces. It defines your stance width and influences comfort and knee tracking. A narrower Q-factor may suit you if you prefer less outward hip and knee angle; a wider one can offer stability with particular shoes or stance needs.
You can have accurate chainline yet still find your pedaling uncomfortable.
How Chainline Affects Shifting
When your chainline aligns the chainring closely with the cassette’s working plane, the chain engages each cog at a squarer angle, so shifts require less derailleur force and produce less rub or noise. This alignment lets the derailleur guide the chain onto target cogs, improving indexed accuracy.
If the chainring sits too far inboard or outboard, the chain approaches cassette cogs at an excessive angle. You may hear noise, feel hesitation, overshifts, or ghost shifts, especially in extreme gears. Check offset, crank compatibility, and chainline before changing cable tension, limit screws, or B-tension.
A wider crank assembly can move chainrings outward; confirm specified chainline matches your bottom bracket, cassette, and drivetrain standard. Correct alignment reduces cross-gearing forces and premature chain, cog, and chainring wear.
Q-Factor and Pedal Stance
Correct chainline helps the drivetrain shift cleanly, but it doesn’t determine where your feet sit on the pedals. Q-factor measures the horizontal distance between outer pedal faces, or crank pedal-attachment points. It determines how widely your legs travel during each pedal stroke.
Chainline describes the chain’s lateral alignment from chainring to cassette. Keep it as straight as practical under load to reduce cross-chain angles. Don’t treat that alignment as a fit measurement: two crank designs can place the chainring similarly yet create different Q-factors.
A wider stance may feel stable, but it can increase hip or knee stress. A narrower stance may let your knees track more naturally. Assess both independently: optimize chainline for efficient shifting, then choose a pedal stance your body tolerates.
Choosing Compatible Components
Choosing compatible drivetrain parts starts with chainline, because the crankset, chainring position, rear hub spacing, and cassette must place the chain near the center of its usable gear range.
Select a crankset and bottom bracket whose spindle standard matches your frame and intended road or MTB width. This preserves the designed chainline while maintaining pedal and chainstay clearance. If you fit an adaptor or change hub axle spacing or end caps, remeasure the chainline; a small lateral offset increases cassette angles, noise, friction, and wear.
Match chainrings to derailleur specifications, but correct chainline comes first because shifter adjustment can’t correct poor drivetrain geometry. Then assess Q-factor, the outside-to-outside crank-arm distance, for your stance, comfort, and knee tracking on long rides. Wider isn’t automatically better.
Diagnosing Chain Skip Under Load
Chain skip under load occurs when the chain climbs or releases from a chainring or cassette sprocket as you apply hard pedal torque, rather than remaining fully engaged with its teeth. Start by measuring chain wear with a gauge: elongation prevents rollers from seating correctly, even when shifting seems acceptable. If skip occurs on rear cogs, inspect their teeth for hooked or razor-like profiles; a worn chain and cassette commonly skip together.
If it worsens in specific front gears, check front-derailleur alignment and chainline. The chain should stay centered on the selected chainring and shouldn’t rub or track sideways. Confirm the fault safely: ride in the affected gear at moderate cadence, then apply standing pressure. Repeatable release under increased torque clearly confirms chain skip.
Torque Crank Bolts to Specification
A secure crank interface depends on tightening its bolts to the manufacturer’s specified torque, which creates the clamp force needed without stripping threads, damaging the axle interface, or cracking a carbon component. Check the crank and bottom-bracket manual for the exact value; many systems use low-to-mid tens of newton-meters, but no general figure substitutes for the specified setting.
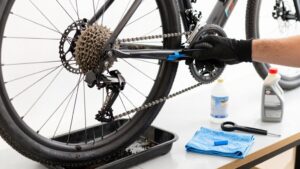
Use a calibrated torque wrench, increase load smoothly, and follow any prescribed alternating sequence for paired pinch bolts. On splined or keyed interfaces, proper torque keeps the crank seated and prevents loosening, creaks, or slip under pedaling load. Recheck the bolts after your first few rides, or at the interval specified in the crank manual, because bedding-in can reduce clamping force slightly as threads initially settle.
Derailleur Cage Length
Derailleur cage length determines how much excess chain your rear derailleur can take up while maintaining tension across the cassette. The cage is the outer derailleur body that carries the jockey wheels. Its length, short, medium, or long, sets chain capacity, not merely cassette compatibility.
- Choose a short cage for limited chain-length change and tighter, close-range gearing.
- Use a medium cage when your chainring and cassette differences require moderate total capacity.
- Select a long cage for wide-range cassettes or extra chain length, common on 1x, gravel, and mountain bikes.
Calculate required total capacity from the difference between your largest and smallest chainrings plus the difference between your largest and smallest cassette cogs. Match or exceed that specification. It causes slack, skipping, and slow shifts.
Conclusion
Once you understand how pedal force travels through the crank, bottom bracket, chain, cassette, and freehub, you can describe drivetrain problems accurately and fix them efficiently. Check shell standards, chainline, Q-factor, cage length, and freehub engagement before buying parts.
When a chain skips under load, inspect wear, adjustment, and compatibility. Always torque crank bolts to specification. With these terms, you’ll diagnose noise, shifting faults, and fit issues with confidence before small faults become expensive repairs.