How to Clean a Bike Drivetrain the Right Way (Step-by-Step)
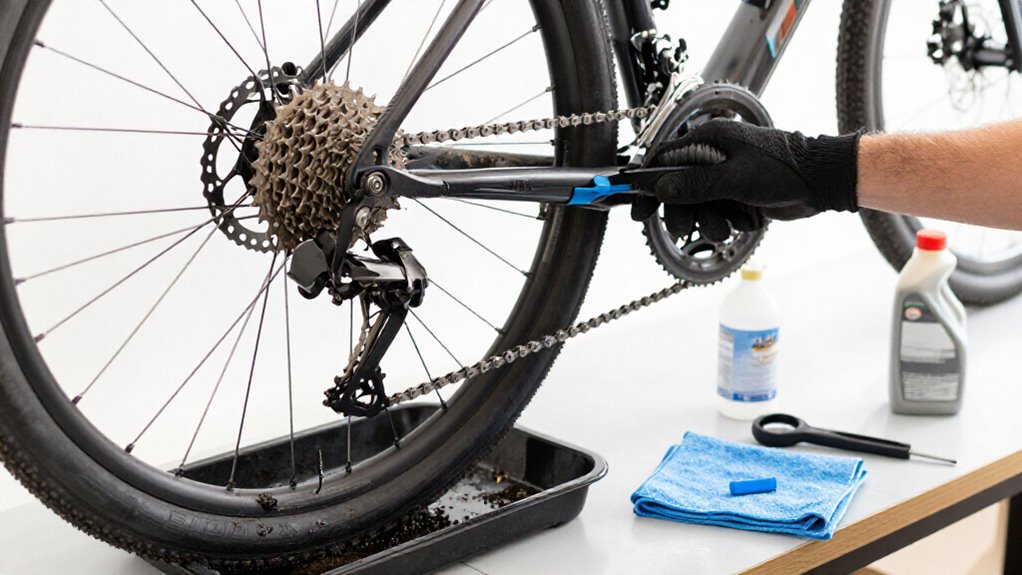
Secure your bike in a stand, cover disc rotors, and place a towel beneath the drivetrain. Rinse loose grit at low pressure, shift to the smallest rear cog, then apply bike-specific degreaser to the chain, cassette, and jockey wheels.
Brush, rinse until clear, and dry fully. Check that links flex freely and shifting is smooth. Lubricate only the chain rollers, wipe excess, and test under load. The steps below help you avoid common mistakes safely.
Smooth, Quiet Pedaling
Smooth, quiet pedaling starts with a truly clean drivetrain. Secure your bike, then give the chain, cassette, and derailleur a quick low-pressure rinse to remove loose dirt. Apply bike-specific degreaser and follow its label dwell time, usually seconds to one minute.
Scrub the inner chain links carefully: trapped grit works like grinding paste against cassette and chainring teeth. Clean each sprocket, chainring tooth, rear derailleur, and jockey wheel until no residue remains.
Rinse thoroughly, repeating the process if grime persists. Don’t leave degreaser behind; it can mix with fresh lubricant and create black, abrasive paste. Dry components completely by spinning cranks, then wiping chain with microfiber. Apply one drop of lube to each roller, backpedal revolutions, let it penetrate briefly, and wipe off excess.
Protect Disc Rotors From Degreaser
Disc rotors need protection before you degrease the drivetrain: even a small amount of cleaner or chain lube can contaminate the pads, cause squealing and weak braking, and sometimes require pad replacement. Cover each rotor before opening the degreaser, and place an absorbent towel beneath the bike to catch runoff.
Use controlled application, never an indiscriminate aerosol mist.
- Fit commercial rotor covers, or secure clean plastic bags with tape.
- Keep every cover clear of the rotor’s braking track.
- Choose a foaming cleaner or trigger sprayer, aimed downward.
- Brush the chain and cassette with strokes directed away from the rotor.
- Rinse downward, dry nearby parts fully, then remove the shields.
If lube reaches a rotor, clean it promptly with isopropyl alcohol and a fresh wipe.
Step 1: Shift Onto the Smallest Cog
Shift the chain onto the smallest rear cog before you apply degreaser. This position leaves the drivetrain at its slackest, reducing the chain movement required while you scrub. It also exposes the cassette’s tooth faces and derailleur area, where thick grime commonly collects.
Turn the cranks by hand and shift carefully until the chain sits fully on the smallest cog. Stop pedaling before you begin cleaning. Keep it there unless another position is necessary to reach a specific area. Shifting back to larger cogs mid-clean can carry loosened grime onto surfaces you’ve already cleaned and complicates rinsing.
After rinsing and drying, shift through every gear briefly to confirm clean derailleur indexing and detect trapped debris or degreaser. Use gentle pedal pressure; don’t force shifts.
Step 2: Secure Bike in Work Stand
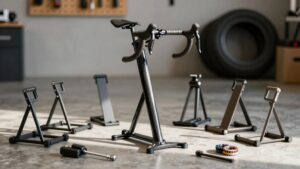
Mount the bike securely in a work stand, clamping it only at a manufacturer-approved frame or seatpost location so the rear wheel and drivetrain can turn freely. Check the clamp is tight enough to prevent twisting, but don’t overtighten it or crush a lightweight tube. Set stand height and angle so chain is centered over rags and tools, allowing access to cassette, chainrings, and derailleur pulleys.
Push the rear wheel and drivetrain gently to confirm bike won’t shift while you scrub. Rotate cranks backward by hand; they should move smoothly without pedals, wheel, or stand contacting anything. If you’ll rinse nearby, position the bike where low-pressure water can drain away without directing spray toward hubs, bottom-bracket bearings, or other seals. Keep all brake surfaces protected.
Step 3: Apply Degreaser to Chain
Rinse the drivetrain with low-pressure water to remove loose grit, then apply a bike-specific chain degreaser directly along the chain’s dirty links and rollers. Wear gloves and keep the spray clear of brake surfaces. Rotate the cranks backward slowly as you apply the product, coating the sections where old lubricant and grime collect.
If you use a chain-cleaning device, fill it only with the amount its instructions recommend. Let the degreaser dwell for the label’s specified time—often seconds to about a minute.
Then rotate the chain through the device to loosen deposits. For stubborn buildup, add fresh degreaser and repeat the rotation. Don’t use harsh household grease removers, which can harm components. Rinse thoroughly afterward so no residue combines with new lubricant and grime.
Step 4: Scrub Cassette With Narrow Brush
With loose grit removed, scrub between and around the cassette sprockets using a narrow drivetrain brush. Rotate the cranks slowly by hand while you work, keeping fingers clear of the chain and teeth. This exposes each tooth and every gap, so grit cannot remain lodged in wear-prone valleys.
If the cassette is heavily soiled, work bike-specific drivetrain degreaser into the sprockets with the brush. Follow the label’s dwell time, usually seconds to about a minute. Focus on both edges of every sprocket and the cassette body, where oily paste collects.
Rinse at low pressure until water runs clear; repeat if needed. Wipe the drivetrain dry and let it air-dry before lubrication, preventing residual degreaser from creating black goo with fresh chain lubricant later on.
Step 5: Clean Derailleur Pulleys Thoroughly
Next, shift to a gear that keeps the chain taut, then rinse the derailleur pulley area with low-pressure water to dislodge loose grit. Spray bike-specific degreaser onto upper and lower jockey wheels, keeping it away from brake surfaces. Use stiff drivetrain brush to scrub pulleys, including roller grooves and spaces near moving parts.
Backpedal slowly while you hold the brush or nozzle against the pulleys; keep fingers, gloves, and loose clothing clear of the chain and wheels. Let the degreaser dwell for the label’s time, typically seconds to about one minute, then agitate again. Rinse at low pressure until runoff is clear. Repeat the process if grime remains.
Spin cranks briskly to shed water, then lubricate only inner roller contact points, never pulley exteriors.
Step 6: Wipe Excess Degreaser Away
Once the degreaser has done its job, rinse the drivetrain with low-pressure water until the runoff runs clear. This prevents leftover chemical residue from mixing with fresh lubricant and creating black, abrasive paste. Keep spray away from hubs, bottom-bracket seals, and brake surfaces.
Use a clean microfiber cloth to wipe the chain, cassette, derailleur body, and jockey wheels. Fold the cloth frequently so you lift contamination rather than smear it back onto components. Backpedal slowly while holding the cloth around the chain, keeping fingers clear of chainrings and pulleys.
Then dry every component completely. Spin the cranks to shed trapped water, and wipe again. Check for oily film; if you find any, repeat the rinse-and-wipe process. Don’t apply lubricant until the drivetrain is dry.
Verify Chain Links Move Freely
Turn the cranks forward and backward, then shift through every cassette gear to confirm the chain runs smoothly without skipping, binding, or gritty resistance. Keep the bike secure on a stand or upside down, and keep fingers clear of chainrings and pulleys.
Pause at the joining link and flex it sideways. Its inner and outer plates should pivot freely, without a reluctant or frozen link. Stiffness usually means trapped grime or residual degreaser remains inside the link.
Rinse the chain with low-pressure water, then brush cassette and jockey wheels if needed. Turn the pedals and shift across the cassette; watch the derailleur guide the chain cleanly over each sprocket. When movement feels effortless and cleaner is gone, dry thoroughly before lubricating rollers.
Chain Skips Under Load
If the chain skips when you apply force to the pedals, inspect the cassette sprockets, chainring teeth, chain rollers, and jockey wheels for packed grit or old lubricant.
| Check | What you’ll see |
|---|---|
| Sprockets and teeth | Clean gaps; confident engagement |
| Rollers and jockey wheels | No black residue; smooth rotation |
| After cleaning | Dry parts; reassuring load test |
Rinse loose grit with low-pressure water, keeping spray away from bearings and braking surfaces. Wearing gloves and eye protection, work bike-specific degreaser into crevices; follow its label, allowing seconds to about a minute. Rinse thoroughly and repeat until spotless. Spin the cranks to expel water; you’ll then dry every part with a lint-free rag. Re-test shifting and pedaling under load only after everything is completely dry before riding with confidence.
Apply Lube to Rollers
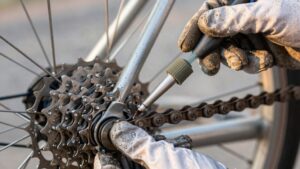
With the drivetrain clean and completely dry, lubricate only the chain’s rollers—the inner moving contact points—not the outer plates. Use a controlled drop on each roller, starting at the joining link or powerlink, if your chain has one. This gives you a clear reference point and helps confirm that every link receives lube.
Turn the cranks backward slowly for several revolutions to draw the oil into the roller bearings. Keep lubricant away from disc rotors, rim braking surfaces, and pads. Let it penetrate for a few minutes, then hold a dry, lint-free microfiber cloth around the chain and backpedal to remove excess. If sections still look dry, add small drops and repeat. Don’t flood the chain: surplus lube collects grit and builds grime quickly.
Conclusion
Cleaning your drivetrain methodically keeps pedaling smooth, quiet, and efficient. You’ve protected the disc rotors, shifted to the smallest cog, removed grime, and checked that every chain link moves freely. If the chain skips under load, inspect wear before riding hard.
Apply lube only to the rollers, then wipe off excess to limit dirt buildup. With regular cleaning and careful lubrication, you’ll extend component life and ride more safely on every outing throughout the year.