How to Measure Bike Chain Wear
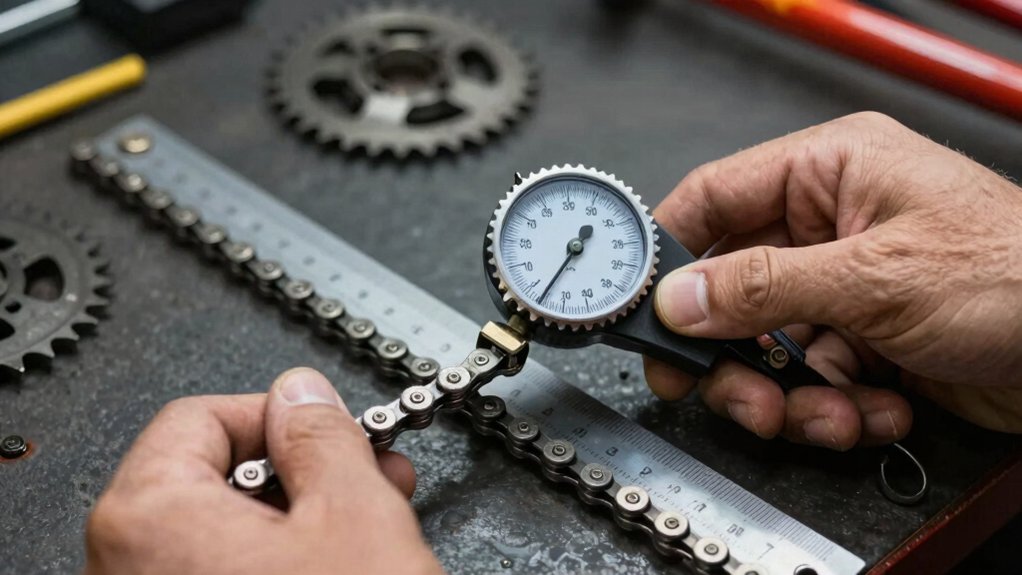
You’ll check chain elongation pin to pin using a reliable gauge or a 12 tooth sprocket: seat the chain fully, tension it, and measure three separate 24 link spans, recording the highest reading. Use a 0.5% threshold to protect cassettes and 0.75% only if you accept higher drivetrain wear.
Inspect the master link’s stamp, fit and clip orientation. Remove it from measurement if it differs. Replace when thresholds are reached, and continue for detailed steps and tool tips.
What Is Bike Chain Wear?
- Use a reliable gauge (three-point or 24-link direct measurement) rather than two-point tools for accurate chain elongation readings.
- Measure chain elongation by comparing pin-to-pin length over 12 or 24 links. Record the highest of three different spans.
- Treat 0.5% elongation as a preventive replacement threshold to protect chainrings and cassette.
- If elongation is 0.5–0.75%, plan replacement soon; at 0.75%, replace immediately to avoid drivetrain damage.
- Exclude or remove the master/quick link from measurement spans. Visually inspect it for wear, stamping, and correct clip orientation.
.5% Vs 0.75% Gauge
How do you choose between a 0.5% and a 0.75% gauge? You’ll favor 0.5% when you prioritize prevention: it signals early wear and preserves cassette life.
0.75% delays replacement but raises drivetrain risk. Use chain wear terminology consistently: “elongation” and “replacement threshold.” Measurement accuracy matters; three-point gauges and direct 24-link measurement give reliable readings. Two-point tools can under- or over-read.
| Gauge | Action | Risk |
|---|---|---|
| 0.5% | Plan replacement soon | Low |
| 0.5–0.75% | Replace short term | Moderate |
| 0.75% | Replace immediately | High |
Check multiple spans, avoid quick links, and prefer tools proven accurate for your chain type to make the right call.
Measure With 12-Tooth Sprocket
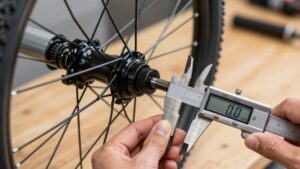
Using a 12-tooth sprocket as your reference, you’ll check chain stretch by seating the chain fully on the small cog, tensioning it, and measuring pin-to-pin over a known span. The short pitch amplifies elongation, so small wear shows clearly. You’ll hook the chain on the sprocket to remove sag, pick a starting pin, and measure a specific number of pins with a caliper or ruler.
This method isolates elongation from roller variance and avoids relying on an irrelevant topic or unrelated concept that confuses results. Measure in three spots, compare readings, and record the highest value. Replace the chain before elongation reaches critical limits for cassette protection.
- Frustration turns to confidence.
- Doubt becomes clear data.
- Delay shifts to timely action.
Replace Master Link Identification
When you inspect a master link, look for its distinctive appearance and any stamping that denotes size or reuse. Check clip orientation and whether the link is marked reusable or single-use. Incorrect installation or a one-time link can fail, so confirm compatibility with your chain speed and pitch before riding.
Master Link Appearance
Recognizing the master link‘s appearance lets you quickly identify a potential weak spot in the chain before it fails. Inspect the link for uneven wear, stretched or thinned plates, and corrosion compared with adjacent links. A visibly different finish, burrs, or looseness under tension indicates the link may not share the same wear pattern and should be monitored or replaced.
Check clip orientation and seating: ensure the clip or outer plate aligns flush and locks fully over the pin heads. On reusable master links, confirm both halves mate evenly and that retaining clips face the correct direction per manufacturer instructions. If the master link looks different or moves more than others, remove it from measurement spans to avoid false wear readings.
Link Stamping Marks
How can you quickly spot the replace master link on your chain? Look for link stamping: manufacturers often mark the master or replacement link with a stamped logo, arrow, or “R” on the outer plate. You’ll see a subtle difference from surrounding plates: shallower machining, different finish, or a small cast mark.
Use those stamps as wear indicators. If the marked link shows disproportionate stretch, plate thinning, or pin movement, it flags replacement even if average chain wear seems low. Check stamped marks in multiple spots because some chains use two half-links. Keep measurement methods consistent; don’t rely solely on stamping but treat link stamping as a quick visual cue that guides where to measure more precisely.
Clip Orientation Check
Curious which way the master link clip should face? You want the open end of the clip pointing opposite the direction of travel so it can’t be levered off by the cassette or a chainring. Inspect clip orientation with the chain on the bike under slight tension. If the clip faces the wrong way, remove and rotate the master link or fit a replacement.
Don’t rely on feel alone; visually confirm the clip sits flush and centered. Beware waxed chain deception: wax can hide poor seating or make a clip appear snug when it’s not. Clean the link area before final checks. Record orientation for future maintenance and always re-torque or re-seat per the manufacturer’s instructions after testing.
Reusable Versus Single‑Use
After you confirm the clip is seated and oriented correctly, check whether the master link is reusable or single use. This is important because replacing a one-time link with a reused clip can lead to failure.
Look for manufacturer marks or instructions on the link. Reusable links often have a simple press-fit mechanism or spring pins; single use links may be crimped or stamped with “one-time” indicators. If unsure, consult the chain or link packaging or the maker’s website.
When measuring wear, don’t include the quick link in your measurement span; its geometry and wear rate differ. If the link is single use, replace it with the specified new clip. Use a fresh reusable link only when labeled reusable versus single use.
Compatibility And Size
Which master link fits your chain depends on speed, width, and whether the link is designed for reuse. You’ll match the master link to the chain’s speed rating (8–12+), noting compatibility considerations like inner width and pin diameter.
Check manufacturer specs: many quick links are labeled by speed and won’t seat correctly on mismatched chains. Size variations exist between narrow road chains and wider mountain chains; don’t force a link that looks close.
If you measure chain wear first, avoid testing across the quick link—it wears differently. Keep spare matched links in your toolkit and replace the link when replacing the chain. When in doubt, use the same brand or a link explicitly rated for your chain’s speed and width.
How Often Should You Check Your Bike Chain Wear on a Bike?
You should inspect your bike chain wear at least once a month for routine riders and before every long ride if you commute daily or ride in wet or dusty conditions. Catching wear early keeps repair costs low and prevents the cascading damage that turns a small component issue into a full drivetrain or wheelset replacement.
Frequently Asked Questions
How Often Should I Check Chain Wear Based on Riding Conditions?
You should check cadence and track wear more often in harsher conditions: every 200–300 miles (300–500 km) if you ride wet, muddy, or gritty. Check every 500–700 miles (800–1,100 km) for mostly dry, clean roads. Inspect after long rides, races, or hard climbs.
Measure at least three spots; avoid quick links, and don’t measure freshly waxed chains. Replace before 1% elongation to protect the cassette.
Can a Worn Chain Damage My Cassette Before 1% Elongation?
Yes, a worn chain can start damaging your cassette before it reaches 1% elongation. If you ignore the topic or get distracted by irrelevant discussion, you might delay replacement and let worn pins and rollers accelerate cassette tooth wear.
Check tension and measure in several spots. Replace earlier if you ride hard or want to preserve the cassette. Regular checks prevent expensive cog wear and shifting problems.
Do E-Bike Motors Accelerate Chain Wear Differently?
Yes, e motor wear can accelerate chain wear. You’ll see higher loads, more frequent torque spikes, and greater chain tension implications, especially under assist or hill starts. That increases pin and roller stress, speeding elongation and cassette wear.
You should check chain wear more often, keep tension consistent, maintain lubrication, and replace chain before 1% elongation to protect the drivetrain and extend cassette life.
How Does Climate (Rain/Salt) Affect Chain Wear Measurement?
Rain and salt increase climate effects by accelerating corrosion and abrasive wear. You’ll see faster true elongation and more uneven wear. That degrades measurement accuracy: dirty, rusty links hide pin-to-pin spacing and fool go/no-go gauges.
Clean and dry the chain, tension it, and measure multiple spots (avoid quick links) to restore reliability. Calipers or digital checkers give the best repeatable readings after proper cleaning and lubrication.
Can Cleaning or Lubrication Change Measured Wear Readings?
Yes, cleaning impact and lubrication effect can alter readings. If you clean and degrease a chain, you’ll often see slightly more wear because grime had been masking elongation. If you measure immediately after heavy lube, readings can look less worn because residue fills gaps.
You should clean and dry the chain. Avoid freshly waxed or heavily lubed surfaces, then tension and measure in multiple spots for consistent, repeatable results.
Which Chain Wear Measurement Approach Is Right for Your Bike?
To keep your drivetrain efficient and avoid skipping or premature wear, check chain stretch with a 0.5% versus 0.75% gauge and confirm fit on a 12‑tooth sprocket.
Identify the master link by appearance and stamping. Check clip orientation and know whether links are reusable or single‑use. Always match chain width and speed compatibility to your cassette.
Replace the chain as soon as measurements or visual checks indicate wear to protect sprockets and maintain smooth shifting.
Related reading: Rear Derailleur Shifting Troubleshooting — a closer look at this topic.