How to Set Handlebar Height on a Road Bike
You’ll set handlebar height to balance comfort, control and power by adjusting stem length, stem angle and spacer stack in small steps.
Raise bars to reduce saddle pressure and move weight rearward; lower them for a more aerodynamic, forward-biased position.
Match bar width to shoulders and shorten the stem to slow steering or lengthen it for quicker handling.
Record saddle height and stack, test 5–20 mm changes, and use correct torque on clamps.
Keep going to learn precise drops, torque values, and maintenance.
Quick Overview
- Use seatpost-to-bar drop as a start: pick a drop suited to your rider type (e.g., 20–60 mm all-rounder, 0–20 mm commuter).
- Raise or lower the stem (spacers or flip stem angle) in 5–10 mm steps and test comfort and breathing.
- Shorten the stem to sit more upright and slow steering; lengthen to reach forward and increase front-end grip.
- Match bar width to shoulder width and record saddle height, stack, and reach before changes for repeatable setup.
- Torque stem and faceplate bolts to manufacturer specs (typically 5–8 Nm faceplate, 8–12 Nm steerer) and recheck after riding.
Handlebar Height Vs Stem Length
Which matters more for your ride: handlebar height or stem length? You’ll find both matter: height sets comfort and weight balance; stem length shifts handling and reach. Raise bars to reduce saddle pressure and move weight rearward. Shorten stem to sit more upright and slow steering. Lengthen stem to push weight forward for grip and faster steering.
Match handlebar width to shoulder width. Adjust stem angle to fine-tune front-end height without swapping spacers. Test small changes: 10–20mm steps for reach, 5–10mm for height.
| Adjustment | Effect |
|---|---|
| Raise stem | Less saddle pressure, rearward bias |
| Shorten stem | Upright, slower steering |
| Lengthen stem | Forward bias, quicker steering |
| Change stem angle | Fine height tweaks |
Seatpost-To-Bar Drop Table
Wondering how much drop you should aim for between your saddle and handlebars? Use a seatpost-to-bar drop table to pick a starting number based on ride style, flexibility, and bike geometry. Record saddle height, stack, and reach. Then, test these drops incrementally.
Check seatpost compatibility when lowering the saddle or changing spacers. Confirm carbon compatibility if you use a carbon post or stem; don’t overtighten. Practical reference ranges:
- Recreational/commuter: 0–20 mm drop
- Endurance: 10–40 mm drop
- All-rounder: 20–60 mm drop
- Race/aero: 50–100+ mm drop
- Flexible/track riders: 80–120 mm drop
Measure with a level. Make small changes and re-evaluate comfort and power after each adjustment.
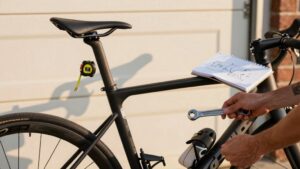
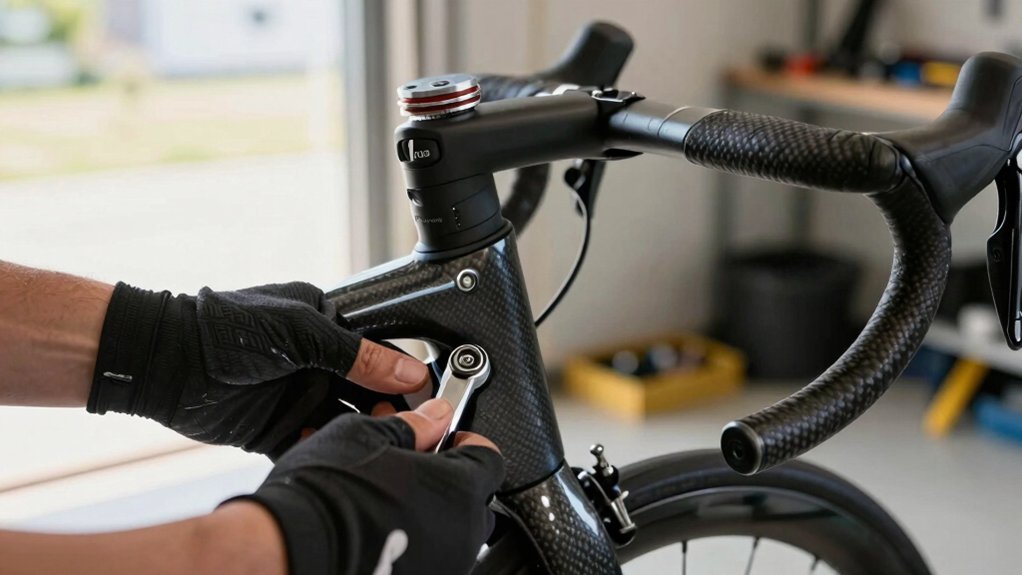
Torque Specs for Clamps
Check the stem and handlebar clamp bolts for the correct torque values stamped by the manufacturer, and set your torque wrench accordingly. Tighten bolts in the recommended sequence and in small, equal increments while checking clamp surfaces for damage or contamination.
Recheck torque at regular intervals, and after any crash, to keep clamps secure.
Correct Torque Values
How tight should you make those bolts? You should use a calibrated torque wrench and follow manufacturer specs: most stems call for about 5–8 Nm on faceplate and 8–12 Nm for steerer clamp bolts depending on material.
Tighten bolts in small, equal increments to the target value to avoid subtopic misalignment of clamps and uneven pressure. Avoid over-torquing; it can crack carbon or strip threads. Under-torquing lets the stem slip.
Clean threads, and don’t apply improper lubrication where dry torque specs are specified. Use carbon paste or light grease only where recommended. After torquing, verify alignment and ride briefly; then recheck torque.
If you’re unsure, consult the stem or frame manual or a professional mechanic.
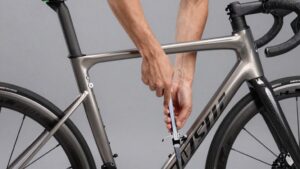
Bolt Sequence Order
When you tighten the stem and faceplate bolts, follow a cross-pattern and work in small, equal increments so the clamp loads the steerer and handlebar evenly. Start loosely; bring opposite bolts up a little at a time and repeat until snug. Use the manufacturer torque values for final passes: this prevents uneven clamping that can crush carbon or twist aluminum.
Check stem alignment with the front wheel between your legs before the last tightening sequence. Then finish the bolt sequence in the same cross-pattern. For two-bolt faceplates, alternate top-left, bottom-right, top-right, bottom-left; for four-bolt stems use a true cross pattern.
After torquing, verify stem alignment and brake/shift lever orientation before riding.
Torque Wrench Use
Why not use a torque wrench every time you tighten stem, faceplate, and clamp bolts? You should: it prevents overtightening that can crush carbon or strip threads and ensures consistent clamping force across bolts.
Set the torque to the manufacturer’s spec for your stem and handlebars, typically found on the stem or in the manual. Use the torque wrench in small increments, alternating bolt sequence to equalize load.
Clean and lightly lubricate threads if specified, but never grease clamp surface on carbon bars unless recommended; use carbon paste where required. After initial torque, recheck after a short ride.
A torque wrench gives repeatable results, protects components, and keeps steering safe. It’s a small tool that avoids big damage.
Clamp Surface Condition
Wondering whether the clamp faces are ready for proper torque? Inspect the clamp surface for dirt, paint buildup, or corrosion; any unevenness can prevent full contact and change required torque readings.
Clean both clamp surface and handlebar tube with isopropyl alcohol and a soft cloth, removing grease that masks misalignment. Check for nicks or deformation; replace parts if you see significant damage.
When you reassemble, follow the correct bolt sequence: snug bolts in an alternating pattern to draw the clamp evenly before final torque. Use the torque wrench to reach manufacturer specs in incremental steps, repeating the bolt sequence between increments. Proper clamp-face condition and sequence ensure reliable clamping without overloading fasteners.
Torque Maintenance Interval
How often should you check stem and clamp torque? Check torque maintenance every 3 months or after 200–500 miles. Additionally, check immediately after any crash, major adjustment, or spacer change. Use a calibrated torque wrench and follow manufacturer specs: most stems need about 8 N·m for faceplate bolts; steerer clamp bolts may be slightly higher.
Tighten bolts in a cross pattern, then recheck. Document torque values and dates so you track trends and catch loosening before it affects control. Proper torque maintenance preserves clamp integrity and steering precision, which directly supports seated comfort by preventing bar slip or micro-movement that strains your neck and wrists.
If you feel any movement at the bars, stop riding and re-torque to spec.
Frequently Asked Questions
Can I Raise Bars Without Removing Spacers From Above Stem?
Yes, you can raise bar height without removing spacers from above the stem by adding spacers below the stem or flipping the stem if it has rise. For safe bar height adjustments, loosen stem bolts, reposition spacers under the stem (not above), align bars, then torque bolts to spec.
Stem spacer changes still affect headset stack and steering; make small, incremental changes and check reach, comfort, and proper torque after each adjustment.
Will Bar Height Changes Affect Bike Handling at High Speed?
Yes, changing bar height can affect high speed handling. You’ll alter weight distribution, front-end loading, and steering responsiveness. Raising bars shifts weight rearward and can make the front feel lighter and twitchier. Lowering bars shifts weight forward and can increase stability but may reduce comfort.
Make small adjustments, test at speed in safe conditions, and re-check stem alignment and torque. If unsure, get a professional fit.
Can I Use Riser Bars on a Drop-Bar Road Bike?
Yes, you can fit riser bars if you check riser bars road compatibility. You’ll need a stem that clamps the bar diameter, clearance for brake/shift cables, and levers designed for drop-bar ergonomics or adapter clamps.
Expect altered handling and reach; small rises work best. Test brake lever position and ride cautiously. Then, fine-tune stem spacers, reach, and rotation. If unsure, consult a bike shop for fit and safety.
How Does Bar Height Interact With Cleat Position?
Bar height affects cleat position by changing hip angle and leg extension. You’ll adjust cleats to avoid bar clipping and optimize pedal position. If bars sit lower, you’ll shift cleats slightly rearward to prevent toe overlap and maintain power. Higher bars may let you move cleats forward for comfort.
Make small changes and test for knee tracking and heel alignment. Prioritize consistent pedal position to prevent numbness or injury.
Is Bar Tape Thickness Relevant to Final Bar Height?
Yes, bar tape thickness affects final bar height, so you should account for it. Thicker tape (and added gel) raises hand positions a few millimeters, altering reach and perceived drop.
When fine-tuning final bar height, measure with your chosen tape in place and make incremental stem/spacer adjustments. If you’re close to a limit or picky about feel, swap tapes and recheck until reach, drop, and comfort match your riding style.
Conclusion
You’ve learned how handlebar height, stem length and seatpost-to-bar drop affect fit and comfort. You also understand why correct clamp torque, bolt sequence and clean clamp surfaces matter. Use a torque wrench to the spec for your parts; follow the proper bolt sequence; and recheck torque at intervals to avoid slippage or damage.
Adjust height and stem length incrementally. Ride-test and fine-tune until your position balances comfort, control and efficient power transfer.