Bike Saddle Bag Sizing Guide: Get the Fit Right First Time
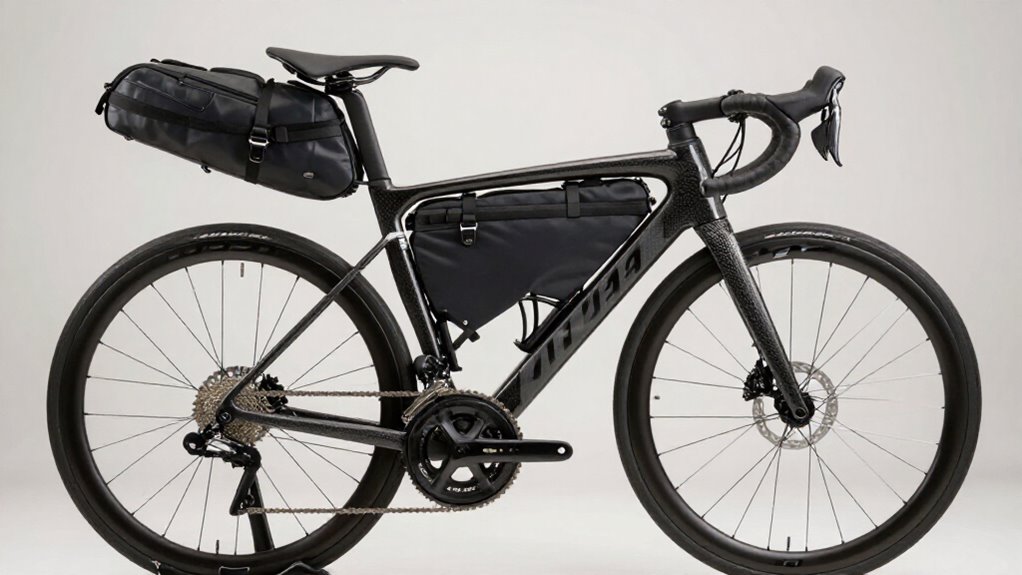
Choose a saddle bag only after you measure rail-to-tire clearance, check heel space through a full pedal stroke, and cycle a loaded dropper through its travel.
Confirm seatpost diameter at the strap location and use carbon-rail-approved hardware.
Match capacity to your load: 0.5-3L for essentials, 3-16L for layers or overnights.
Treat roll-top liters as main-compartment volume, pack gear forward, secure three points, and verify rear-light visibility.
The checks below help prevent rub, sway, and interference.
Measure Rail-To-Tire Clearance
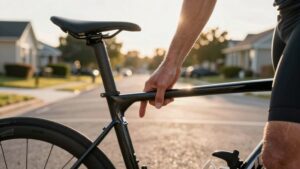
Before choosing a large saddle pack, measure the vertical gap from the saddle rails, where the harness or buckles attach, to the top of the rear tire. This rail-to-tire clearance determines whether a loaded pack can contact the wheel on rough terrain or during suspension compression. Small frames often need compact profiles; a 17L expedition pack may rub where a 5L or 7L option fits safely.
Choose 4.5L or 6L when you need maximum space; some 6L models add a bungee cord. Mount the bag, then inspect the gap while stationary. Turn the cranks through your full pedal stroke to check heel clearance. If possible, simulate bumps and watch for tire approach during vibration. Recheck after every seatpost or dropper-height adjustment; small changes can eliminate clearance quickly.
Capacity Chart: 0.5–16 Liters
With rail-to-tire and heel clearance confirmed, use capacity to match the bag to your normal load rather than simply choosing the largest option. Liters describe volume; dimensions still determine whether your pump, layer, or tools fit. Choose the smallest capacity that covers roughly 80% of rides, then position dense items forward near the rails to limit sway.
| Capacity | Typical load | Fit focus |
|---|---|---|
| 0.5 to 3 L | Tools, tube, essentials | Minimal bulk; check tire gap |
| 3 to 16 L | Layers to overnight kit | Secure rails and seatpost; balance weight |
Use 3 to 6 L for day rides, 6 to 10 L for minimalist overnights, and 10 to 16 L for multi-day loads shared with frame and handlebar bags. On small frames, favor a lower-profile shape; it preserves pedaling clearance and reduces rearward leverage.
Usable Volume Excludes Roll-Top Closure
Treat a roll-top saddle bag’s stated capacity as the usable volume of its main compartment, not as storage you gain by leaving the collar unrolled. Manufacturers typically rate the main compartment rather than the closure, so a 6-liter bag doesn’t become larger when you pack into its collar.
Plan your load around the listed liters: fit your puncture kit, mini pump, tools, and other essentials inside the compartment first. Then roll only the remaining slack to compress the opening and weather-seal the load. Bulky items near the limit can make rolling difficult and reduce comfortable packing room.
Don’t overstuff the top in pursuit of extra capacity; it can create a larger, less stable profile that rubs or sways while you pedal. Verify fit loaded.
Seatpost Diameter Compatibility
Measure your seatpost diameter at the bag’s clamp or strap location, then match it to the manufacturer’s clamp range or specified adapter.
If you use straps, confirm they cinch securely without slipping, and use a diameter adapter where a clamp is oversized.
Finally, load the bag and check tire clearance through suspension or dropper-post travel so it can’t rub under compression.
Measuring Seatpost Diameter
Seatpost diameter determines whether a strap-mounted bag or seatpost adapter clamp will fit securely without slipping. Measure the post at the exact height where the bag hardware will sit, usually just below the saddle rails, and record the result in millimeters. Common diameters include 27.2, 30.9, 31.6, and 34.9 mm, but don’t assume yours matches a common size.
Use calipers for an accurate measurement. Without calipers, wrap a soft tape snugly around the post, measure its circumference, and divide that figure by π (3.14). Inspect the mounting area for a taper, protective sleeve, or diameter change; measuring only the post’s top can give a misleading result.
After installation, pedal and ride over bumps. The hardware should remain stationary, with no rotation or creep.
Matching Clamp Sizes
Match your seatpost’s outside diameter to the bag mount’s specified clamp range before you buy. Common posts measure 27.2, 30.9, 31.6, or 34.9 mm, but don’t assume a “universal” mount fits yours: confirm that your exact measurement sits within its stated adjustment range. A true clamp or quick-release mount needs close compatibility to hold the bag firmly and prevent rotation, sliding, or rattling under load. Straps tolerate more variation, though you should still tighten them enough to stop movement without damaging the post.
If you ride a dropper post, check clearance and clamp range with the post fully extended and fully lowered; the bag must not rub moving hardware. Rail-mounted bags rely primarily on rail spacing and shape, yet any seatpost-mounted component must fit.
Using Diameter Adapters
When your saddle bag’s clamp doesn’t match your seatpost’s outside diameter, use the manufacturer-approved diameter adapter to create a secure, even fit without over-tightening. First, measure the post’s outside diameter and check the bag maker’s approved adapter range. Confirm compatibility with your mounting system, especially a three-point seatpost clamp, because the correct insert helps control sway and limits rubbing.
Before final tightening, check that the adapter sits flush and doesn’t contact seatpost bolts, a dropper remote, or the dropper’s travel path. On small frames, an adapter may shift the bag, so re-check tire clearance when compressed and confirm it clears dropper movement. Don’t substitute improvised shims: uneven material can distort the clamp, concentrate load, and allow the bag to move under pedaling forces.
Checking Strap Fit
How tightly the seatpost strap fits determines whether a saddle bag stays stable or sways under load. Before tightening a rubberized strap, measure your seatpost’s outside diameter and match it to the manufacturer’s stated compatibility range.
Position the harness directly behind the saddle, so it bears against the post without contacting the clamp hardware or top of the seatpost collar. If you use a dropper post, raise it fully and test strap length and placement through its travel; it mustn’t shift or rub.
On systems such as the Swift Olliepack, saddle-rail buckles share the load with the strap, so remove all slack. After fastening, pedal and bounce the bike several times. Confirm the strap remains tensioned, doesn’t loosen, and avoids unwanted contact during movement.
Allowing Tire Clearance
Tire clearance depends on both the space beneath your saddle and the way the bag’s straps sit around your seatpost and rails. Before final positioning, measure the gap from saddle underside to tire crown. Leave room for compression and side-sway on rough surfaces.
Confirm your seatpost diameter, rail diameter, and strap layout match the bag. Overtightened seatpost straps or rail buckles can force the bag outward or downward, reducing clearance. If you use a large post or dropper post, retighten and reposition the harness, then cycle the dropper through its travel.
On small frames, a 17L expedition pack may contact the tire; choose a 5–7L pack instead. For tight setups, a 4.5–6L bag keeps weight seated directly behind the saddle, not hanging near the tire.
Account for Dropper-Post Travel
A dropper post changes the clearance available beneath and behind your saddle, so size and position the bag for the post’s full travel—not just its extended height. With the bag loaded to its intended capacity, cycle the post slowly from full extension to full compression while you stand beside the bike or support the wheel off the ground.
Check that the bag, harness, and straps clear the post collar, lever housing, cable routing, rear tire, and any suspension linkage. Watch for straps that tighten, rub, or pull the bag rearward as the saddle drops. Use the manufacturer’s rail buckles and rubberized seatpost straps so the load stays unified rather than creeping toward moving parts. If clearance disappears at full drop, choose a smaller, lower-profile
Carbon Rails Need Approved Clamps
If your saddle uses carbon rails, match the saddle bag’s rail hooks, buckles, and any adapter clamp to the rail manufacturer’s approved hardware. Carbon-safe hardware spreads load correctly and prevents crushing or weakening the rails.
Check every contact point: rail hooks, buckle straps, and three-point fasteners must be rated for carbon. If your pack uses a seatpost adapter, verify its diameter and tension specification matches your post’s material. Don’t over-tighten it.
Install the bag before your ride and confirm it sits centered behind the saddle. A shifting bag can load one rail and tempt you to add excess clamp force. Follow both manufacturers’ instructions, check alignment after tightening, and use approved hardware rather than improvising with universal clamps or shims that don’t fit safely.
Weekend Touring: 10-Liter Pack
For weekend touring, a 10-liter saddle pack gives you room for puncture gear, a spare tube, tools, a compact layer, and snacks without adding the sway common to larger seatpacks. Your bike still needs enough saddle-to-tire clearance. Check the gap with the pack loaded, particularly on small frames or with wide tires. If clearance is tight, choose a 5–7-liter model.
Confirm the pack accommodates your tube size, then compare usable internal length against your pump and tool kit. Pack dense items forward near the saddle rails, and wrap the mini-pump and tools so they can’t damage the tube. Select dual rail-buckle straps or a three-point attachment compatible with your saddle and seatpost. Load it fully, then pedal to verify heel clearance and tire space.
Prevent Saddle Bag Sway
Prevent saddle bag sway by choosing a three-point attachment that anchors to both saddle rails and the seatpost. This layout resists yaw and keeps a loaded bag tight against your saddle through rough-road vibration. Use the harness exactly as designed; rubberized seatpost straps and dual rail buckles create a secure fit.
- Load the bag to its intended capacity, then cinch every strap firmly.
- Push down and rock it side-to-side; it shouldn’t shift, rattle, or swing.
- Pedal while stationary and confirm the bag doesn’t rub your thighs, tire, or frame.
- Position straps around seatpost or dropper hardware, so nothing binds or pulls the bag off-center.
A secure setup protects confidence on descents and prevents unwanted mid-ride adjustments.
Recheck tension after rough sections as soft gear settles.
Check Rear-Light Visibility
Visibility matters as much as bag capacity: once you’ve loaded and secured the saddle bag, confirm it doesn’t block your rear light’s direct line of sight. A hidden light turns a well-packed bike into a real risk, especially in traffic, rain, or fading daylight.
- Load the bag to your normal riding capacity.
- Ask someone to watch from behind while you pedal and brake.
- Check that the bag body and straps clear the light mount and beam.
- Cycle a dropper post fully; its travel mustn’t cover a seatpost-mounted light.
Choose a low-sway, two-point attachment system. On rough gravel, vibration can shift a loose bag into the beam path.
Recheck clearance after tightening straps, and position heavier gear forward near the saddle rails to reduce movement.
Conclusion
Measure your rail-to-tire clearance, seatpost diameter, and available dropper travel before choosing capacity. Match the bag’s usable liters—not its rolled-up maximum—to your load, with 10 liters often suiting weekend touring.
Use manufacturer-approved clamps on carbon rails, then tighten every strap to prevent sway. Pack so the roll-top clears the tire through full suspension movement.
Finally, mount or reposition your rear light where the bag can’t block it. A correct fit keeps rides stable and visible.