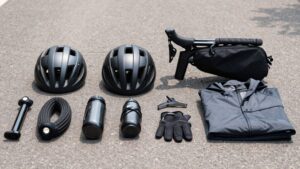
The Essential Road Bike Gear Checklist for New Riders
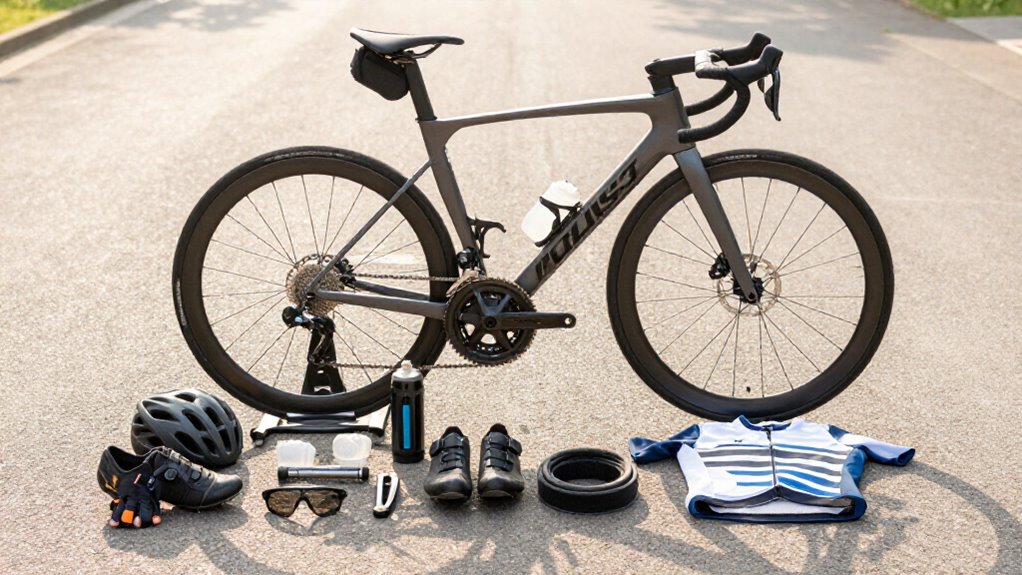
Start with a properly fitted CPSC- or EN 1078-certified helmet, then add daytime lights: 400–800 lumens front and 50–100 rear.
Carry two levers, a spare tube or tubeless plugs, a mini pump, and a multi-tool.
Check tire pressure with a gauge before every ride, and learn your Presta valve steps at home.
Pack water, snacks, layers, and navigation according to time and weather.
Next, you’ll find practical setup tips for every road ride you take.
Helmet-to-Flat-Kit Priority Guide
Start with the gear that keeps you safe and self-sufficient: a properly fitted, certified road helmet, a home floor pump with a gauge, and a basic flat kit.
Choose a helmet carrying CPSC or EN 1078 certification, then adjust its retention system so it sits level and snug. Replace it after any crash or about every five years, because its foam degrades.
Before every ride, use your floor pump and gauge to set tire pressure; proper inflation improves ride feel and helps prevent punctures. Pack two tire levers, a spare tube, or a tubeless plug kit, plus CO₂ cartridges or a mini pump. Add a compact multi-tool for wheel removal and quick roadside adjustments. Practice using each item at home first, so you’ll stay calm.
Ride-Length Gear Checklist
Your gear list should grow with your time, distance, weather exposure, and distance from help, not simply with mileage. Check your bike, carry ID, phone, payment, weather-appropriate clothing, water, and lights whenever visibility may fade. Then scale supplies realistically:
| Ride length | Bring |
|---|---|
| Micro, under 30 minutes | Small bottle in heat; snack only after fasting. |
| Short, 30–90 minutes | 500–750 mL, rear-pocket snack, sunglasses, gloves. |
| Medium, 90–180 minutes | 750–1,500 mL; eat 30–60 g carbohydrate hourly; add layers. |
| Long, over 180 minutes | Two bottles, regular food, charged navigation, battery, extra layers, first-aid supplies. |
For hot, remote, or changing routes, carry more water, calories, and weather protection than the table suggests. Tell someone your plan, check forecasts, and turn back early if conditions, daylight, or energy deteriorate unexpectedly.
Presta Valve Basics
A road-bike ride kit only works if you can use it, so learn the Presta valve before you need it at the roadside. Most road bikes use this slim valve, with a dust cap and small internal nut. Before pumping, remove the cap and loosen the nut until it stops; this opens the valve.
Attach a Presta-compatible pump head, inflate to the pressure recommended for your tire and rim, then remove the pump, tighten the nut, and replace the cap. Remember: unscrew, pump, reverse the steps. If the nut remains closed, air won’t enter. Don’t guess at pressure: underinflated tires puncture more easily and can handle poorly.
Carry a Presta-ready mini pump or adapter, since standard Schrader pump heads won’t fit. Practice this process at home before riding.
Daytime Light Lumen Recommendations
For daytime visibility, use a 400-800-lumen front light and a 50-100-lumen rear light, preferably with an attention-grabbing flash mode. Increase output in bright sun or busy traffic, and aim both lights so drivers can see you without glare.
Check battery life before every ride and recharge early so your lights don’t fade when you need them.
Front Light: 400–800 Lumens
Most new road riders benefit from a 400–800-lumen front light for daytime visibility, since a bright, focused beam helps drivers spot you sooner in traffic. Choose a model with a focused pattern and strong throw, rather than judging it by lumen output alone. It’ll make you recognizable from farther away.
Use flashing or pulse mode during daylight to attract attention quickly, particularly at intersections and on busy roads. Securely mount the light and aim it slightly downward, so you’re conspicuous without shining into drivers’ eyes. Before buying, check runtime at your preferred daytime setting. Choose one that lasts beyond your typical ride, and recharge it before every outing. A charged, aimed light is a simple, effective layer of protection whenever you share the road.
Rear Light: 50–100 Lumens
Balance that front visibility with a daytime rear light rated around 50–100 lumens. This compact, rechargeable light gives you practical “be seen” protection without adding unnecessary bulk or extreme output. Choose one with several brightness settings, letting you match its intensity to conditions: use a lower setting in clear, bright sun and raise it when clouds, shade, rain, or late-day conditions reduce contrast. Mount it centrally on your seatpost or seatstay, then check that your jersey, saddlebag, or backpack can’t block the beam. Charge it before every ride and carry a backup power source on longer days.
If you regularly ride in traffic, a radar-assisted rear-light system can add another layer of awareness by alerting you to vehicles approaching from behind. It’s smart added safety overall.
Flash Mode Visibility
Even in bright sun, run a flashing rear light in the 50–100-lumen range to help drivers notice you sooner than they might with steady visibility or reflective clothing alone.
Flash mode creates a distinct electronic cue that can stand out when a driver’s attention wanders. Don’t treat reflective apparel as a replacement; use it alongside your light.
Choose a compact, USB-rechargeable unit you’ll actually charge and use consistently, such as the Lezyne Strip Drive Pro or Knog Blinder R70. The Garmin Varia RTL515 adds rear-facing radar to alert you to approaching traffic. Securely mount your light and keep its lens clean. Aim the beam straight back at road level, not toward the pavement or sky. Check the mount before every ride so it stays visible.
Adjusting For Conditions
Daytime lights work best when you match their output and placement to the road around you. For daylight riding, choose a front light with roughly 30 to 100 lumens and a high-visibility rear light delivering about 10 to 50 lumens. Aim the front beam ahead and center the rear light where a saddlebag or clothing can’t hide it.
On midday rides, use a flashing rear light and a low-to-mid-lumen front light rather than relying on a dim front alone. Drivers approaching from behind notice the rear signal first. When you ride beside busy traffic or cross-street-heavy routes, check light’s daytime-visibility distance rating.
That specification helps you judge conspicuity better than lumens alone. Adjust your setup rolling out, so road users can spot you early.
Battery Life Considerations
Choose a rechargeable rear light that delivers roughly 50–200 lumens in a high-output flashing mode, so drivers can notice you sooner in bright daylight. That output helps you stand out better than a dim dusk-only light. Before buying, check the stated runtime for the exact flash setting you’ll use, not only its lowest mode.
High-output flashes consume power quickly, so choose a light that comfortably exceeds your usual ride time.
Recharge it before every ride and carry a small power bank on longer days if needed. A USB-rechargeable model makes topping up simple and avoids hunting for coin-cell batteries. If you use a radar-style light, such as the Garmin Varia RTL515, its flashing beam and rear-traffic alerts add useful daytime awareness. Check charge levels.
Matching Gear to Road Conditions
Road conditions can change quickly, so match your setup to the weather, light, and pavement before you roll out. Check tire pressure with a floor pump before each ride; proper pressure improves handling, while underinflation changes ride feel and can raise puncture risk.
For wet or cool roads, use grippy, vibration-damping bar tape and seal your spare tube, levers, and flat kit in waterproof storage. In heat, bring a water bottle, with drink mix when needed, to protect hydration and energy.
When skies are overcast, dusk approaches, or traffic is heavy, switch on daylight-visible front and rear lights; a flashing rear light helps drivers notice you sooner. Debris make flats normal, so carry tire levers, a spare tube or tubeless plugs, and a mini pump.
Avoid Co₂ in Freezing Temperatures
Cold weather changes more than your clothing and tire grip: it also makes CO₂ inflators less dependable. Around 32°F/0°C and below, cartridges can lose pressure and dispense too little gas to restore a flat tire properly. The cold causes pressure to drop quickly, so one cartridge may leave you with an underinflated tire, and extra cartridges aren’t a dependable plan.
For rides that stay below freezing, carry a small hand pump instead of relying solely on CO₂. A pump takes more effort, but it reliably lets you reach your target PSI. Check tire pressure before you leave and during stops, because cold air can lower it noticeably. Start with pressure suited to your tires and conditions, then ride conservatively if it falls to protect your traction.
30-Mile Weekend Ride Example
For a 30-mile weekend ride, pack as if a flat, thirst, or fading energy could happen before you reach home. Fill one or two bottles and add drink-mix powder when heat raises your sweat rate. Before rolling out, use a gauged floor pump to set tire pressure; road tires slowly lose air, and soft tires can feel sluggish and puncture more easily.
Carry tire levers, a spare tube, and CO₂ or a mini pump, plus a multi-tool. Wear a fitted CPSC or EN 1078-certified helmet, and run lights in daylight, including a flashing rear light. Choose bibs or padded shorts with a quality chamois, and bring easy-to-digest snacks.
Your comfort should improve after one to two weeks; sip and fuel steadily to prevent bonking.
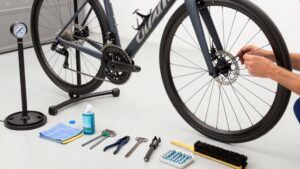
Fixing Rubbing Disc Brakes
A rubbing disc brake is usually a small alignment issue you can diagnose before your next ride. Work methodically, and don’t ride until the wheel spins freely again.
- Spin the wheel and check that the caliper sits parallel to the rotor, with no wobble or uneven clearance.
- Remove and reseat the wheel, then tighten its quick-release or axle to the specified torque.
- Loosen the caliper mounting bolts slightly, center pad clearance, and retighten them.
- If rub stays constant, use a rotor-truing tool to gently correct a warped rotor.
- Spin again, listening for a consistent scrape and confirming an even gap.
Finish with a short, controlled test ride. Check that both pads release fully; the wheel shouldn’t slow immediately from drag. Stop if it does.
Tubeless Plug Kit Essentials
Once your brakes run quietly, pack a tubeless plug kit so a small road puncture doesn’t end your ride. For nail or screw holes, plugs can seal the tire without installing a tube. Practice at home; calm repetition helps you work safely roadside.
- Carry two tire levers.
- Pack a reaming tool.
- Include a hooked insertion tool.
- Match plugs to your tire and puncture size.
- Bring a CO₂ inflator or mini pump.
Remove the object, clean and roughen the hole, force in a plug, then trim excess. Reinflate fully and check for leaks before riding. Keep a spare valve core or core tool in the kit. If the seal won’t hold, install a tube or call for a ride; don’t risk a low-pressure tire.
Conclusion
Start with the gear that protects you, keeps you visible, and gets you home after a flat. As your rides grow longer or conditions change, add tools, layers, lights, and repair supplies that match the route. Practice using your pump, plugs, and brake adjustments before you need them roadside.
You don’t need everything at once—build your kit thoughtfully, check it before every ride, and you’ll roll out safer, calmer, and more confident with each ride.