The Essential Bike Accessories Checklist Every Rider Needs
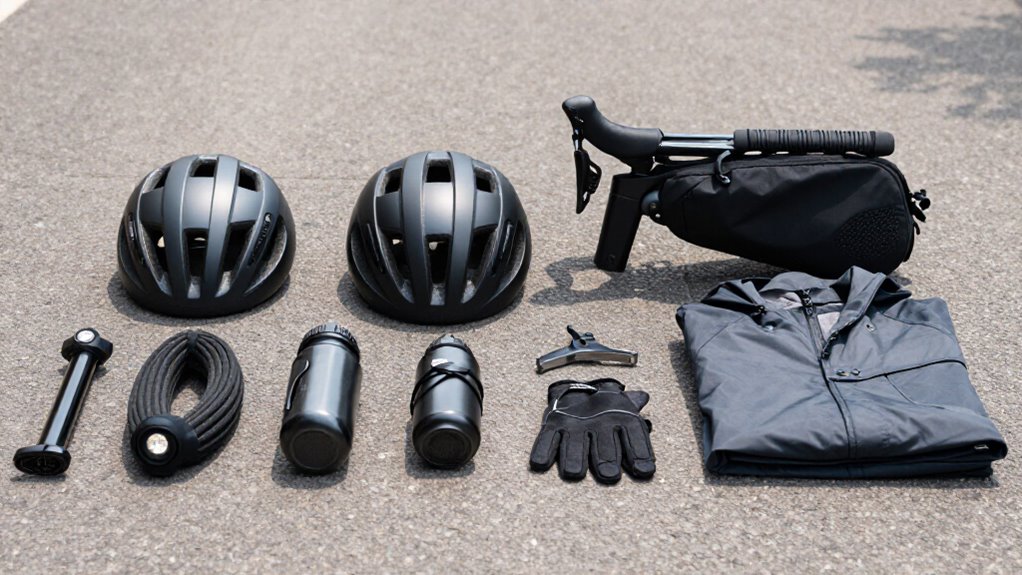
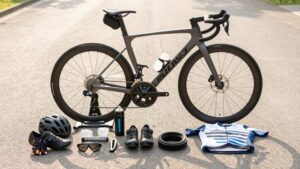
Start with a certified, snug helmet, daytime-flashing rear light, front light, hydration, flat kit, and two tire levers.
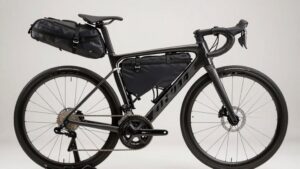
Match accessories to your route: carry a saddle pack, gauge, and GPS on roads; add plugs, a high-volume pump, and offline navigation for gravel.
Know whether your valves are Presta or Schrader, set pressure within sidewall limits, replace any crash-damaged helmet, lock to fixed racks, and address rubbing disc brakes before riding.
More ahead refines your setup.
Daytime Rear Light Visibility
Even on bright, sunny days, use a red rear light to make yourself easier for drivers and other road users to detect earlier. Set it to a daytime flashing mode where legal, and check its charge before every ride. A flashing red signal can stand out sooner than muted clothing, helping road users identify your position when attention is divided at intersections and on busy roads.
Modern rechargeable units are compact and bright, so there’s little reason to leave one off. Mount the light, keep its lens clean, and aim it rearward without blocking it with bags or clothing. A radar-equipped unit, such as Garmin Varia RTL515, can additionally warn you about approaching traffic from behind. Use it consistently, even if you feel visible.
Accessory Priorities by Riding Style
Your riding style determines which accessories deserve space on the bike and in your kit: prioritize safety and self-sufficiency first, then add equipment that suits your terrain, distance, and conditions. Carry a certified, well-fitted helmet, front and rear lights, hydration, and a flat kit on every ride. Match the remaining load to failure consequences and remoteness.
| Style | High-priority accessories | Situational additions |
|---|---|---|
| Road | Saddle pack, gauge, GPS | Power meter, rain vest |
| Gravel | Plug kit, high-volume pump, offline GPS | Frame bags, knee protection |
For road distances, use a pump capable of your required pressure and pack identification. On gravel, long-finger gloves and a wider-tyre spare improve control and recovery. Check light charge, tool function, and water volume before every departure in changing weather or traffic hazards.
Presta vs. Schrader Valves
A flat kit only works if its pump fits your bike’s valve: Presta valves are tall and narrow, common on road bikes, while Schrader valves are shorter and wider, like those on car tires and many hybrids or mountain bikes. Before inflating a Presta valve, remove cap, unscrew small top nut, and attach a compatible pump head carefully.
Afterward, detach it without bending stem, tighten nut, and replace cap. For Schrader, remove cap, seat compatible head firmly, inflate, and recap. Many pumps fit both types, but don’t assume your mini-pump or CO2 inflator does. Check compatibility before every ride; carry correct adapter if necessary. Forcing a mismatched head can damage valve parts or leave you unable to repair a roadside flat. Test it beforehand.
Tire Pressure by Tire Width
Set narrow road tires to higher pressures than mid-width gravel or wide mountain tires, always staying within the sidewall’s stated range. You’ll generally need more pressure as rider and cargo weight increase, while heavier tires and rough terrain require enough support to prevent rim strikes or pinch flats.
Lower pressure slightly for wet or uneven surfaces to improve grip, then recheck before riding because temperature changes affect PSI.
Narrow Road Tire Pressures
Tire width provides a practical starting point for pressure, but you should always stay within the range printed on the sidewall. For 25–28 mm narrow road tires, begin around 90–110 psi (6–7.5 bar), ideally near the middle of the approved range. This baseline supports handling, rolling efficiency, and protection against rim strikes.
With 23–25 mm tires, don’t chase low pressure. Their smaller air volume makes pinch flats and harsh impacts more likely, so use the upper half of the sidewall range, especially on broken pavement or with heavier loads. Check pressure with a gauge before every ride. Cold weather lowers pressure, while heat raises it; adjust accordingly. If your bike uses 28 mm tires, lower pressure modestly for more grip or comfort, never exceeding the stated maximum.
Mid-Width Gravel Tire Pressures
For mid-width gravel tires measuring about 40–50 mm, start near 35–45 psi on a typical tubed setup, then fine-tune from there. Begin nearer 45 psi for a 40 mm tire or heavier loads; drop a few psi as width approaches 50 mm to preserve similar firmness.
Lower pressure improves the contact patch, grip, and comfort on loose surfaces, but don’t run so low that you risk rim strikes or tire burps over rocks. Excessively high pressure makes the ride harsh and can reduce traction. Check pressure with a reliable gauge while tires are cool, before every ride.
After a major adjustment, inspect handling and recheck both tires. Adjust gradually for your weight, cargo, terrain, and casing construction, keeping front and rear pressures appropriate individually.
Wide Mountain Tire Pressures
Start by checking the width printed on your sidewall, such as 26×2.1, 27.5×2.3, or 29×2.4, 2.6, because wider mountain tires generally perform best at lower pressures. For 2.3–2.5-inch tires, begin at 20–28 psi (1.4–1.9 bar); for 2.5–2.6-inch tires, use 18–26 psi (1.2–1.8 bar).
Fine-tune with a reliable gauge. If the bike feels harsh or bounces across rough ground, reduce pressure slightly. If the tire squirms in corners, feels unstable, or risks rim strikes, add pressure. Tubeless setups can usually run 2–4 psi lower than tube setups, improving traction while avoiding pinch flats.
Check pressures before every ride and after major temperature or terrain changes. Heat and long climbs can alter readings, so recheck when conditions shift. This routine helps you maintain predictable handling and protect your wheels.
Rider Weight Adjustments
Once you’ve established a terrain-based baseline, adjust it for your weight and tire width within the manufacturer’s approved range. If you’re a heavier rider, move toward the upper end of that range, particularly on 23–25 mm road tires.
A few additional psi supports the more heavily loaded casing, limits squirm, and reduces pinch-flat risk. Conversely, wider 28–32 mm tires operate efficiently at lower pressures than narrow tires.
When changing from a narrow tire to a wider model, begin by reducing pressure about 5–10 psi, provided you remain within the limits. Always adjust conservatively. If tire feels unstable, increase pressure slightly; if it strikes the rim on an impact, stop and add pressure before continuing. Check pressure weekly and before long rides with a gauge.
Surface And Weather Effects
Surface and weather should guide the final pressure adjustment within your tire manufacturer’s approved PSI range. Wider tires can run at lower pressures, improving comfort and grip, while narrower tires generally need more pressure to resist pinch flats.
For gravel or broken pavement, move toward the lower end to increase tire compliance and traction. On smooth, hard-packed roads, use a slightly higher setting for sharper steering and efficiency.
In cool or wet weather, begin near midrange because ride heat raises pressure. Check again if the bike feels harsh or sluggish. Use your gauge and correct valve procedure: remove the Presta cap, loosen the nut, secure pump head, inflate, then reverse steps. This prevents misleading readings and unsafe adjustments for your specific tire width and terrain.
Check Helmet Certification Labels
Before you buy or ride with a helmet, verify that it carries a recognized cycling-safety label, such as CPSC in the U.S. or EN 1078 in Europe. These certifications show the helmet meets established cycling-impact requirements, rather than relying on an untested brand claim. Locate the printed or molded label on the exterior, inside the shell, or near the strap system and confirm it’s legible.
Also check for a MIPS marking. Its low-friction liner is designed to help manage rotational forces in certain impacts. Certification doesn’t override fit: choose a helmet that sits level, feels snug, and remains stable when you shake or turn your head.
Adjust the retention dial and straps so the helmet can’t wobble or shift noticeably during normal riding motions.
Replace Damaged Helmet After Crash
Replace your helmet after any significant crash or hard impact, even when the shell looks intact. The expanded-polystyrene liner absorbs energy by compressing, and that deformation can be permanent without visible cracks. Once the foam has taken a hit, it may not manage impact energy as designed during another fall. Replace it after any hard strike involving your head or helmet; don’t rely on a visual inspection alone.
MIPS and similar rotational-impact systems add protection, but they don’t restore a compressed energy-absorbing liner. Also avoid dropping your helmet or knocking it against hard surfaces while carrying it. Retire an uncrashed helmet about every five years because UV exposure, sweat, heat, and normal material aging can degrade its protective performance. Use a certified replacement promptly.
Coffee-Shop Lockup Setup
For every coffee-shop stop, lock your bike as if you’ll be away longer than planned. Use a quality U-lock or heavy-duty chain every time; “just a minute” isn’t security. Choose a well-lit, high-visibility space near the café and secure it to fixed infrastructure, such as a rack, post, or rail. Avoid light fixtures and anything movable.
Pass the lock through the frame’s main triangle and the anchor so the frame can’t be lifted, rolled, or twisted free; never lock only a wheel. Add a second lock when practical to protect the front wheel, saddle, or detachable bag. Before you walk inside, tug the bike and lock, confirm the shackle or chain is fully engaged, and make sure no release mechanism is exposed or accessible.
Fix Rubbing Disc Brakes
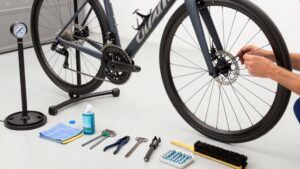
A secure lockup protects your bike when you’re off it; a quick disc-brake check keeps it rolling safely when you’re back on. Before riding, lift the wheel, spin it, and listen for the tick that identifies rotor contact.
- Check that the quick-release or thru-axle is tight and the wheel sits in its dropouts. Inspect the rotor: it should run true and centered through the caliper.
- If alignment is off, loosen the caliper mounting bolts. Hold the brake lever, retighten the bolts, then spin the wheel again.
- For a warped rotor, use a rotor truing tool and make corrections; don’t kink it. If rubbing remains, inspect pads for wear or contamination and clean pads and rotor with isopropyl alcohol. Test braking before traffic or descents.
Carry Two Tire Levers
Carry two tire levers so you can lift even a tight road or gravel tire bead without forcing it and risking damage to the tire or rim. Deflate the tube or tire completely, then hook one lever beneath the bead and use the second to work along the rim. This controlled method protects your hands and avoids pinching a tube during removal or reinstallation.
- Keep both levers in an accessible saddle bag or jersey pocket, not buried under other gear.
- Pack a spare tube or tubeless plug kit, so a puncture doesn’t leave you with only a removed tire.
- Before inflating, inspect the casing, remove debris, and confirm the bead sits evenly around the rim.
Practice this at home before relying on it roadside.
Conclusion
You’ll ride safer and solve more roadside problems when you match your accessories to your bike, route, and riding style. Use a certified, undamaged helmet, run correct tire pressure, and keep a daytime rear light visible. Carry two levers, know your valve type, and correct brake rub before it worsens.
For stops, lock the frame and wheel securely. These essentials don’t add clutter—they give you reliable protection, visibility, and self-sufficiency on every ride you make.