How to Choose Disc Brake Pads Material
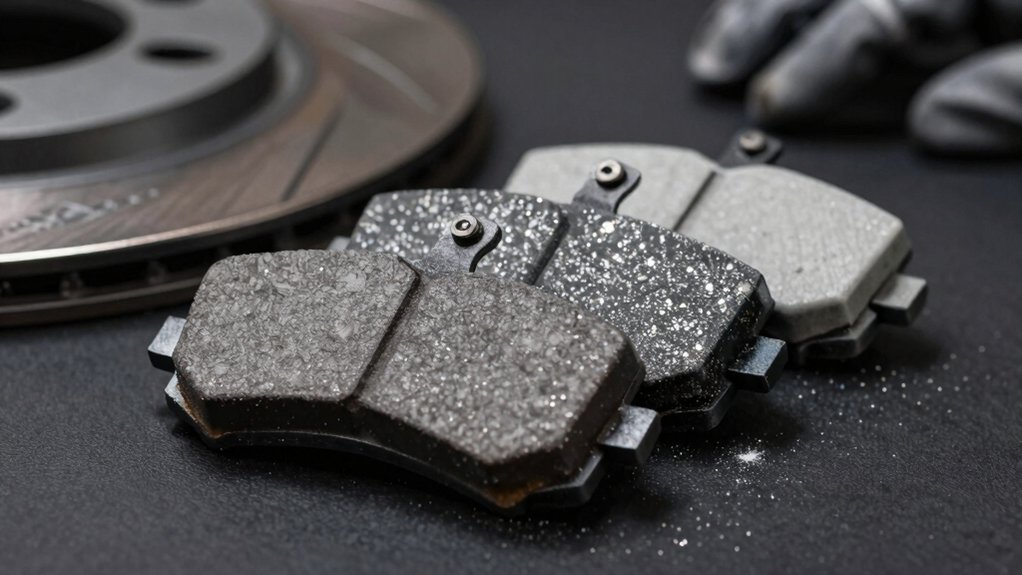
Choose pads by matching your driving and heat needs: pick organic for quiet, everyday street use with low heat. Semi‑metallic is suitable for balanced modulation and moderate thermal capacity. Choose sintered/ceramic for high temperatures, heavy loads, or track duty where heat transfer and fade resistance matter.
Consider rotor condition and bedding requirements since thin or poorly bedded rotors reduce performance. Measure thickness against manufacturer minima and inspect wear patterns. Continue for specific selection, bedding steps, and replacement thresholds.
Quick Overview
- Match pad material heat rating to your driving: organic for low, semi-metallic for medium, sintered/ceramic for high heat loads.
- Prioritize noise and modulation needs: organic pads are quieter and offer smoother bite than metallic options.
- Consider heat transfer and fade resistance: sintered/ceramic pads transfer heat best and resist sustained fade.
- Check rotor condition and thickness: thin or scored rotors reduce pad effectiveness and may require different pad choices.
- Follow bedding and re-bed procedures for each material to ensure a uniform transfer layer and stable braking performance.
Pad Material Heat Ratings
How hot your brakes get determines which pad compound will hold up and maintain consistent stopping power; so choose accordingly. You’ll match pad types to operating temperatures: organic pads offer quiet operation and good modulation but suffer organic fade under sustained heat and insulate via limited heat transfer to calipers.
Semi‑metallic balances heat tolerance and quicker warm‑up with moderate heat transfer. Sintered pads resist extreme temperatures and transfer more heat into brake fluid; they suit long descents. Ceramic pads tolerate high temperatures, pass heat differently, and remain durable.
| Pad Type | Heat Rating | Heat Transfer |
|---|---|---|
| Organic | Low | Low |
| Semi‑metallic | Medium | Moderate |
| Sintered/Ceramic | High | High |
Brake Pad Bedding Checklist
Why bother bedding your pads? You need pad bedding to mate friction material to rotor surface, stabilize bite, and avoid glazing. Follow this concise checklist for every installation.
- Warm-up: complete 8–10 progressive stops from moderate speed (keeping temperatures below extreme ranges) to transfer a uniform friction layer.
- Cooling cycles: allow pads and rotors to cool between aggressive stops; thermal stabilization prevents uneven transfer and glazing.
- Inspection: after bedding, check pad wear, surface uniformity, and absence of blueing or hot spots. Re-bed if the transfer layer looks patchy.
Perform pad bedding with the pad material’s characteristics in mind (resin, sintered, semi-metallic, ceramic). Document procedure and results for repeatable braking performance.
Rotor Thickness Minimums
When you inspect rotor thickness minimums, focus first on the manufacturer’s specified minimum safe thickness and any stamped or documented limits. Measure thickness at multiple points with a micrometer or caliper to identify wear patterns, grooves, or taper that can hide local thin spots.
Replace rotors when measurements approach the spec limit, show uneven wear, or when continued use would compromise pad contact or heat capacity.
Minimum Safe Thickness
Wondering when a rotor has reached the end of its safe life? You’ll use minimum safe thickness limits specified by the rotor manufacturer, not feel or noise alone. Those limits account for material loss from rotor wear and the increased susceptibility to heat-related distortion when pad heat concentrates in thinner metal.
Measure remaining thickness against the stamped minimum. If unknown, replace when the rotor is within 0.2–0.5 mm of typical new thickness for bikes; or follow vehicle specs for cars. Don’t bend rules: continuing past minimum risks warped rotors, reduced thermal capacity, and compromised braking performance.
When in doubt, replace. Rotor replacement is cheaper and safer than tolerating reduced structural integrity or sudden failure.
Measuring Rotor Thickness
Knowing the rotor’s minimum safe thickness is only useful if you can measure remaining material accurately, so here’s how to do that correctly. First, clean the rotor braking surface and let it cool; contaminants and heat change readings. Use a calibrated micrometer or digital caliper at several radial positions, measuring thickness perpendicular to the surface and avoiding chamfers.
Record measurements at inner, middle and outer tracks; rotors often wear unevenly. Compare the lowest measured rotor thickness to your documented replacement decision points. If any reading equals or falls below the threshold, replace the rotor.
Also note lateral runout and surface scoring: deep grooves or runout beyond spec can force earlier replacement even if thickness remains above the minimum.
Manufacturer Spec Limits
Why does the rotor manufacturer set a minimum thickness, and why should you enforce it? Manufacturers specify a minimum thickness to preserve structural integrity, thermal capacity, and safe heat dissipation under load. If you ignore that limit, the rotor can warp, crack, or suffer reduced heat rating performance during hard or repeated stops.
You should measure thickness with calibrated tools and retire rotors that reach the spec minimum. Thin rotors reduce pad bedding consistency and raise caliper fluid temperatures, compromising modulation and increasing the risk of failure. Replace rotors when they hit the limit; do not wait until later. Doing so maintains predictable braking, protects calipers and pads, and ensures your chosen pad material can operate within its published heat rating envelope.
Thickness Wear Patterns
How does uneven rotor wear develop, and what does it tell you about system health? You’ll see thickness wear appear as ridges, tapering, or localized scoring when pads contact rotors inconsistently. Measure rotor thickness at multiple points with a micrometer; compare to manufacturer minimums and your baseline.
Consistent radial reduction indicates normal pad wear; asymmetric wear patterns point to caliper sticking, seized pistons, misaligned pads, or warped rotors. Thin spots concentrated where pads contact more often can signal glazing or a hard compound transferring material. Track thickness wear over service intervals to quantify wear rates by pad material and riding conditions.
Use the pattern diagnosis to prioritize mechanical corrections before considering pad material changes.
Replacement Decision Points
When should you replace a rotor? You replace it when thickness reaches the manufacturer’s minimum or when runout, scoring, or heat damage compromises safe operation. Measure thickness with a micrometer at multiple points; use the smallest reading versus the specified minimum.
Don’t judge by boring color alone; discoloration can indicate glazing or overheating but doesn’t define structural integrity. Also, ignore unrelated weight changes from removed accessories. Rotor mass loss should be measured as thickness, not perceived heft.
If the rotor is below minimum, warped beyond spec, cracked, or has deep grooves that reduce thickness locally, replace it. Always record measurements and torque values after replacement. Follow pad compatibility recommendations to prevent premature rotor wear.
Frequently Asked Questions
Which Pad Type Produces the Least Dust on City Commutes?
Ceramic pads produce the least dust on city commutes. You’ll get ultra-low noise reduction and minimal particulate generation, plus good heat management that keeps rotor deposits low during repeated stops. They’re technically durable and gentle on rotors; so maintenance intervals lengthen.
Expect higher upfront cost and slightly muted initial bite when cold. However, for quiet, clean urban riding, they’re the most practical choice because they minimize dust and noise while managing heat effectively.
Are Ceramic Pads Compatible With My Existing Calipers?
Yes, ceramic pads often fit existing calipers, but you’ll need to verify ceramic compatibility and check caliper limitations. Confirm pad shape, thickness, and spring/hardware match your caliper model.
Inspect piston type and bore condition; some calipers tolerate ceramic friction compounds better than others. Consult manufacturer fitment tables and torque/spec guidelines. If in doubt, contact your brake or bike manufacturer to confirm compatibility and avoid performance or warranty issues.
How Often Should I Replace Backing Plates or Shims?
You replace backing plates and shims only when they’re damaged, corroded, warped, or during pad replacement if the hardware shows wear. Inspect them every few pad changes or annually for commuting. Check for cracks, bent edges, or loose bonding.
Replace aluminum or steel backing plates if heat damage or delamination appears. Always fit new shims when glazing or noise persists. Use OEM-compatible backing plates and shims for reliable fit and function.
Do Different Pad Materials Require Unique Break-In Procedures?
Yes, you’ll follow different break-in protocols depending on pad material. For resin and ceramic pads, do multiple light stops to bed surfaces without heavy heat buildup management. Avoid long downhill braking initially.
Semi‑metallics need moderate, progressive stops to seat evenly while monitoring heat. Sintered pads demand graded, heavier applications to stabilize friction and controlled cooling to prevent glazing. Always check rotor condition and repeat short bedding cycles if performance shifts.
Can Pad Compound Affect ABS or Traction Control Performance?
Yes, pad compounds can influence ABS and traction control because they change braking performance characteristics like initial bite, modulation, and heat buildup. You’ll find resin pads give sharp cold bite, but fade sooner. Sintered pads hold consistent high-temperature force; ceramic/semi-metallic pads offer stable modulation with less dust.
Electronic systems rely on predictable deceleration. Using inconsistent compounds can alter threshold behavior and intervention timing; therefore, match pads to system expectations.
Conclusion
You’ve learned how pad materials and heat ratings affect performance. You have also learned how to bed pads correctly and the importance of checking rotor thickness against manufacturer specs and minimums. Measure thickness accurately, watch wear patterns, and compare readings to spec limits.
If rotors or pads hit minimums, show uneven wear, or compromise braking performance, replace them. Prioritize materials matched to your heat demands and riding style to keep braking safe, consistent, and predictable.