Fat Bike Rim Width and Tire Width Compatibility Chart
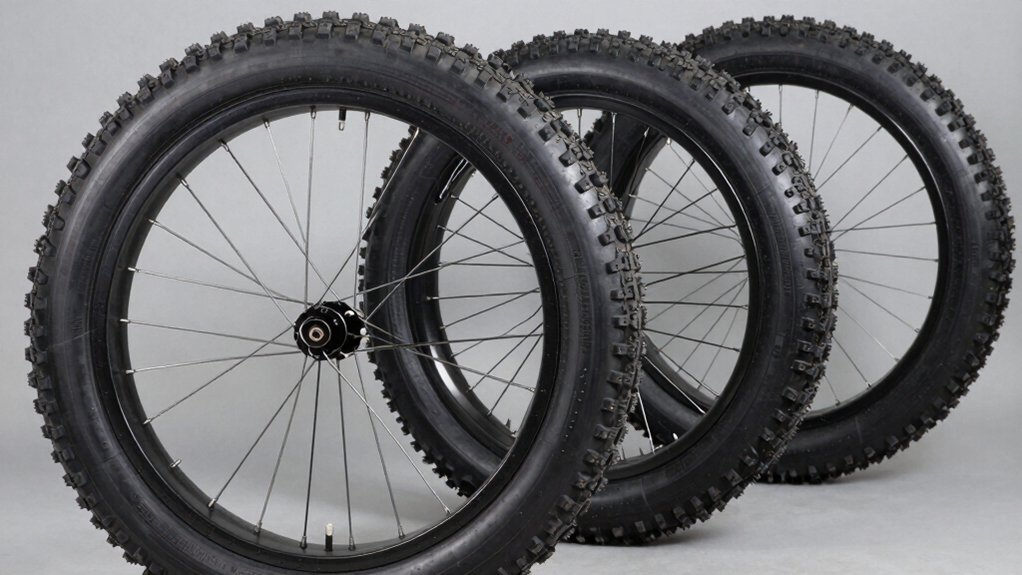
Match Fat Bike Tire width to internal rim width using a 40–80% rule to get a rounded, stable profile and predictable handling. For example, 65–70 mm rims suit 3.8–4.0″ tires; 70–80 mm suit 4.0–4.2“; 80–90 mm suit 4.2–4.8″; and 90–100 mm suit 4.5–5.0”.
Verify bead seat diameter, frame clearance and rim hook type. Additionally, check tubeless valve length and hole size; then test-fit and inflate to ride pressure for 24 hours to confirm fit. More specifics follow.
Quick Overview
- Match internal rim width to tire width using a 40–80% rim-to-tire guideline for a rounded, stable tire profile.
- Use common pairings: 65–70 mm rims → 3.8–4.0″ tires; 70–80 mm → 4.0–4.2″ tires; 80–90 mm → 4.2–4.8″ tires.
- Verify bead seat diameter, frame clearance, and hooked vs. hookless rim limits before buying tires.
- Test-fit tires; inflate to riding pressure, hold for 24 hours, and check for roll-off or ballooning.
- Choose tubeless valve length by rim depth and torque valve base to spec: prefer removable cores for sealant.
6–100mm Rim-to-Tire Guide
Wondering How to match a fat-bike rim to a tire without guessing? You measure internal rim width, then pick a fat tire that yields a rounded profile and stays within the 40–80% rim-to-tire guideline.
Prioritize mid-range tire sizes for stable handling and confirm bead seat diameter and frame clearance before purchase. Hooked vs hookless rims change max pressure and fit.
| Rim Width (mm) | Recommended Tire Range (in) |
|---|---|
| 65-70 | 3.8–4.0 |
| 70-80 | 4.0–4.2 |
| 80-90 | 4.2–4.8 |
| 90-100 | 4.5–5.0 |
Test fit; inflate 24 hours; verify manufacturer charts to avoid roll-off or ballooning.
Inflation Pressures & PSI Ranges
After you’ve chosen a rim and tire pair that yields the desired profile and fits your frame, set inflation to match terrain, load, and rim width. Pressure controls contact patch, sidewall support, and ride compliance. You’ll use lower inflation pressures for soft surfaces and wider rims to increase contact patch and flotation. Higher pressures suit hardpack, narrow rims, and heavier loads to prevent folding and rim strikes. Observe manufacturer limits and test incrementally.
- Soft snow/sand: Target lower end of psi ranges to maximize flotation and traction. Avoid pinch flats by monitoring sidewall support.
- Mixed trails: Use mid psi ranges balancing compliance and puncture resistance. Adjust for rider weight.
- Hardpack/fast: Raise to upper psi ranges to reduce rolling resistance and stabilize handling.
Tubeless Valve Stem Specs
When fitting tubeless valves, you’ll check valve stem lengths against rim depth to ensure the stem protrudes enough for pump access without excess flex.
Verify core type (removable vs. sealed), rim hole diameter compatibility, and material (brass, aluminum, or composite) for corrosion resistance and torque limits. Finish by confirming sealant-friendly cores, correct torque on the valve base, and use of appropriate grommets or rubber seals to prevent leaks.
Valve Stem Lengths
How long should your tubeless valve stems be for a given fat rim? You select stem length based on rim depth, wall thickness, and tyre pressure. Choose a stem that extends sufficiently above the rim bed to allow tightening without stretching.
For 55–65mm inner widths with shallow rims, 35–40mm stems work; for 70–85mm use 40–55mm; for 85–100mm deep rims use 55–80mm. Consider valve stem materials for corrosion resistance and stiffness; brass or aluminum bodies with rubber bases are common.
Ensure proper sealing and torque: hand-tighten the nut, then torque to manufacturer spec to compress the base reliably without deforming it. Trim excess stem only if a secure cap and core access remain.
Valve Core Types
Which valve core type suits your tubeless setup depends on sealing, serviceability, and pressure needs. You’ll choose between removable-core Presta valves for easy sealant injection and fixed-core stems that minimize leak points.
Removable cores let you add sealant or install valve extenders without dismounting the tire; they require a tight core and compatible stem thread to prevent seepage. Fixed cores reduce moving parts and potential failure but complicate on-wheel service.
Consider high-pressure applications where brass cores resist deformation. Aluminum cores save weight but can gall. Check valve core types compatibility with your rim’s tubeless valve specifications and with available core tools.
Match core material and serviceability to your maintenance routine and performance targets.
Rim Hole Diameter
Why does the rim hole diameter matter? You need the correct rim hole diameter to accept tubeless valve stems without compromising the seal or rim integrity. Measure the drilled opening and choose a valve base or grommet that matches. Oversized holes require large-base valves or sleeved inserts; undersized holes can be reamed but weaken the rim.
Rim hole diameter also influences how the valve grommet compresses against the rim bed, affecting air retention and tire bead compatibility during seating and inflation. When mounting wide fat-bike tires, verify the rim profile and hole size against valve specs to prevent leaks and stress concentrations. Document the diameter, use manufacturer-recommended valve types, and test at operating pressures before riding.
Valve Stem Materials
Curious about what valve stem material you should pick for tubeless fat-bike wheels? You’ll choose based on durability, sealing, and rim interface. Aluminum stems resist corrosion and handle higher torque at the base; they’re lightweight and compatible with thicker rim walls.
Brass or nickel-plated stems offer superior sealing against sealant chemistry and repeated use, but weigh more. Rubber-based removable cores or full-rubber stems flex to absorb impacts on wide rims and simplify sealing, yet can deform under high torque.
Consider stem length for 55–100mm internal widths and ensure compatible base diameter and grommet material to match rim hole tolerances. When fitting tubeless valve stems, prioritize material that balances corrosion resistance, rigidity, and sealant compatibility for reliable inflation and serviceability.
Sealing And Torque
Because a reliable tubeless seal depends as much on valve stem seating and torque as it does on rim and sealant compatibility, you should treat stem sealing and torque spec adherence as a primary installation step. You’ll install metal or reinforced rubber stems through the rim bed, seat the rubber grommet evenly, then finger-tighten the locknut.
Use a calibrated torque wrench or a preset driver to apply manufacturer-specified sealing torques: typically 2–5 Nm for alloy locknuts; lower for carbon with isolation washers. Over-torquing compresses grommets, distorts seats, and compromises rim sealing. Under-torquing allows slow leaks and bead lift under high pressure.
After the initial ride, recheck torque and inspect for seepage. Document torque values per rim/valve combination for repeatable, reliable rim sealing.
Frequently Asked Questions
Can I Run Road Tires on Fat Bike Rims for Commuting?
Yes, you can run road tires on fat bike rims only if tire compatibility is confirmed and frame clearance allows.
You’ll need narrower tires than usual; however, you must match rim inner width, bead profile, and recommended inflation for safe road riding. Check manufacturer specs and WTB/Surly guidance. Avoid extreme mismatches that stress beads or rims.
Test fit and inspect for rubbing, rim damage risk, and proper handling before commuting regularly.
How Does Rim Tape Thickness Affect Tire Fit and Safety?
Thicker rim tape raises effective inner width slightly, so you’ll need to check tire bead seating and pressure. It can help protect spoke holes; however, it may hamper tight bead fit. Use tire sealant cautiously: excess can hide small gaps worsened by improper tape.
Don’t rely on rim polish to mask defects; it alters friction. After any tape change, true the wheel and inspect bead seating. This ensures you’ll maintain safe, predictable tire behavior.
Are There Rim Width Limits for Belt-Drive Conversions?
Yes, you’ll encounter belt drive limits tied to rim compatibility and rim width safety. You must guarantee the rim width safety matches beltline clearance and chainstay spacing. Overly wide rims can shift tire profile, altering tire fit considerations and stressing belt alignment.
Check manufacturer specs for belt-compatible rim profiles; maintain precise axle spacing and avoid extreme tire/rim combos. Proper installation and torque keep belt drives reliable within specified limits.
Do Rim Widths Change Wheel Rotational Inertia Noticeably?
Yes, rim inertia vs width matters: Wider rims shift mass outward, increasing rotational inertia and making acceleration slightly slower. You’ll notice effects more on lightweight, low-mass wheels where weight distribution moves rim mass farther from the axis.
For fat-bike ranges, the change is modest versus added tire mass and overall wheel assembly. Optimize by minimizing outer rim mass and balancing tyre, rim, and hub contributions to weight distribution and inertia.
What’s the Impact of Rim Width on Brake Rotor Clearance?
You won’t see rim width directly change brake clearance unless you alter hub spacing or rotor mount. Wider rims shift tire/bead position outward, which can force calipers if frame or adapter is tight; this effectively reduces usable brake clearance.
You should measure rotor-to-rim and caliper-to-rim distances after swapping rims. If clearance’s marginal, adjust caliper position, use a different rotor size or spacer, or select a rim/hub combo that preserves proper brake clearance.
Conclusion
You now know how rim width, tire size, and pressure interact across 6–100 mm setups. You also understand what tubeless valve specs, lengths, core types, hole diameters, and materials matter for secure seals and correct torque.
Use the chart to match rim inner width to tire width. Pick appropriate valve stem length and core; drill or check rim hole diameter. Torque fittings per spec. Do routine seal checks and pressure tests before each ride.
Related reading: How Tire Width Affects Ride Comfort and Speed — a closer look at this topic.