How to Set up Cleat Position
You’ll set cleats so your knee tracks over the pedal spindle and your foot is mechanically neutral: Position fore‑aft to center the ball of the foot over the spindle. Rotate to align your toe with knee tracking and adjust lateral placement for comfort.
Choose cleat float to match your pedals and riding style, and account for stack height. Torque bolts to 5–6 Nm and use shims (0.5–3 mm) only when alignment can’t be achieved otherwise. Keep testing and logging changes to refine fit.
Quick Overview
- Position cleat fore-aft so ball of the foot sits over or just behind the pedal spindle for efficient power transfer.
- Rotate cleat to match natural toe angle, allowing 4–6° float for most road riders and more for MTB/gravel.
- Adjust lateral (medial–lateral) placement to center the knee over the pedal spindle during the downstroke.
- Use shims (0.5–1.5 mm) only when fore-aft, lateral, or rotation adjustments don’t correct knee tracking or pressure points.
- Torque cleat bolts to manufacturer spec (typically 5–6 Nm); re-torque after the first ride and 50–100 km.
Cleat Float and Stack Height
Why does cleat float matter? You need float to permit small rotational motion (degrees) so your knee and ankle track naturally. Appropriate float reduces joint stress without sacrificing power when you maintain cleat alignment. Check pedal compatibility: some pedals offer 0–15° ranges; choose based on biomechanics.
| Float Range | Typical Use | Effect |
|---|---|---|
| 0° | Track/sprinters | Rigid power transfer |
| 4–6° | Recreational/road | Balance comfort and efficiency |
| 7–15° | MTB/gravel | Max joint relief |
Stack height complements float. Higher stack increases saddle height and pedal lever arm, altering torque and perceived float. Set cleats loosely, test on trainer, adjust fore-aft and rotation, then tighten to manufacturer torque to verify optimal cleat alignment and compatibility.
SPD Cleat Torque Values
Float and stack height affect how your foot moves and how forces transmit through the pedal-spindle interface. You also need to control how tightly SPD cleats are fastened. You’ll torque SPD cleat bolts to the manufacturer spec: typically 5–6 Nm. This ensures consistent offset alignment and maintains shoe sole grip under load.
Under-torqued bolts allow micro-movement that changes lateral position. Over-torqued bolts can strip threads or deform the cleat pocket; this alters fore-aft placement.
Use a calibrated torque wrench for repeatable settings. Apply threadlocker sparingly where threads are exposed. Re-torque after the first ride and 50–100 km of use. Inspect bolt heads and cleat wear for elongation or play. Record torque values and any shims used for future reference.
Cleat Shims and Spacers
You’ll use cleat shims and spacers when foot alignment, heel tilt, or shoe sole stack height create persistent knee tracking or pressure problems that can’t be corrected by fore-aft, lateral, or rotational adjustments alone.
Common options include thin polymer shims, metal washers, wedge (varus/valgus) spacers, and stack pads; thicknesses typically range from 0.5 to 3 mm, and you should select the minimal thickness that restores neutral alignment.
Install shims between the cleat and shoe sole per manufacturer torque specs. Re-torque to 5 to 6 Nm, and troubleshoot by making single-variable changes and test-riding to confirm resolution of hotspots, numbness, or medial/lateral knee drift.
When To Use Shims
Sometimes you’ll need thin shims or spacers to correct small but functionally significant misalignments between your foot and pedal. Use them when you’ve verified through testing that fore-aft, lateral, or rotational cleat adjustments alone can’t achieve neutral hip-knee-foot tracking. You should also use them when you need to address persistent pressure points, numbness, or lateral knee drift.
You’ll apply shim usage incrementally: add 0.5–1.5 mm layers under the cleat and retest biomechanics. Focus spacer placement under the medial or lateral edge to change varus/valgus foot angle or behind the cleat to shift effective fore-aft contact. Record each change, ride short intervals, and reassess knee tracking and comfort. Use minimal thickness that fixes symptoms; excessive stacking alters pedaling dynamics and increases injury risk.
Types Of Cleat Spacers
When shims are needed to fine-tune alignment beyond what fore‑aft, lateral, and rotational adjustments can achieve, you’ll choose from a few specific spacer types designed to address different biomechanical issues.
Micro-thickness shims (0.5–1.0 mm) correct small rotational or medial-lateral imbalances without altering pedal clearance significantly. Wedge shims introduce a graduated angular correction to address persistent pronation or supination; they shift load vectors under the first metatarsal. Spacer rings or stackable discs add axial height when increased pedal clearance is required to prevent shoe sole interference or rubbing.
Composite shims (nylon/TPU) damp vibration while maintaining consistent thickness; metal shims offer minimal compression under load. Fit shims under cleat screw heads or between cleat and sole per manufacturer specs, then re‑test alignment dynamically.
Correct Shim Thickness
Choosing the correct shim thickness means balancing biomechanical correction with pedal clearance and shoe comfort. Start with the smallest effective increment and increase only as needed. You’ll use thin (0.5–1.0 mm) shims for femoral or forefoot tilt correction. Reserve thicker spacers (1.5–3.0 mm) for pronounced tibial or knee valgus adjustments.
Verify changes with dynamic assessment: short rides and knee-tracking observation. Maintain manufacturer torque specs and re-check bolt preload after initial laps. Avoid stack-ups that reduce float or foul the pedal body. Confirm shoe compatibility to ensure screw length and tread don’t interfere.
Keep pedals and interface clean; regular cleaning pedals prevents grit from altering shim seating and clamping reliability. Document shim thickness so you can reproduce or revert adjustments.
Installing Shims Properly
How do you install cleat shims and spacers so they correct alignment without compromising pedal engagement? You will select shim thickness based on measured misalignment in cleat alignment; use thin (0.5–1.5 mm) increments to avoid overcorrection.
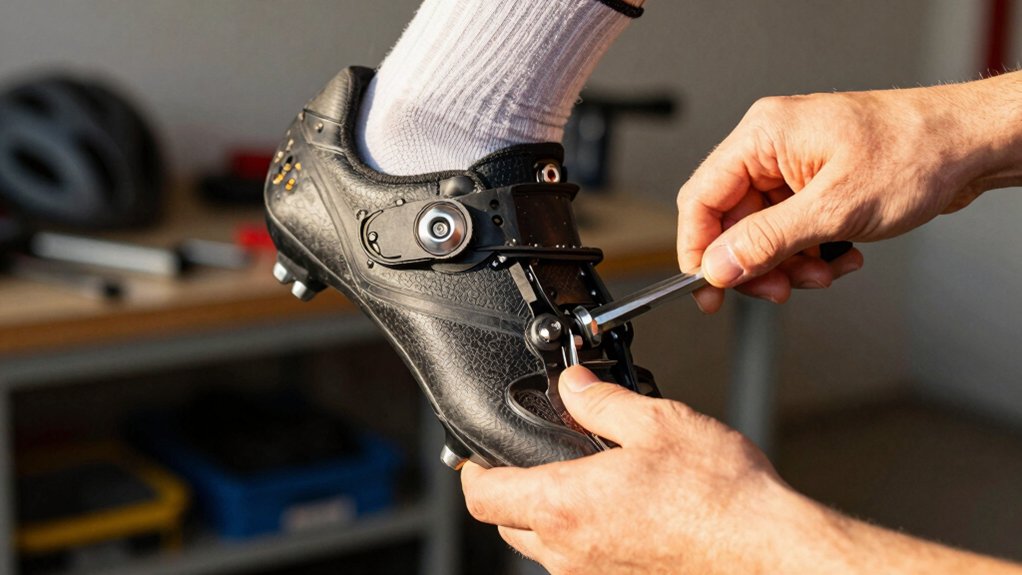
Loosen cleat bolts, place shim(s) between shoe sole and cleat or under cleat flange per manufacturer guidance, then re-seat cleat to intended fore-aft, lateral-medial, and rotational positions. Torque bolts to specified 5–6 Nm while maintaining shim position; verify no interference with cleat-pedal interface and that float remains within expected range.
Perform short tests to confirm improved pedal ergonomics and knee tracking. Then fine-tune shims incrementally. Document shim stack and final measurements for reproducibility and to simplify future adjustments.
Troubleshooting Fit Issues
After you’ve settled on a shim stack and tightened the cleat bolts, you’ll often find small misalignments that need correction. Troubleshooting focuses on pinpointing whether issues stem from shim thickness, shim placement, or residual cleat position errors.
Check symptoms on a short, controlled ride: lateral knee drift suggests medial-lateral shim misplacement, forefoot numbness indicates excessive stack height or too-forward fore-aft positioning, and persistent rotational discomfort implies incorrect cleat angle despite shims.
Adjust one variable at a time; change shim thickness by 0.5–1.0 mm or shift shim edge laterally by a few millimeters, then retest. Consider float considerations: increased float may mask minor alignment errors but won’t fix pressure hotspots.
Re-torque bolts to spec after each change and document settings for reproducibility.
Frequently Asked Questions
Can I Use Different Cleats on Front and Back Pedals?
Yes, you can use different cleats on front and back pedals, but check pedal compatibility and shoe compatibility first. Mix-and-match systems work if cleat color and brand markings indicate the same engagement standard; otherwise, you risk uneven cleat wear and unsafe release.
Use matching bolt patterns and torque to spec. Test on a trainer and observe pedal compatibility. Replace worn cleats to maintain predictable performance and safe release.
How Often Should I Replace Worn Cleats?
Replace worn cleats as soon as you notice slipping, excessive play, or rounded engagement points: typically every 6–12 months with regular use. Monitor wearing comfort and pedal retention on test rides. Reduced tactile feedback or frequent mis-engagement signals replacement.
Prompt replacement supports injury prevention by maintaining consistent biomechanics and alignment. Torque new cleat bolts to spec, retest knee tracking, and document wear intervals to predict future replacements.
Do Cleat Positions Differ for Spinning Classes?
Yes, cleat position can differ for spinning classes. You’ll typically move the cleat slightly forward and more centered laterally to favor cadence and anterior forefoot contact. This adjustment helps reduce heel drop and improves stability on high-cadence efforts.
Rotate toward a neutral alignment to avoid knee stress from repetitive motion. Test on the bike, make small fore-aft and lateral tweaks, and verify comfort and knee tracking during short intervals before class.
Can Cleat Placement Affect Shoe Warranty Coverage?
Yes, cleat warranty coverage can be voided if installation impact causes damage or improper use. You should follow manufacturer torque specs and approved cleat models; evidence-based policies cite installation impact, altered soles, or non-OEM hardware as exclusions.
Keep installation photos, receipts, and use authorized fitters to document correct procedure. If a warranty claim arises, this documentation and adherence to specified limits strongly support coverage.
Are Cleat Markings the Same Across Brands?
No, cleat markings aren’t universal. You’ll find brand variation in hole patterns, bolt spacing and indexing. Cleat compatibility depends on the system (SPD, Look, Shimano, Speedplay). Use manufacturer specs and templates to match bolt centers and rotation indices.
Measure bolt spacing and compare fore-aft markers. Don’t assume visual alignment. Mismatched markings can cause improper fit, so verify compatibility before installation and test for correct knee tracking.
Conclusion
You’ll achieve reliable, comfortable power transfer by setting cleat position with measured, repeatable steps. Start with neutral fore-aft and lateral alignment. Account for float and stack height; use manufacturer torque specs for SPD cleats.
Add shims only when you need to correct knee tracking or accommodate anatomy. Choose thin, uniform spacers and install them beneath the cleat plate. Verify alignment through a short test ride; refine incrementally and document settings for consistent results.