How to Fix Skipping Gears on a Bike
If your gears are skipping, first check chain tension and cable play. You want about 12–13 mm midpoint slack and no sticky housing. Inspect the cassette for hooked or shark‑tooth teeth and test with a new chain if unsure.
Locate the derailleur B‑tension screw and adjust the upper-pulley gap so the pulley clears the largest cog by a few millimeters without lifting the chain off. Make small turns, re-tension the cable, and test under load. Follow up for detailed tuning steps.
Quick Overview
- Check chain tension: midpoint slack ~12–13 mm; too loose causes skipping; too tight causes excess wear.
- Inspect cassette teeth for shark-tooth profiles, hooked tips, or uneven heights. Replace worn cogs.
- Adjust the derailleur B-tension screw to set 5–6 mm pulley-to-largest-cog clearance; more for big cogs.
- Verify cable tension and housing friction. Relieve slack and fine-tune until shifts are crisp under load.
- Ride-test through all gears under pedaling load; make small B-screw or cable adjustments for smooth engagement.
Chain Tension & Cog Sizes
How tight should your chain be? You want about 0.5 inch (12–13 mm) of up/down slack at the midpoint; +/-5 mm total works too. Too loose (>0.5 inch) and you’ll get skipping or drops. Too tight and you accelerate wear. Match tension to cog sizes: large cogs need more wrap and proper B-screw clearance; small cogs need ~5–6 mm clearance to avoid binding.
| Check | Target |
|---|---|
| Midpoint slack | 12–13 mm |
| Small cog clearance | 5–6 mm |
| Large cog wrap | Full engagement |
| Problem sign | Skipping/dropping |
If you ride single-speed, pull the wheel back. Multi-gear bikes use B-tension plus minor wheel movement. Don’t treat this like an irrelevant topic or unrelated concept; tension controls drivetrain life.
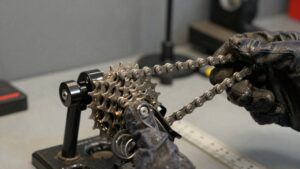
Cassette Wear Limits
You’ve already checked chain tension and cog sizes. Now check the cassette for wear because a stretched chain will quickly eat away at the cassette teeth. Inspect sprockets for shark-tooth profiles, uneven tooth heights, or shiny hooked tips. If teeth look pointed or the chain rides high, replace the cassette.
Check for skipping under load on each cog. Measure wear by comparing new vs current chain stretch. Swap a new chain briefly to see if shifting improves. Replace cassette when multiple cogs show hooked teeth. Keep replacement intervals to avoid cascading wear.
You’ll save money by catching cassette wear early. Maintain proper chain tension and replace chains on schedule to prevent rapid cassette damage.
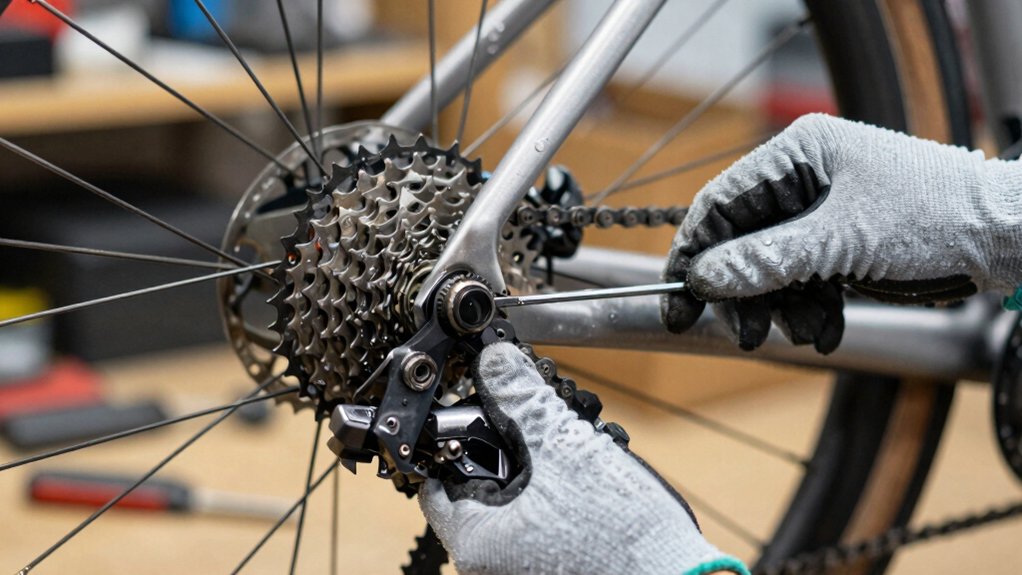
Derailleur B-Tension Adjustment
Locate the B-tension screw on the rear derailleur and use it to set the gap between the upper pulley and the largest cassette cog. You’ll turn the screw until the pulley sits at the correct distance for good chain wrap without rubbing. Then, check that cable tension hasn’t pulled the derailleur out of alignment.
Finally, ride-test through the gears and fine-tune the screw so shifting is crisp under load.
B-Tension Screw Location
Where’s the B-tension screw and why does it matter? You’ll find the b tension screw position on the derailleur body near the upper pulley pivot. It’s a small screw that sets the derailleur angle and controls how close the upper pulley sits to the cassette.
Start with the bike on a stand. Shift to the largest cog and eyeball the pulley-to-cog clearance. Turn the B-tension clockwise to move the derailleur away (bigger gap) or counterclockwise to bring it closer (smaller gap). Small changes matter; incorrect position can cause skipping, especially under load.
Lock the screw once you’ve achieved a smooth, consistent shift across the range. Then test ride under real pedaling effort.
Upper Pulley Gap
Want to stop skipping under load? Check the upper pulley gap first. Position the chain on the largest rear cog and inspect the distance between the upper pulley and that cog. If the upper pulley sits too close, the chain will bind under torque. If it’s too far, shifting gets slow and sloppy.
Turn the B-tension screw in small increments while watching the gap and testing under pedal load; clockwise usually increases clearance. Aim for a consistent small gap that lets the chain seat without rubbing. After adjustment, shift through the cassette and watch how the chain passes the lower pulley. It should track cleanly without hesitation.
Recheck under real riding load and tweak only as needed.
Correct Screw Tension
How do you know the B-tension is set right? You’ll see the upper pulley sit close enough to the largest cog to guide the chain without rubbing. With the bike on a stand, shift to the biggest sprocket and spin the cranks at a steady adjustment cadence. Listen for smooth engagement and no skipping under moderate load.
Turn the B-screw in small increments: clockwise moves the pulley away; counterclockwise brings it closer. After each click, test-shift through the cassette. Record your maintenance frequency and recheck after a few rides. Cables settle and parts bed in. If the chain still skips on the largest cog or the pulley contacts the sprocket, fine-tune or consult a mechanic.
Chain Wrap Check
Checking chain wrap tells you whether the derailleur’s B-tension is keeping the upper pulley at the right distance for reliable tooth engagement. Put the bike on a stand, shift to the largest rear cog and a mid front chainring, then spin the cranks while watching the chain’s contact with the cogs. You want the chain to wrap around the largest sprocket as much as possible without the pulley rubbing.
If you see the chain lifting off the cog teeth or hopping under moderate load, back off the B-screw (turn counterclockwise) to bring the pulley closer in small increments until the wrap is solid and skipping stops. After each tweak, re-check chain wrap and ride briefly under load to confirm derailleur alignment and stable engagement.
Cable Tension Influence
Why does the B-tension screw matter? It sets the derailleur pulley-to-cassette gap, so you’ll avoid skipping when the chain climbs larger cogs. If the pulley sits too close, teeth clash; too far and shifts get slow.
First, relieve cable slack. Shift to the largest rear cog and inspect the gap. Turn the B-screw clockwise to move the pulley away; turn it counterclockwise to bring it closer. Check for housing friction that can mask B-screw effects: dirty or crushed housing alters cable pull and makes adjustments misleading.
After each small turn, backpedal and shift through gears under light load to confirm smooth engagement. Lock the cable retention bolt and test on a road or gentle climb to verify no load-induced skipping.
Frequently Asked Questions
How Often Should I Replace My Chain to Prevent Skipping?
Replace your chain every 1,000–2,500 miles depending on riding conditions and load. Check wear with a chain maintenance ruler every few hundred miles. If you ride wet, muddy, or climb hard often, swap nearer 1,000 miles.
Keep chain maintenance regular to protect cassette and chainrings and ensure gear compatibility. Replacing the chain early is cheaper than replacing multiple drivetrain parts. Adjust cables and index after fitting.
Can Worn Chainrings Be Rotated or Repaired Instead of Replaced?
You generally can’t repair badly worn chainrings. Rotation helps only if wear is slightly uneven and teeth aren’t hooked. Inspect for chainring wear, bent teeth, or missing teeth as part of shifting troubleshooting.
Lightly filing burrs or swapping chainrings between bolts can extend life slightly. However, replacing a worn chainring is the reliable fix to stop skipping and prevent cassette damage. Keep your chain fresh to avoid recurrence.
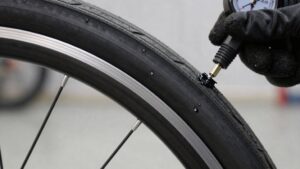
Do Tubeless Setups Affect Gear Skipping or Drivetrain Wear?
Tubeless setups don’t directly cause gear skipping, but tubeless compatibility and air pressure effects can influence drivetrain wear. If you run lower pressures for traction, you’ll load the drivetrain differently; this increases chain stress under torque and accelerates wear.
Sealant and dirt from tubeless repairs can contaminate the chain, too. Keep the chain and cassette clean, maintain correct air pressure for your riding, and check compatibility to avoid added wear or contamination.
Can Lubing Frequency Change Depending on Riding Conditions?
Yes, you’ll adjust lubing frequency based on conditions. In wet, muddy or salty rides, you’ll need increasing lubrication and more frequent cleaning to prevent rust and grit that accelerate wear.
In dry, dusty conditions, you’ll clean more often and use lighter lube to avoid buildup. High-speed touring where wind resistance matters calls for minimal excess lube and regular wipe-downs so grime doesn’t increase drag or harm shifting performance.
Is Gear Skipping Dangerous While Descending at High Speed?
Yes, gear skipping while descending at speed can be dangerous. You’ll lose pedaling control and may get jolted, upsetting balance and forcing abrupt skidding techniques or sudden brake control inputs.
Don’t panic: ease off the pedals, shift to a lower gear smoothly, and use progressive braking with both brakes. Pull over to inspect the chain, cables, and derailleur alignment before resuming high-speed descents to avoid crashes.
Conclusion
You’ve walked through the key checks to stop skipping gears: match chain tension to cassette size, inspect cogs for wear, and adjust the derailleur’s B-tension so the upper pulley sits at the right gap. Set the B-tension screw carefully. Confirm sufficient chain wrap and fine-tune cable tension for crisp shifts.
Take small adjustments, test ride, and repeat until shifting’s solid. If problems persist, replace worn parts or consult a mechanic.