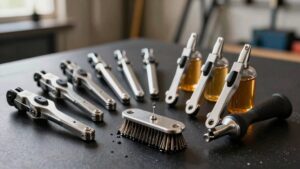
Tubeless Setup Checklist
You’ll follow a quick tubeless setup checklist: Confirm rim internal width matches your tire per ETRTO/TSS and use TSS tires on hookless rims. Seat valves, tighten cores with a tool (don’t over-torque), and remove cores to inject sealant. Pour fresh sealant within its working window, spin the wheel to distribute, then check for leaks after inflation.
Account for temperature and humidity effects, and plan reapplication intervals (road 3–6 months, MTB 2–4). Keep going to learn specific torque, volumes, and tricks.
Quick Overview
- Verify tire and rim compatibility (ETRTO/TSS); noting hookless rims need TSS tubeless-ready tires.
- Fit proper rim tape and install a tubeless valve. Tighten the core with a valve tool but avoid over-torquing.
- Remove valve core to inject recommended sealant volume. Then reinstall core to spec and inflate to seat beads.
- Spin and rotate wheels immediately to distribute sealant while fluid. Then inspect for leaks and bead integrity.
- Track sealant age and reapply per type and conditions (MTB 2–4 months, road 3–6 months). Log dates and storage.
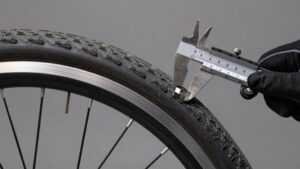
Tire-Rim Compatibility Chart
Wondering which tire will fit your rim? You’ll check rim internal width against tire width and confirm tubeless compatibility to avoid a tire rim mismatch. Use ETRTO/TSS guidance: hookless rims require Tubeless Ready/TSS tires. Hooked rims accept tubes or tubeless. Pick tires whose minimum pressure and width match rim specs.
| Rim Width (mm) | Min Tire Width (mm) | Notes |
|---|---|---|
| 23 (hookless) | ≥28 | TSS/Tubeless Ready only |
| 27–28 (gravel) | ≥42–45 | Lower pressures; TSS required |
Verify manufacturer TSS marks and max pressure. If specs conflict, don’t force the fit. Choose a compatible tire or rim tape and parts that ensure an airtight tubeless setup.
Valve Core Torque Spec
How tight should you make the valve core? You want it snug, not fused. Correct valve core torque prevents leaks without damaging threads or deforming the valve stem. Use a valve core tool and turn until you feel firm resistance; then add a slight quarter-turn: that’s usually sufficient.
- Hand-tighten the valve nut; then secure the core with a valve core tool.
- Avoid over-torquing: excessive force can disturb rim tape tension and compromise the seal.
- If you leak at low pressure, back off slightly; re-seat the valve and retry.
- When injecting sealant through the valve, remove the core fully; reinstall to recommended torque afterward.
Check for leaks after inflation and before riding.
Sealant Cure Time Limits
Check the sealant’s working time and shelf life so you know how long it’ll remain liquid enough to seal punctures effectively. Remember: temperature and humidity change cure rates. Warm, dry conditions speed curing; cold or humid air slows it. This affects how soon you should ride and when to reapply.
Plan reapplication intervals based on manufacturer shelf-life limits and observed performance rather than a fixed calendar.
Sealant Working Time
When should you expect your tubeless sealant to stop flowing and start curing? You’ll usually have a working window of hours to days depending on product. Initial flow for puncture sealing happens within minutes; however, full curing or thickening can begin within 24–72 hours.
Monitor for reduced flow caused by sealant evaporation at bead areas and early sealant clumping that signals the finish of active sealing. Work quickly during installation: spin and rotate tires to distribute sealant while it remains fluid. If you need extra time, add fresh sealant rather than relying on aged residue.
After the working window, verify bead integrity and inspect for dry patches. Replace or top up sealant whenever clumps or gaps compromise coverage.
Temperature Effects
Sealant behavior changes with temperature, so after you’ve worked quickly during the fluid window, factor ambient and tire temperatures into how long sealant will keep flowing before it thickens. You’ll notice colder air and wheels extend working time; warmer air and rim heat from sunlight or prolonged riding speeds coagulate the sealant.
Plan your pour and seating steps around expected temperature drift during the job and initial ride. If it’s warm, work faster, use slightly less aggressive agitation, and consider cooler storage for sealant. If it’s cold, give extra spin time to distribute thinner sealant and watch for delayed sealing.
Always check bead seating and leakage after a short ride. Real-world heat can shorten effective cure time and reveal missed leaks.
Humidity Influence
How quickly your tubeless sealant skins over depends largely on ambient humidity. Therefore, factor moisture into your working window and cure-time expectations. You’ll see faster skin formation in high-humidity environments; humidity impact shortens the time you have to adjust beads, seat tires, and spin to distribute sealant. In dry conditions, skinning slows; you’ll need longer working time and may recheck seals later.
Account for moisture sensitivity when planning: prep rims, install valves and tape, mount one bead, pour or inject sealant, then seat the bead promptly. If humidity is high, work more quickly and verify bead seating immediately. If low, allow extra minutes before final inflation and inspect for slow-sealing punctures.
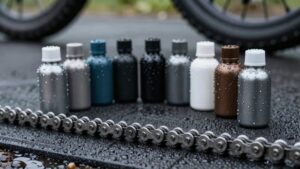
Shelf Life Limits
Humidity affects how quickly sealant skins over, and it also shapes how long liquid sealant remains usable before it starts to cure inside the bottle. You should track manufacturer shelf life and date opened. Many sealants last 6–12 months unopened; 3–6 months once opened depending on humidity and storage temperature. Store bottles upright in a cool, dry place to slow curing.
If sealant smells off, has solid chunks, or won’t flow, discard it. Don’t risk contaminating the Tire or Rim during setup. When preparing a new tubeless wheelset, check sealant condition before pouring. Old sealant can clog valves and fail to seal punctures.
Replace expired product to ensure reliable bead seating and lasting tubeless performance.
Reapplication Intervals
Because liquid sealant gradually thickens and evaporates inside the tire, you should plan reapplication on a schedule rather than waiting for a failure. Most riders need to refresh MTB sealant every 2–4 months and road tires every 3–6 months; wetter climates and frequent low pressures shorten that window.
Check sealant level by removing the valve core or tipping the wheel. If coverage is thin or clumpy, drain and refill. Factor repack logistics into maintenance: carry measured sealant doses and a small syringe for quick top-ups. At service intervals, inspect valves, tape, and beads; replace worn items as needed.
Store spare parts and fresh sealant in a cool, dry place and log dates so you don’t miss reapplication windows.
Frequently Asked Questions
How Often Should Rim Tape Be Replaced?
You should replace rim tape every 2–3 years or sooner if damaged, stretched, or losing adhesion. Check whenever you service tires or swap wheels. Moisture, punctures, or repeated bead seating can shorten rim tape longevity. If the tape shows lifts or exposes spoke holes, replace it immediately.
You can often reuse the tubeless valve if its base and threads are undamaged. However, inspect valve rubber and threads before reinstalling.
Can I Reuse Old Tubeless Valves?
You can sometimes reuse old tubeless valves if they’re in good shape. However, replacement valves are safer when you see corrosion, damaged threads, or a tired rubber base.
Check rim tape lifespan and valve seating. Temperature effects can harden seals and cause leaks. When transporting wheels, take precautions to avoid bending stems.
If you want reliability and airtightness, replace valves rather than gamble on older components.
Is Tire Bead Lubricant Necessary?
You don’t strictly need tire bead lubricant, but it helps you seat the tire and avoid pinches when working with tubeless-compatible rims and tires. Use a minimal amount of lubricant or soapy water so it won’t interfere with bead sealant adhesion; avoid oily products.
For stubborn beads, lubricant makes seating faster and reduces damage risk. Ensure tubeless compatibility of all parts and dry any excess before relying on sealant for the airtight seal.
How Do Temperature Changes Affect Tire Pressure?
Temperature changes directly alter tire pressure: when air cools, pressure drops; when it heats, pressure rises. You will see ride pressure fluctuations with daily and seasonal shifts.
Expect wheel variance between front and rear due to different loads and heat buildup. Those fluctuations can affect sealing reliability: cold can make beads less snug and sealant thicker, while heat can increase pressure and stress the seal. Check and adjust before riding.
What Precautions for Transporting Tubeless Wheels?
You should secure tubeless wheels carefully. Take precautions for loading by deflating slightly to avoid pressure shifts. Protect valve stems with caps and tighten valve nuts. Keep beads seated.
Use sturdy transport packaging: padded wheel bags or boxes with rim protection and spoke cushioning to prevent impacts and abrasions. Immobilize wheels to stop rubbing. Store upright to avoid sealant pooling. Check pressure and sealant after transport before riding.
Conclusion
You’ve now got the essentials for a reliable tubeless setup. Match tires and rims, torque valve cores correctly, and respect sealant cure and working times. Account for temperature and humidity when you mix and apply. Note shelf-life limits and plan reapplications on schedule.
Inspect and top up sealant regularly, especially before long rides. Follow this checklist and you’ll cut flats, save time, and keep your wheels sealing reliably.
Related: How to Set up Tubeless Tires
Related: Tubeless Tires Explained
Related: Tubeless Tire Losing Air Troubleshooting
Related: Bike Maintenance Toolkit Checklist