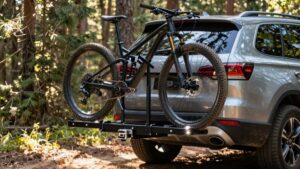
Disc Brake Rotor Compatibility Guide
You’ll match rotors by bolt pattern (6‑bolt, Centrelock, etc.), rotor diameter and thickness limits, and caliper/fork boss specs. Inspect hub boss thickness and use proper adapters if needed.
Verify minimum thickness with a caliper at multiple points and retire rotors below spec. Scan the braking track for heat discoloration, hairline cracks, glazing or raised edges with a 10x loupe and straightedge. Measure post‑brake temperatures with an IR gun or thermocouples to confirm thermal stress; more procedural detail follows.
Quick Overview
- Identify rotor mounting pattern (6-bolt, Centrelock, 8/10-bolt, flat/post mount) to ensure hub and rotor mate correctly.
- Verify rotor diameter fits caliper and fork/frame clearance and is within manufacturer-specified limits.
- Measure rotor thickness at multiple points and compare to the stamped minimum; replace if below spec.
- Inspect braking surface for heat discoloration, glazing, hairline cracks, or warpage. Retire if tempering or cracks are present.
- Record boss/adapter thickness and rotor mounting depth to select the correct bracket, spacer, or replacement rotor.
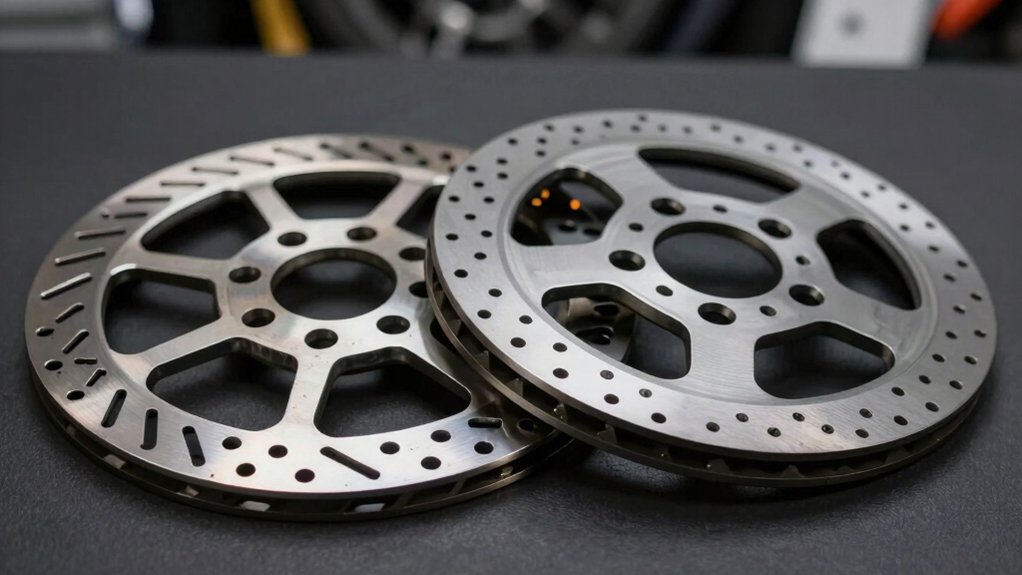
Rotor Bolt Pattern Chart
Wondering which bolt pattern fits your hub and frame? You inspect rotor bolt count and mounting type, then confirm pattern compatibility with hub specs. Do a visual inspection: count holes, check Centrelock splines or six-bolt M5 threads, and note rotor diameter limits from your caliper and fork documentation.
| Pattern | Bolt Count | Typical Use |
|---|---|---|
| 6-Bolt | 6 | Mountain, general cycling |
| Centrelock | — | Modern road/MTB hubs |
| 8/10-Bolt | 8/10 | Commercial/air disc brakes |
| Flat/Post Mount | Variable | Frame/fork-specific |
Record boss thickness and rotor size to select the correct bracket or adapter. Use specified tools (T25 for six-bolt, lockring tools for Centrelock) and torque to manufacturer values.
Minimum Thickness Limits
After you’ve identified the rotor bolt pattern and confirmed hub and caliper limits, check the rotor’s minimum thickness stamped on the braking surface or listed in the manufacturer’s spec sheet. You should measure with a caliper and compare to the published minimum thickness. If it’s below spec, replace the rotor. Do not rely on visual wear alone.
- Use digital calipers at multiple points around the ring to detect uneven wear.
- Record measurements and subtract remaining thickness from original spec to quantify material loss.
- Consider rotor bolt pattern when sourcing replacements to ensure mounting compatibility and correct thickness range.
Follow manufacturer torque and inspection intervals. Thin rotors increase risk of heat-related deformation and reduced braking efficiency.
Heat Check Procedure
When you inspect a rotor for heat checks, start with a close visual surface inspection for hairline cracks and temper coloration that indicates overheating. Use magnification and targeted lighting to detect fine cracks. Verify with infrared or contact temperature measurements where possible and record peak temperatures.
After checks, follow a controlled cooling protocol: avoid rapid quenching and allow the rotor to return to ambient before re-measuring thickness or reinstalling.
Visual Surface Inspection
How do you tell if a rotor’s surface has been compromised by heat? You perform a targeted visual inspection following the rotor study checklist: examine the braking track for fine radial cracks, blistering, raised edges, glazing, or annealed spots. Use good light and a 10x loupe for hairline checks; mark suspect areas with a non-permanent marker.
Next, run a straightedge along the track to detect localized warpage. Feel for abrupt step changes with a fingernail. Measure thickness at multiple points with a micrometer to identify uneven material loss. Record findings and compare to manufacturer minimums. If you see contiguous cracking, deep blisters, or thickness below spec, remove and replace the rotor. Do not attempt field repairs.
Coloration And Tempering
Coloration on a rotor’s braking track signals heat exposure and changes in tempering. You should inspect color shifts, such as straw, blue, purple, or gray, alongside surface defects to assess thermal stress. Note that straw-to-blue hues typically indicate localized temperatures from roughly 200 to 400°C and may correspond with reduced hardness or altered metallurgical structure. This requires closer measurement of thickness, hardness, and crack presence before returning the rotor to service.
You should document coloration tempering patterns relative to usage history and compare them to baseline rotor specifications. Measure runout, residual thickness, and hardness across the affected area. Consider whether discoloration aligns with rotor bolt pattern eccentricity or uneven pad contact. If hardness drops or material transfer is evident, replace the rotor rather than attempt grinding or heat treatment in the field.
Crack Detection Techniques
Because repeated thermal cycling creates fine surface fissures, you should inspect rotors for heat checks using a systematic visual and tactile routine that combines magnification, consistent lighting, and measured flex tests.
Begin crack detection with bright, angled light and a 10x loupe; scan the rotor surface inspection zones: braking track edges, pad contact bands, and vented vanes. Note linear hairline patterns perpendicular to rotation; these indicate thermal fatigue. Run a fingernail or plastic probe gently across suspected lines to confirm surface breaks versus superficial discoloration.
If cracks exceed 1–2 mm or propagate through the cross-section, retire the rotor. Record findings and compare to manufacturer service limits. Repeat inspections after any prolonged downhill or high-load use to catch progressive failure early.
Temperature Measurement Methods
After you’ve inspected for heat checks and addressed any surface cracks, measure rotor temperatures to quantify thermal stress and guide replacement decisions. Use an infrared (non-contact) thermometer for quick spot checks and record peak values after a standardized braking event.
For detailed mapping, use thermocouples attached to rotor faces with high-temperature adhesive. Log data during successive stops to observe cumulative heating and cooling curves. Compare readings to manufacturer maximums and published heat check thresholds to determine when micro-fracturing risk increases.
Ensure measurements occur at consistent positions (inner, mid, outer radius) and note ambient temperature. Calibrate instruments regularly and avoid touching hot rotors. Document temperature measurement results alongside visual heat check findings to produce objective replacement criteria.
Post-Check Cooling Protocol
When you’ve completed heat checks and measured peak temperatures, allow the rotor to cool under controlled conditions to prevent rapid thermal gradients that can exacerbate micro-fractures. Position the wheel in still air at ambient temperature; avoid direct water quenching and keep the rotor horizontal to minimize convection differentials.
Monitor temperature decay with the same IR gun or thermocouples used for measurement and log time-to-ambient for reference. During cooldown, perform visual and magnified inspections for thermal scoring and initiate crack detection protocols using dye-penetrant or magnetic particle methods as applicable to the material.
If any indications appear, remove the rotor and evaluate against manufacturer safety limits. Document findings, corrective actions, and cooldown profiles for reproducible maintenance records and warranty support.
Frequently Asked Questions
Can I Fit a Centerlock Rotor to a Six-Bolt Hub?
Yes, you can fit a Centerlock rotor to a six-bolt hub using an adapter; however, centerlock compatibility and six bolt adaptation have trade-offs. You’ll need a Centerlock-to-6-bolt adapter ring and six Torx bolts. You must torque bolts to spec.
Expect added weight, potential thermal differences, and slightly more complexity during maintenance. Verify rotor thickness and caliper clearance. Adjust pad spacing if needed to ensure safe, optimal braking performance.
Do Rotor Brands Affect Pad Material Choice?
No, rotor brands generally don’t dictate pad material choice. You’ll match rotor materials (steel alloy, coated, floating) and pad compounds (organic, sintered, semi‑metallic) by performance needs: heat tolerance, wear rates, noise, and modulation.
Ensure rotor size and thickness fit caliper specs. Follow bedding procedures. Slight thickness or coating differences may need pad spacing adjustments. However, cross‑brand combinations work when dimensions and mounting standards align.
How Does Rotor Diameter Affect Brake Lever Feel?
Rotor diameter directly changes brake lever feel: larger rotors increase mechanical advantage; so you’ll get firmer, more progressive modulation with less lever travel. Smaller rotors feel quicker but require more hand force.
Rotor materials and heat management influence this. Stiffer, thermally conductive alloys preserve lever consistency under load, while poor heat dissipation causes fade and softer, spongy lever feel as pads and fluid heat. Adjust rotor size to match required power and thermal demands.
Are Adapters Safe for Long-Term Use?
Yes, adapters can be safe for long-term use if you choose quality hardware, install correctly, and inspect regularly. Adapters’ safety depends on material, fit, torque specs, and absence of play. Poor adapters accelerate wear, increase noise, and risk failure.
For long-term durability, use hardened bolts; avoid lightweight alloy adapters on heavy-duty setups. Torque to spec, check mounting periodically, and replace adapters showing fatigue or corrosion.
Can I Mix Shimano and SRAM Rotors and Calipers?
Yes, you can mix Shimano and SRAM rotors and calipers, provided rotor size and mounting method match. You’ll want to evaluate compatibility nuance: slight thickness differences may need pad spacing adjustments. Bedding-in remains essential.
Discussion ideas include testing rotor thickness, confirming caliper clearance limits, and verifying fork/frame rotor specs. Use proper tools and torque values. Expect reliable cross-brand performance when mechanical specifications align and installation is precise.
Conclusion
You’ve covered rotor bolt patterns, minimum thickness, heat checks, surface inspection, tempering coloration, crack detection, temperature measurement, and cooling protocol. So wrap up like this:
Finish by confirming the rotor meets bolt-pattern and thickness specs. It should show no heat-checks, cracks, or abnormal coloration. Additionally, record peak and residual temperatures within limits. If any defect or overtemperature appears, remove and replace the rotor.
Follow controlled cooling and recheck dimensions and surface integrity before returning the vehicle to service. This will ensure safe, reliable braking performance.