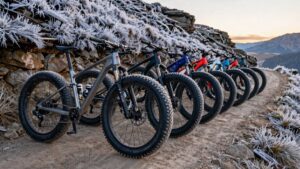
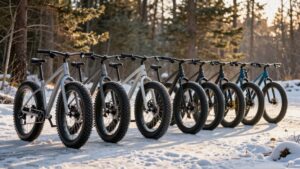
Fat Bike Tire Sizes Explained
Fat-bike sizes trade wheel diameter, rim width and pressure to match terrain and rider weight: Smaller 9×4.0″ rims (80–100mm inner) give great float on snow and sand, lighter, more agile handling, but lower load capacity.
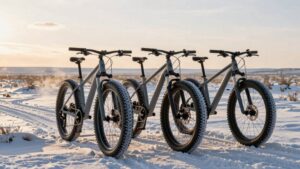
26×4.0″ or 29×4.0″ wheels roll obstacles better and support heavier riders.
Run low pressures for float, raise for firmness, and confirm rim/tire and brake clearance before switching.
Keep going to learn pressure ranges, tubeless steps and compatibility checks.
Quick Overview
- Fat-bike sizing pairs wheel diameter (e.g., 26″, 20″, 9″) with tire width (commonly 3.8–5.0″+); this affects rollover and handling.
- Wider tires and wider rims increase flotation in snow and sand, but they require compatible frame clearance and brakes.
- Narrow “9×4.0” rims (80–100 mm inner) create a wide, low-profile tire for light float and agile handling on compact frames.
- Rider weight and rim width determine load capacity. Heavier riders need wider rims/tires to avoid sinking and overstressed rims.
- For best performance, choose tubeless-ready rims. Follow manufacturer psi ranges: start low for snow/sand, and adjust pressures per terrain.
6–29×4.0″ Comparison Chart
Curious how a 9×4.0″ tire stacks up against more common 4.0″ variants? You’ll find the 9×4.0″ trades wheel diameter for flotation: narrow rim width (80–100mm inner) supports a wide tire shape that gives high float on snow and sand but limits load capacity. It suits kids’ and mini fat frames. Adults over ~150 lbs will sink or overstress rims. Compared with 20×4.0″ and 26×4.0″, the 9″ rim yields lighter, more agile handling with reduced rollover on obstacles.
| Attribute | Quick Take |
|---|---|
| rim width need | 80–100mm for stability |
| best use | light snow, kids trails, compact frames |
Check frame clearance and brake compatibility before fitting.
Tire Pressure Quick Checklist
Wondering what pressure you should run in your fat bike tires? Use this quick checklist to balance tire inflation and riding comfort without guesswork.
- Check manufacturer’s recommended psi and aim near the middle of the range.
- Start low (5–10 psi typical); then increase in 1–2 psi steps to reduce squirm on hardpack.
- Match pressure to terrain: lower for sand/snow for float; higher for firmer trails for rollover.
- Monitor feel: if you pinch or bottom out, add pressure. If you feel harsh bumps, reduce pressure for comfort.
- Weigh rider plus gear and adjust front/rear pressures independently for stable handling.
Follow this each ride and you’ll keep consistent handling, better traction, and predictable riding comfort.
Tubeless Conversion Tips
Before you convert, check that your rim width, bead hook, and ETRTO specs match the fat tire you plan to run. Use firm bead-seating techniques; fit a tubeless valve and airtight tape properly; and pick a sealant formulated for large-volume tires.
Finally, set target pressures low for traction. Test for burping and adjust sealant quantity and pressure to stop leaks.
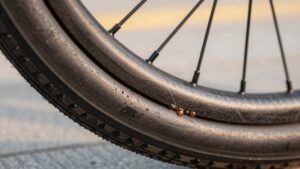
Rim Compatibility Check
How do you know if your Fat Bike Rims are ready for a tubeless conversion? Start by checking rim safety: inspect for cracks, dents, or damaged bead seats. Confirm the rim’s ETRTO width matches your tire’s recommended range.
Verify material compatibility; aluminum and carbon rims often have different valve and adhesive requirements. Follow the manufacturer’s tubeless guidance.
Measure internal rim width. Fat rims (75–100mm) need tires sized appropriately to avoid burping. Confirm the rim has a proper tubeless-ready profile or can accept rim tape, valves, and sealant securely.
Check spoke hole sealing options and bead lock features. If anything’s marginal, consult the rim maker or a qualified mechanic before attempting conversion.
Bead Seating Techniques
Want the bead to seat reliably the first time? Use a clean rim and inspect the tape and valve for damage. Tubeless readiness starts with a uniform, airtight base.
Mount the tire so both beads sit evenly in the rim bed. Push opposite beads inward while you work around the wheel, and ensure the valve stem is straight and seated tightly. Inflate sharply with a compressor or a high-volume pump to snap the beads into the rim flanges. Keep a pressure gauge handy to avoid overinflation.
If one side won’t seat, deflate and reposition the bead with a tire lever. Then re-inflate. Finish by checking for leaks with soapy water and adding sealant per manufacturer instructions.
Sealant Selection Tips
Looking for the right sealant? Choose based on climate, puncture profile, and maintenance rhythm. Cold climates need low-freeze formulas; hot, dusty areas favor durable, fast-curing liquids. Compare sealant brands for particle size, ammonia-free chemistry, and advertised tubeless sealant life. Shorter-life mixes need topping every 2 to 3 months; longer-life options can last 6 to 12 months.
Use thicker sealant for larger-volume fat tires to ensure coverage. You will need more volume than a standard MTB. Measure volume recommendations per rim width, and rotate the wheel after adding sealant to spread it. Carry a small tube of fast-acting sealant for long rides.
Finally, note compatibility with rim materials and foam inserts. Always clean and re-tape before switching products.
Valve And Tape Setup
Curious about the simplest way to get a reliable tubeless seal on a fat rim? Start by choosing a sturdy tire valve with a removable core sized for fat rims. Long stems help reach through deep rims and make sealant top-ups easier.
Dry-fit the rim strip, then apply tubeless tape centered and tension-free, overlapping edges by a few millimeters. Pierce a clean hole with the valve’s base tool, insert the valve, and tighten the locknut to compress tape around the stem. Inflate slightly to check for leaks before seating the bead.
Add recommended sealant through the valve core or bead, then reinstall the core and inflate to seat. Recheck the valve area for seepage and retighten if needed.
Pressure And Burp Management
When you dial in tubeless pressures on a fat rim, balance low-pressure traction with burp risk by starting at the manufacturer’s lower limit and adjusting in small increments. Use 5–10 psi as a baseline for fat tires; however, be ready to raise pressure for aggressive cornering or heavy loads.
For tubeless conversion, seat the bead cleanly, use proper tubeless tape and a reliable valve to improve air retention, and add sealant per manufacturer volume. Test for burp prevention by leaning into corners at low speed. If you hear or feel burps, increase pressure slightly or add rim tape cushion. Inspect bead seating and repeat sealant top-ups after a few rides.
Keep records of pressure versus terrain to refine your setup.
Frequently Asked Questions
Can I Use Fat Tires on a Standard Mountain Bike Frame?
You usually can’t just fit fat tires on a standard mountain bike frame. You’ll need to check fat bike compatibility and frame clearance first. Most MTB frames and forks lack the 3.8–5 inch clearance and wider rims (75–100mm) fat tires require.
If your frame, fork, chainstay, and brake mounts have sufficient room and rims match ETRTO specs, you can swap; otherwise, you’ll need a dedicated fat frame or frame/fork modifications.
Do Fat Tires Affect E-Bike Motor Efficiency or Range?
Yes, fat tires reduce fat tire efficiency and produce motor range impact. You’ll draw more power because wider, heavier tires increase rolling resistance and rotational mass; thus, your e-bike motor works harder, especially at higher speeds or soft surfaces.
You’ll notice reduced range per charge. However, low tire pressures improve traction. To minimize impact, run correct pressure, choose lighter tires/rims, and ride smoother routes to keep motor effort and range loss down.
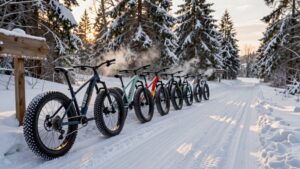
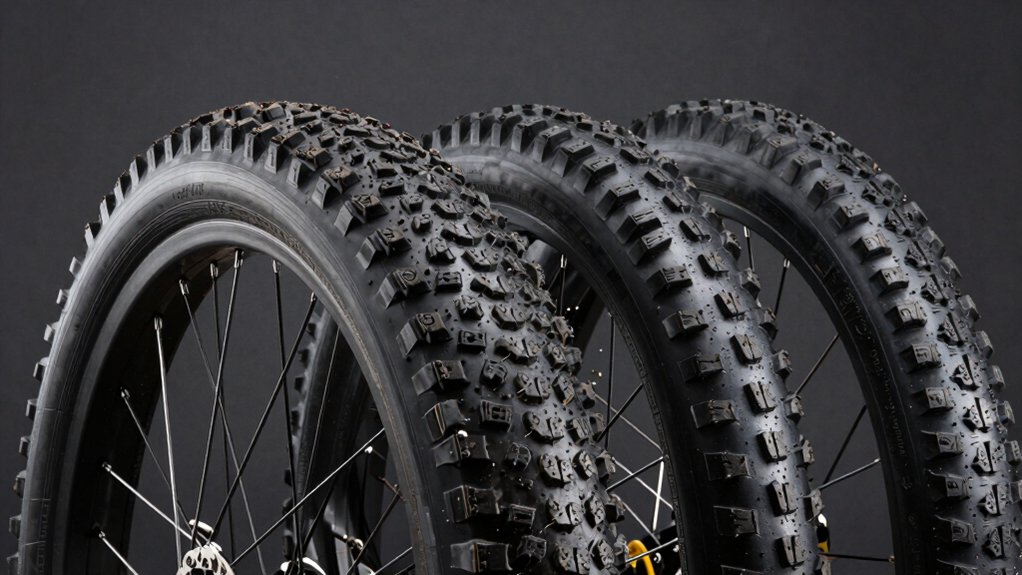
Are There Winter-Specific Fat Tire Tread Patterns?
Yes, you’ll find winter tread patterns designed for cold weather grip. They use deeper, widely spaced knobs to shed snow and slush, siping for bite on ice, and softer rubber compounds that stay pliable in low temperatures.
Choose studdable tires if you’ll hit icy patches. Match tread aggressiveness to your terrain: tighter knobs for packed snow and larger, more open lugs for soft, powdery conditions and improved flotation.
Can I Carry a Spare Fat Tube on Long Rides?
Yes, you should carry a spare tube on long rides. Your spare tube strategy should include a correctly sized tube (matching diameter and width), a patch kit, pump or CO2, tire levers, and a multi-tool.
Pack it securely in a frame bag or pack to prevent crushing. On remote terrain, a spare tube and basic repair gear will save time and keep you riding. Practice swaps before you go.
How Do Fat Tires Impact Braking Distances on Pavement?
You’ll usually get longer braking distance on pavement with fat tires because their larger contact patch and lower pressures increase rolling resistance and flex, reducing pavement grip during hard stops.
You can mitigate this by using higher pressure within the fat-tire range; choosing tread with firmer center knobs; and practicing progressive braking. Keep tires properly inflated and aligned to shorten braking distance and maintain consistent pavement grip in varied conditions.
Conclusion
You’ve got the essentials to choose, fit, and run fat tires confidently. Check rim compatibility, seat beads carefully, set tape and valves correctly, and use the right sealant for tubeless conversions.
Dial pressure and manage burps based on conditions. Use the quick checklist to keep pressures safe. With proper setup and routine checks, you’ll get reliable traction, fewer flats, and smoother rides.
So ride smart, tweak as you go, and enjoy the terrain.
Related: 5 Fat Bike Wheelsets
Related: When to Use a Fat Bike
Related: How Tire Width Affects Ride Comfort