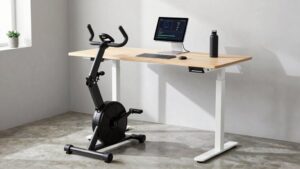
How to Start Indoor Cycling Training on a Trainer
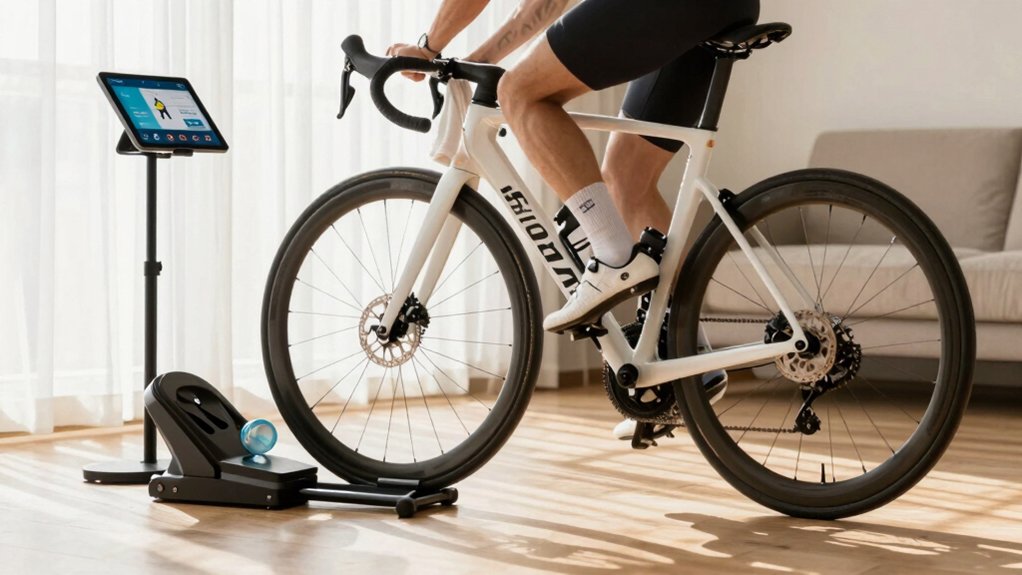
Start by matching a trainer type to your goals: smart or direct‑drive for precise ERG work; fluid for road feel; magnetic or wheel‑on for sprints. Fit the correct skewer or thru‑axle adapter, tighten securely and check for play. Then center the wheel and confirm spacing.
Calibrate the trainer before testing FTP and track efficiency over sessions to catch drift. Use a torque wrench for thru‑axles and recheck after warmup. You’ll find detailed setup, calibration, and safety tips ahead.
Quick Overview
- Choose the right trainer type (smart/direct-drive for ERG, fluid for road feel, magnetic/wheel-on for sprints) to match your goals.
- Calibrate your trainer and verify power/efficiency before baseline FTP and regular sessions.
- Swap to the correct wheel-to-trainer skewer or thru-axle adapter and inspect threads and springs.
- Secure and torque the skewer/adapter correctly; center the wheel and check for side-to-side play.
- Start with short structured workouts. Recheck tightness after warm-up and monitor power consistency over sessions.
Trainer Power & Resistance Chart
Wondering which trainer will best match your workouts? You’ll compare trainer types by their power-resistance curves and pick one that fits your goals. Use trainer calibration and efficiency metrics to verify output: smart/direct-drive for ERG precision, magnetic for linear sprint work, and fluid for road-like feel. Calibrate before testing FTP and track efficiency metrics over sessions to spot drift.
| Trainer Type | Curve/Mode | Best Use |
|---|---|---|
| Fluid | Progressive (speed-dependent) | Endurance, road feel |
| Magnetic/Wheel-On | Linear (resistance) | Short intervals, sprints |
| Smart/Direct-Drive | ERG (power-target) | Structured workouts, sweet spot |
Choose based on interval needs and confirm calibration regularly for consistent training data.
Wheel-To-Trainer Skewer Guide
After you’ve chosen and calibrated a trainer based on its power-resistance curve, swapping your bike’s axle hardware for the correct wheel-to-trainer skewer keeps rides secure and data accurate. You’ll fit a hardened steel or titanium skewer designed to sit firmly in the trainer’s clamps, reducing slippage and uneven wear. Proper installation protects dropout faces and supports consistent power readings; this is key for novice training and progression.
- Choose manufacturer-recommended skewer material for durability and fit.
- Inspect skewer threads and springs during regular wheel maintenance.
- Confirm tire compatibility with your trainer roller to avoid heat or deformation.
- Tighten the skewer until the bike sits snugly; you should need firm thumb pressure to move it.
Check skewer condition periodically and replace if damaged.
Skewer Torque and Spacing
Before you mount the wheel on the trainer, make sure skewer tightness and spacing are correct to prevent slippage or frame damage. Check that your trainer accepts your axle type: thru-axles may need adapters or different torque. Follow the manufacturer’s torque specs while confirming the wheel is centered in the dropout.
If you use a quick-release, lock it fully and verify squeeze and clearance on both sides before starting any session.
Correct Skewer Tightness
Why does skewer tightness matter? You rely on correct skewer tightness to keep the wheel stable on the trainer, prevent movement that can damage the trainer or frame, and ensure consistent wheel alignment.
During skewer maintenance, check for play by rocking the wheel side-to-side; any movement means you need slightly more torque. Tighten the skewer lever until it’s firm to close but still operable by hand. Don’t over-torque and stress drops or the axle.
Confirm spacing matches the trainer’s skewer or adapter specification so the wheel sits squarely in the trainer. After a few minutes of riding, recheck tightness and alignment; heat and vibration can settle components.
Regular checks keep sessions safe and uninterrupted.
Thru-Axle Compatibility Check
If you found the right skewer tightness, next check that your trainer accepts your bike’s thru-axle standard and that axle spacing and torque settings match the trainer’s adapters. You’ll confirm whether your bike uses a 12mm, 15mm, or 20mm thru-axle and note rear spacing (e.g., 142mm, 148mm Boost).
Compare that to the trainer’s documented specs; many adapters are adjustable, but some only support specific standards. Know the difference: thru axle vs. quick release systems require different adapter types and clamping forces. Inspect adapter fit, hand-threaded inserts, and alignment before mounting.
Be aware of compatibility limitations. If your trainer lacks the right adapter, buy the correct one from the manufacturer to avoid damage and ensure safe, repeatable rides.
Torque Specification Guidelines
How tight should you make your skewer or thru-axle when mounting your bike to a trainer? You should follow the manufacturer’s torque specs: typically 5–10 Nm for skewers and 10–15 Nm for many thru-axles. Always check your bike and trainer manuals. Use a calibrated torque wrench to avoid over- or under-tightening.
Proper torque secures the wheel; it prevents shifting under load and reduces torque noise that signals loose fittings. Even clamping pressure matters: align axles squarely and tighten incrementally while checking alignment. Correct torque limits frame stress and minimizes unwanted movement that increases pedal wear.
After the first spin, recheck torque and listen for noise. Periodically inspect fasteners to keep mounting reliable and safe.
Wheel Centering And Spacing
Wondering whether your wheel sits perfectly centered in the trainer? You should check wheel alignment and bedrock spacing every time you mount the bike. Close gaps evenly so the axle rests flush in the trainer’s slots; uneven spacing skews handling and wears tires.
Tighten skewers or thru-axles to manufacturer torque specs so the wheel won’t shift under load, but don’t over-torque and risk damage. Spin the wheel to confirm it tracks true and doesn’t rub the frame or trainer. If your trainer includes optional spacers, use them to match your bike’s axle width and preserve consistent bedrock spacing.
Re-check alignment after the first few minutes of riding; minor shifts are easier to correct than problems mid-workout.
Quick-Release Safety Tips
Ever checked your skewer tightness and thought it felt “good enough”? You need to treat quick release safety like part of your pre-ride checklist. Close the lever firmly; it should leave an imprint on your palm when properly torqued. Align the skewer with the trainer’s dropout center so the wheel sits straight.
Check axle spacing; some trainers require spacers or specific axle widths to prevent lateral play. Recheck after the first minute of pedaling and again after five; thermal expansion and initial load can loosen things. Don’t overtighten to the point of stripping threads or damaging carbon dropouts.
Learn indoor cycling basics for trainer-specific setup and inspect skewers, springs, and contact points regularly. A secure wheel prevents crashes and equipment damage.
Frequently Asked Questions
How Do I Set up a Smart Trainer in ERG Mode?
Set up Erg mode by pairing your smart trainer to your app or head unit, selecting ERG as the control mode, then entering target power. Do a trainer calibration (spindown or manufacturer-specific routine) so power reads accurately.
Start with a short warm-up. Let the trainer auto-adjust resistance, and confirm cadence and power respond. If effort feels wrong, re-run calibration; check firmware; and ensure your bike fit and drivetrain are clean.
Can I Use My Road Shoes With a Turbo Trainer?
Yes, you can use your road shoes with a turbo trainer as long as your pedals and shoes are compatible: look for matching cleat systems. Road shoe compatibility typically isn’t an issue on direct-drive or smart trainers. However, you’ll want to check pedal thread standards.
Expect trainer noise levels to vary by trainer type and tire choice. Clip-in shoes won’t affect noise much, but a quiet trainer and mat will reduce sound and vibration.
How Long Should My Initial Indoor Sessions Be?
Start with short sessions of 15–30 minutes and build consistency. You’ll warm up for 5–10 minutes, do the main effort that fits your level, and then cool down for 5–10 minutes. Keep sessions 3 times weekly for about 3–4 total hours initially.
Don’t jump volume; use gradual progression by adding 1–5 minutes per session or another session per week once you complete the current volume reliably. Prioritize rest and recovery between workouts.
What’s the Best Way to Hydrate During Trainer Workouts?
Drink steadily: Start sipping 15–20 minutes before warm-up. Keep a filled bottle within reach, and sip small amounts every 10–15 minutes during the session.
For workouts under an hour, plain water’s fine. For longer or sweaty sessions, use electrolyte options (tablets, powders, or low-sugar sports drinks). Rehydrate afterward with fluids and electrolytes, matching sweat loss if possible.
Practice hydration timing in training so it’s automatic on key sessions.
How Often Should I Perform an FTP Test?
You should test FTP every 6–8 weeks to track progress and retarget workouts. That cadence lets you see meaningful changes without disrupting training blocks.
Between tests, use How to pace FTP advice: start conservatively, build through steady efforts, and finish strong to get a valid result. If you change training load, recovery, or race goals, test sooner.
Don’t test more than monthly unless you’re managing precise competition pacing.
Conclusion
You’ve got the essentials to set up and ride on a trainer safely and effectively.
Check skewer or thru-axle compatibility; follow torque specs; and center the wheel so spacing’s correct. Tighten the skewer to the recommended feel: secure but not over-torqued. Use quick-release safety practices every time.
Match trainer resistance and power targets with your session goals. Do a final safety check before each ride, and you’ll train confidently and reliably.
Related: Hub Maintenance Basics