Disc Brake Rubbing Troubleshooting
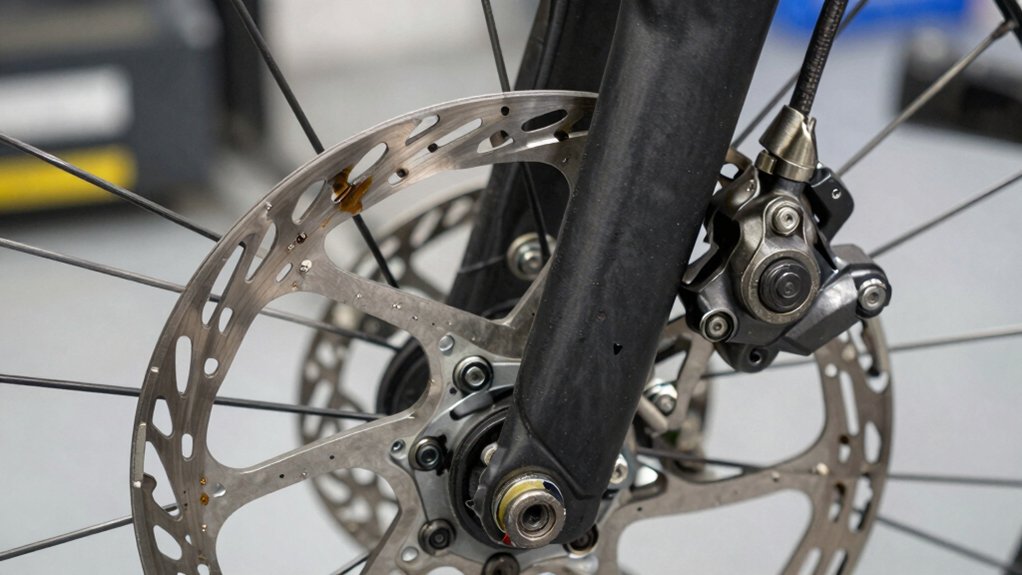
If your Disc Brakes rub, start by checking rotor-to-pad clearance: The top of the pad should sit ~1.0 mm inside rotor OD, and each pad should have ~0.2–0.6 mm running clearance. Center the caliper with the squeeze-and-tighten method; measure rotor runout (keep under ~0.3 mm), and verify pistons retract to 0–0.5 mm protrusion.
Inspect for sticky pistons, contaminated seals, or wheel/backing interference. Follow systematic checks, and you’ll find what to adjust next for a full fix.
Quick Overview
- Verify rotor-to-pad vertical alignment: Pad top edge should sit about 1.0 mm inward from rotor outer diameter; adjust with shims.
- Check rotor runout with a dial indicator. Light-truing or replacement is required if peak-to-peak exceeds ~0.3 mm.
- Center the caliper using the squeeze-and-tighten method and confirm even pad contact with a flashlight or white paper.
- Measure piston retraction and pad clearance (typical 0.2–0.6 mm per pad). Service sticky pistons or seals if asymmetry >0.3–0.5 mm.
- Ensure 3 mm radial clearance between caliper body and wheel. Correct wheel size for large rotors to prevent rubbing.
Rotor-To-Pad Clearance Chart
How close should your rotor sit to the pads? You should target a precise rotor to pad gap so pads sit within the rotor friction band without contact. Set pad top edge 1.0 mm inward from rotor OD; use EBC shims to fine-tune pad height.
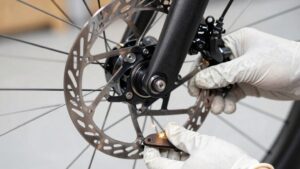
Verify 3 mm radial clearance between caliper body and wheel. Move wheel outward with hubcentric spacers if needed. For large rotors, observe wheel size minimums to prevent interference: 328–332 mm rotors need 17″ wheels; 355 mm need 18″; 380 mm need 19″. Center the caliper using the squeeze-and-tighten method to ensure caliper alignment. Confirm visually with a flashlight or white paper. Then tighten bolts alternately to lock position.
| Item | Spec |
|---|---|
| Pad offset | 1.0 mm inward |
| Wheel clearance | 3 mm |
Minimum Rotor Runout Tolerances
When checking rotor runout, you should measure lateral wobble at the outer braking surface and keep deviations within precise limits to prevent pad contact and uneven wear. You’ll use a dial indicator or a truing gauge, rotating the wheel slowly and recording peak-to-peak deviation. Aim for the minimum runout the manufacturer specifies. Common practice keeps total lateral runout under 0.3 mm to avoid perceptible rub and early pad tapering. Excess beyond that suggests rotor warping or hub interface issues.
- Measure at multiple radii to isolate spoke, hub, or rotor-only runout.
- If runout exceeds limit, attempt light truing; replace if metal fatigue or severe rotor warping occurs.
- Recheck after tightening rotor bolts and seating the wheel.
Caliper Piston Retraction Spec
You’ll measure piston retraction to verify how far pads withdraw from the rotor after release and compare against the recommended retraction limits. Use caliper feelers, a caliper-piston gauge, or precision depth micrometer and perform checks both static and with the wheel mounted under typical load.
Inspect common causes of poor retraction: contamination, sticky seals, over-advanced pistons. Confirm operation under load to reproduce intermittent rubbing.
Piston Retraction Measurement
Start by measuring how far the pistons retract after a brake lever release. Correct retraction ensures pads clear the rotor and prevents constant rubbing. Use a feeler gauge or calibrated probe at the pad edge and note piston deployment distance during a full lever stroke. Then measure pad retraction immediately after release.
Secure the wheel and caliper; cycle the lever several times to stabilize seal behavior. Record static and dynamic retraction values; compare symmetry between pistons and left/right calipers. If retraction is inconsistent, inspect for sticky pistons, seal damage, contamination, or trapped debris that impair pad retraction.
Reset over-advanced pistons with a proper tool, clean components, and bleed the system if air or contamination alters piston behavior.
Recommended Retraction Limits
Having measured piston retraction and identified any irregularities, set clear retraction limits to guide adjustment and verification. You should specify maximum piston protrusion and minimum clearance to rotor: typical allowable protrusion is 0–0.5 mm beyond pad backing plate, and running clearance should be 0.2–0.6 mm per pad when centered.
Use these limits during caliper overhaul and after pad seating to confirm pistons return uniformly. If any piston exceeds protrusion or fails to achieve clearance, service seals, clean bores, and repeat measurement. Record left/right values and compare to manufacturer tolerances; asymmetry over 0.3–0.5 mm indicates need for rebuild or replacement.
Follow these limits as pass/fail criteria before wheel installation and road testing.
Tools For Retraction
Select the right piston-retraction tool before you begin: Use a flat plastic or nylon pad press for single pistons, a two-prong spreader or dedicated caliper press for opposed pistons, and a threaded screw-type piston compressor for stubborn or heavily extended pistons. Choose tools that provide controlled, even force to avoid piston tilt.
Inspect the caliper bore and piston face for contamination before compressing; dirt will impede movement. Retract pistons incrementally, watching pad clearance against the rotor to prevent accidental contact that mimics caliper misalignment or rotor warping. Use torque-rated handles and keep the wheel/rotor installed when possible to monitor true clearance.
After retraction, verify lever travel and pad reset. Repeat slowly if resistance indicates sticky seals or debris.
Causes Of Poor Retraction
Why won’t the piston retract fully? You’ll methodically rule out causes: contaminated seals, clogged caliper bore, or damaged piston surfaces that impede caliper retraction. Inspect for dirt, oil, or corrosion on pistons and inside the caliper; contamination prevents the seal from acting as a retraction spring.
Check pad condition; glazed or contaminated pads can stick. Verify pistons weren’t over-advanced when the wheel or rotor was removed. Excessive extension causes binding. Confirm rotor immobilization during service; a shifting rotor can trap pads against pistons. Examine mounting hardware and guide pins for binding or missing lubrication.
If hydraulic, bleed the system to remove air that reduces piston return force. Replace damaged seals or pistons and lubricate guide surfaces to restore proper retraction.
Checking Under Load
How do you verify piston retraction under real load? You’ll perform a dynamic check with the wheel mounted and bike supported so the wheel spins freely. Hold the bike, apply moderate pedal torque and pin the brake lever briefly to simulate climbing load. Then release while observing rotor clearance.
Measure pad-to-rotor gap before and after load using a feeler or thin card; repeat several cycles. Note any caliper wobble or sudden clearance shift; those indicate mounting looseness or hub misalignment transmitting to the rotor. If retraction degrades under load, inspect piston seals, caliper mounts, and axle clamping.
Tighten mounting bolts to spec, correct hub positioning, then recheck. Replace sticky pistons or contaminated pads if retraction doesn’t restore.
Frequently Asked Questions
Why Does Rubbing Only Happen Under Hard Pedaling?
Because hard pedaling loads the drivetrain and flexes the frame or hub, the rotor shifts slightly and contacts the pads only under that load. You’ll see intermittent rubbing when rotor temperature rises and materials expand. This also occurs when insufficient braking allows pads to ride closer.
Check for hub play, caliper alignment, piston sticking and fork flex. Tighten axles, true the rotor, clean components and ensure proper pad retraction.
Can Oil on the Rotor Be Cleaned Effectively at Home?
Yes, you can clean oil on the rotor effectively at home. Use isopropyl alcohol (90%+) or a dedicated Disc Brake cleaner for rotor prep.
Remove the wheel, spray cleaner, and wipe with a lint-free cloth until no residue remains. Repeat and finish with a fresh wipe. Never touch the braking surface with bare hands.
If pads are contaminated, replace them; contaminated pads won’t recover by cleaning and will keep causing rub.
Should I Replace Warped Rotors or Try Truing Them?
If rotor warping is minor and rhythmic rubs persist, try truing it carefully. Use a proper bending fork, apply light, incremental pressure away from the rub, then brake bed in the rotor with controlled stops.
If bends are severe, thin, creased, or caused by impact, replace the rotor. Truing won’t restore structural integrity or safe thickness. Always verify alignment, torque rotor bolts correctly, and test under load after bedding in.
Why Do New Bikes Rub More Than Older Ones?
New bikes rub more because new components often need bedding-in and piston reset; so braking performance isn’t yet settled. You’ll see tighter clearances from fresh rotors, pads and calipers. Plus, over-advanced pistons from factory setup contribute to this issue.
Contamination, sticky pistons or slightly misaligned calipers amplify initial drag. Methodically clean rotors, retract pistons, center the caliper while tightening bolts and bed pads over several rides to restore normal braking performance.
Can Loose Axle or Quick-Release Cause Rubbing?
Yes, a loose axle or quick-release can cause rubbing. You’ll get axle play that shifts the wheel under load, upsetting brake alignment and letting the rotor contact pads intermittently.
Tighten or properly torque the QR/axle, reseat the wheel in the dropouts, and recheck alignment. If play persists, inspect hub bearings and dropout clamp faces.
Verify rotor runs true after securing the wheel to confirm rubbing is resolved.
Conclusion
You’ve walked through clearance charts, runout tolerances, piston retraction specs, measurement methods, and tools. Now act methodically. Verify rotor-to-pad clearance against the chart, measure runout under the specified limits, and confirm piston retraction with the recommended gauge.
If retraction falls short, inspect for corrosion, sticky pistons, or collapsed seals and address with cleaning, rebuild, or replacement. Recheck under load after corrective work to ensure rubbing is eliminated before returning the vehicle to service.
Related reading: How to Know When Brake Pads Need Replacing — a closer look at this topic.