The Bike Gearing Terminology Glossary Every Rider Needs
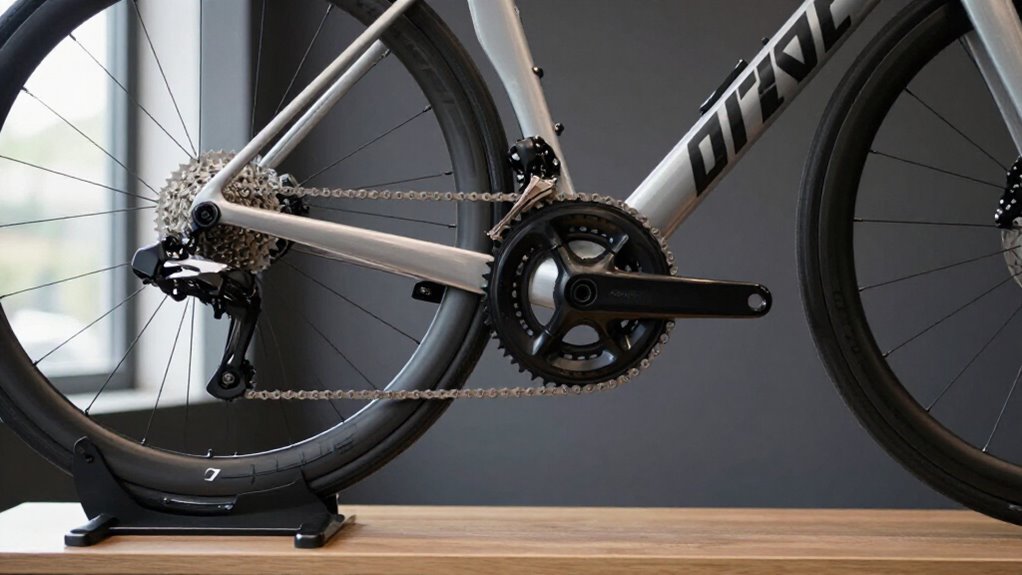
You measure a gear ratio by dividing chainring teeth by rear-cog teeth: a 34×32 equals 1.06:1, an easy climbing gear.
Gear inches and development add your wheel’s effective diameter or measured rollout, showing distance per crank revolution.
A cassette slides onto a splined freehub and uses a lockring; a freewheel threads on with its ratchet.
You must also match freehub standards, cassette range, derailleur capacity, and Q-factor pedal spacing.
The terms below make checks clearer.
Trace Chainring-to-Cassette Relationships
Your chainrings and cassette cogs work as paired levers: divide the front chainring’s tooth count by the selected rear cog’s tooth count to find the gear ratio. A smaller chainring sits closer to the frame; pair it with larger cogs to create your easiest climbing gears.
Conversely, select the larger chainring and smaller cogs for harder gears and greater speed per pedal revolution.
On an 11-32 cassette, the listed progression is 11, 12, 13, 14, 16, 18, 20, 22, 25, 28, and 32 teeth. A 50-tooth ring with an 11-tooth cog yields 4.55:1; a 34-tooth ring with 32 yields 1.06:1.
Don’t assume a 2×9 setup provides eighteen distinct ratios: combinations overlap. Check whether the available pairs let you hold your needed cadence on climbs.
Freehub Body Terminology
A freehub body is the splined, usually removable cylinder on the rear hub that carries the cassette. It transfers your pedalling torque to the hub, yet its ratchet disengages when you coast. Don’t confuse it with a threaded freewheel: a cassette slides onto splines and is secured by a lockring.
| Fitment | Typical cassette feature | Your check |
|---|---|---|
| HG | 7–10 speed, 11T minimum | Confirm body width |
| Microspline/XD | 12-speed, 10T minimum | Match brand standard |
Spline profile and body width control compatibility; HG, HG-11, Microspline, XD/XDR, and Campagnolo patterns don’t interchange. Before buying a cassette, identify the hub’s fitment and smallest sprocket.
You can often remove and service the body, although some hubs use integrated sealed ratchets. This prevents costly mismatches and keeps cassette installation straightforward and reliable.
Gear Inches and Development
Gear inches let you compare how hard each gear feels by combining your chainring-to-cog ratio with effective wheel diameter. You calculate them by multiplying that ratio by wheel diameter, while development states the actual distance your bike travels per crank revolution.
Measure rollout from a valve-mark test to account for your tire’s loaded rolling circumference.
Understanding Gear Inches
A lower number means your bike travels less distance per pedal turn, so you’ll maintain cadence with less pedal force on steep climbs. A higher number moves you farther per turn and suits faster flats or descents, though it demands more torque at low cadence. Because gear inches account for wheel diameter, you can compare setups across bikes more reliably than by tooth counts alone.
Development states the same practical idea as actual forward distance per crank revolution, usually in meters. Use them to assess overall range.
Calculating Gear Inches
To calculate gear inches, divide the chainring’s tooth count by the rear cog’s tooth count, then multiply the result by your wheel’s effective diameter in inches: (front teeth ÷ rear teeth) × wheel diameter****. A 50T chainring and 11T cog produce a 4.55:1 ratio (50 ÷ 11); multiply it by the diameter, and you’ll get the gear-inch value.
For example, 34 ÷ 32 = 1.06:1. With a 27-inch effective diameter, it equals about 28.6 gear inches. To find development, multiply gear inches by π; the result estimates distance traveled per crank revolution in inches.
Convert inches to meters if needed. Lower results reduce pedal force for climbing, while higher results suit faster flat-road riding. Use measured rollout when you need an accurate development figure.
Wheel Size Effects
Wheel size directly changes the distance you travel per pedal revolution, even when the chainring-to-cog ratio stays the same. A larger wheel has a larger circumference, so each wheel rotation carries you farther. Consequently, gear inches rise with wheel diameter: multiply the front-chainring tooth count divided by the rear-cog tooth count by the wheel diameter in inches. A higher result indicates a harder gear, because you cover more ground for each crank turn.
When comparing bikes, don’t compare chainring and cassette numbers alone. A 50-tooth ring with an 11-tooth cog on a 700c/29-inch wheel produces a different effective gear than the identical ratio on a 26-inch wheel. Moving the same drivetrain from 26 to 29 inches makes every gear taller, increasing speed per pedal turn.
Defining Gear Development
Gear development puts wheel size and tooth counts into one practical number: the distance your bike travels for each full crank revolution. It equals chainring teeth divided by rear-cog teeth, multiplied by wheel circumference. Rollout is expressed in metres or inches. With larger development, you’ll travel farther per pedal stroke, supporting flat-road speed but requiring more force. Smaller development lets you maintain easier cadence on climbs.
Gear inches express an equivalent direct-drive wheel diameter. Calculate them by multiplying wheel diameter in inches by the front-to-rear ratio. High numbers indicate harder gears; low ones indicate easier gears. A 50/11 ratio is 4.55:1, versus 1.06:1 for 34/32; a roughly 4.3-fold spread before wheel-size scaling. These metrics let you directly compare bikes despite their different tires, chainrings, and cassettes.
Measuring Development Distance
Development measures the distance your bike travels for each complete crank revolution, combining the front chainring-to-rear-cog ratio with actual wheel circumference. Calculate it as (front teeth ÷ rear teeth) × wheel circumference. For example, a 50/11 combination produces a 4.55:1 ratio: your rear wheel turns about 4.55 times for every crank revolution. A 34/32 combination produces 1.06:1, so it covers much less distance per turn.
Gear inches translate the drive ratio into an equivalent direct-drive wheel diameter in inches: ratio × wheel diameter. Higher numbers mean more distance per pedal turn. Tire size affects circumference and effective diameter, so identical tooth combinations don’t produce identical results on 700c and 26-inch wheels. To check, mark the valve, roll the bike one revolution, and measure rollout.
Comparing Gearing Systems
When you compare gearing systems, use development or gear inches to measure the distance your bike covers per crank revolution, rather than relying on a drivetrain’s advertised speed count. Calculate the result from gear ratio—chainring teeth divided by rear-cog teeth—and effective wheel diameter or rollout. A larger chainring or smaller cog raises development and gear inches; the opposite lowers them.
A single-speed gives you one fixed development. An internal-gear hub supplies several ratios, though usually across a narrower span than a derailleur drivetrain.
With multiple chainrings and cassette cogs, a derailleur system can produce a broad usable range; its rear derailleur guides the chain between sprockets. Compare each system’s lowest and highest effective developments, plus the spacing between usable ratios. Don’t multiply chainrings by cogs.
Low Gear Examples
For an easier climbing gear, pair the smallest chainring with the largest rear cog: a 34T chainring and 32T cog produce a 34 ÷ 32 = 1.06:1 ratio. This means the rear wheel turns about 1.06 times for each crank revolution, reducing the torque you must apply at the pedals.
On a compact 50/34 drivetrain, select the 34T ring and a 32T or 34T cassette cog for your lowest derailleur gear. A 48/32 setup uses its 32T ring similarly. Development, the distance you travel per crank revolution, falls in these combinations.
This lets you maintain cadence on sustained, steep gradients rather than grind. Gear inches express the lower effort result as a direct drive wheel diameter: fewer gear inches indicate an easier climbing gear.
High Gear Examples
A 50T chainring paired with an 11T rear cog creates a 4.55:1 high gear, so the rear wheel turns about 4.55 times per crank revolution.
You get this hardest ratio by combining your largest chainring with your smallest cassette cog. On an 11,32T cassette, the 11T cog supplies the high end, whereas the 32T supplies the easiest gear.
Gear inches express the result through an equivalent direct-drive wheel diameter: higher values mean you travel farther per pedal revolution. Development, or rollout, measures that actual distance per crank revolution and accounts for tire size.
With a road 50/34 crank and an 11,25T or 11,28T cassette, you retain fast descending and flat-road options. Shift to the 11T when speed rises and hold a 70–100 rpm cadence.
Cassette Versus Freewheel Distinction
You’ll find that a cassette slides onto a freehub and uses a lockring, while a freewheel threads onto the hub and contains its own ratchet mechanism. Identify the system before service: cassettes use a separate freehub, whereas freewheels combine the cogs and coasting mechanism.
You can’t interchange them without the compatible hub hardware and removal tools.
Core Design Differences
Although both hold the rear gears, a cassette is only a stack of cogs that slides onto a freehub body and is secured by a lockring, while a freewheel combines the cogs and ratcheting mechanism in one unit that mounts directly to the hub.
This structural split matters when you accurately identify parts and plan service and assess drivetrain compatibility. A cassette contains replaceable rear sprockets; the freehub supplies coasting. A freewheel, by contrast, packages sprockets and ratchet together.
Treat cassette cog count—eight-, nine-, or eleven-speed—as available rear gear positions, not a ratchet description. Before buying gears, confirm your wheel’s hub standard: it determines whether your bicycle accepts a cassette or freewheel. A cassette won’t work with a freewheel hub without the correct freehub.
How Each Mounts
Mounting method provides the clearest distinction: a cassette slides onto a splined freehub body and a lockring secures it, while a freewheel threads directly onto the rear hub and carries its own ratcheting mechanism.
This difference controls wheel compatibility. A cassette replacement requires a wheel with a compatible freehub body; its sprockets and lockring attach there, not to the hub shell. A freewheel replacement installs the threaded unit on its hub interface.
You can’t interchange systems by matching cog count or tooth range. Modern rear drivetrains commonly use cassette-equipped wheels, often with eight to eleven cogs; freewheels are more common on older multi-speed bikes. In either system, cog tooth counts set gear effort, but the mounting interface determines which components fit your wheel.
Identifying Cassettes And Freewheels
Identify the rear gear system by locating its ratchet: a cassette slides onto a separate freehub body and locks in place with a lockring, while a freewheel contains its own ratcheting mechanism and threads directly onto the hub.
To inspect your bike, look at the center of the sprocket cluster. A cassette’s smallest cog sits beside a lockring, usually marked with its tightening specification. On a freewheel, the ratchet sits within the sprocket assembly, so the cluster forms one threaded unit.
Modern derailleur bikes generally use cassettes with eight to eleven cogs; older, budget, and some single-speed bikes often use freewheels. Read markings such as 11-32 or 11-28 as tooth counts: the first number identifies the smallest cog, and the last identifies the largest.
Compatibility And Service Needs
For compatibility and service, you must distinguish a cassette from a freewheel: a cassette slides onto a splined freehub body and is secured by a lockring, while a freewheel threads directly onto the hub and contains its own ratchet.
You can’t fit one system’s sprocket unit to the other’s hub without the correct hub or freehub standard. Modern road and mountain bikes usually use cassettes. Match cog count, speed, spacing, and the applicable shifting standard so your derailleur indexes accurately.
To remove a cassette, use a cassette tool with a lockring wrench. A freewheel needs the remover that matches its thread standard. To alter a cassette-equipped bike’s range, swap its cassette, such as 11–28-tooth for 11–32-tooth, rather than replacing the entire hub or wheel assembly.
Reading a 34×32 Climbing Gear
A 34×32 climbing gear pairs a 34-tooth inner chainring with a 32-tooth rear cassette cog. The notation names the front tooth count first, then the rear count. Divide 34 by 32 to get a 1.06:1 gear ratio.
For every complete crank revolution, your rear wheel turns about 1.06 times, providing low gearing that helps you sustain cadence on moderate climbs.
On a typical 2x compact drivetrain, the 34T ring sits nearest the frame and supplies the easier front option. In an 11–32 cassette, the 32T cog is the largest and easiest rear option. Together, they usually create your lowest climbing gear. Shift into it before gradient increases.
Ease pedal force briefly as you shift, then spin smoothly rather than forcing a high-torque pedal stroke.
Observe Derailleur Capacity Limits
Before fitting a wider-range cassette, check your rear derailleur’s published limits. Manufacturers specify the largest and smallest cassette sprockets it can accommodate, plus total capacity: the tooth difference between your largest and smallest chainrings, plus the cassette’s tooth range.
Calculate cassette range by subtracting the smallest cog from the largest, then add the chainring difference. Your result must not exceed the derailleur’s stated capacity. A cassette beyond its maximum sprocket size can cause hesitant shifts or prevent the chain from reaching the largest cog.
Excess total capacity leaves chain slack in smaller combinations. Cable tension may move the derailleur toward larger cogs, but it can’t overcome these mechanical limits. Check compatibility before buying components, and size the chain correctly as well.
Q-Factor: Pedal Spacing Explained
Q-factor measures the horizontal distance, in millimeters, between the outer faces of your crank arms at the pedal mounts. It defines your pedal stance and influences knee tracking throughout each revolution. A wider setting moves your feet and knees outward; a narrower one suits riders whose knees track closer together.
- Mountain-bike and modern wide cranksets commonly use more Q-factor for stiffness and clearance.
- Road cranksets often use a narrower stance for a compact pedaling position.
- Match Q-factor to comfortable knee alignment, especially during sustained high-cadence efforts.
- Before changing cranksets or pedals, confirm bottom-bracket compatibility, chainline, and frame clearance.
If your knees flare or feel strained, test changes gradually.
Correct spacing can improve comfort without compromising drivetrain alignment or pedal clearance on your bike.
Conclusion
Once you can trace chainring and cassette relationships, identify freehub standards, and distinguish cassettes from freewheels, you can choose parts with confidence. Use gear inches or development to compare ratios, and read a 34×32 setup as a practical climbing option. Check derailleur capacity before changing tooth counts, because compatibility isn’t automatic.
Finally, consider Q-factor when evaluating pedaling comfort and clearance. These terms let you diagnose, specify, and optimize your drivetrain accurately across changing riding conditions.