How to Lubricate a Bike Chain for a Smoother, Quieter Ride
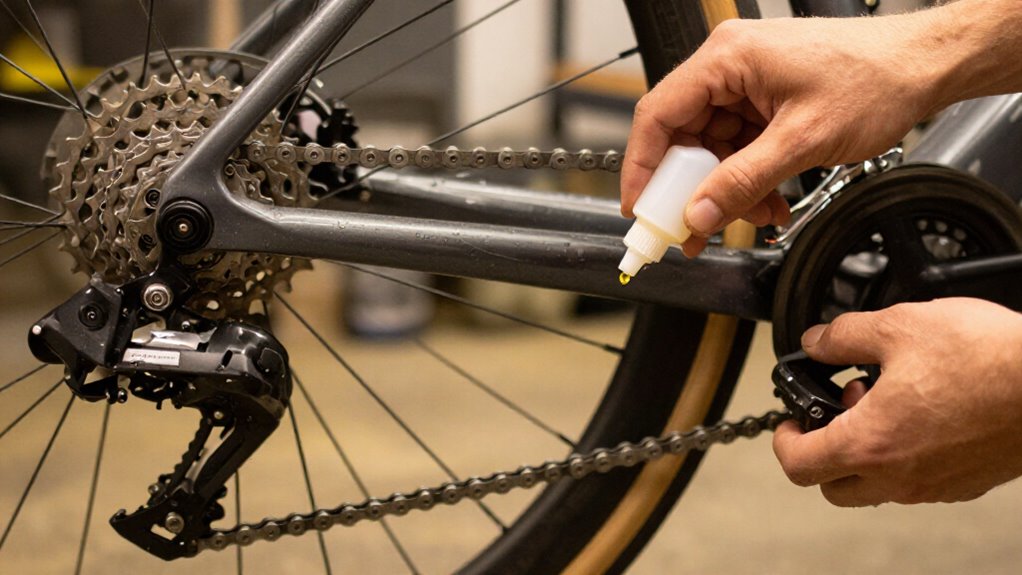
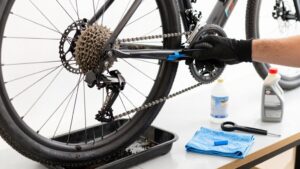
Secure your bike by its approved seatpost in a stable workstand, with the rear wheel clear, then shift to the smallest rear cog.
Degrease while backpedaling, rinse and dry the chain, and apply one drop of suitable lube to each roller.
Turn cranks four times, then wipe outer plates nearly dry.
Keep fingers, rags, and lube away from moving parts and brakes.
Check for noise or skipping; the steps below cover weather-specific care and wear.
Aim for Quiet, Smooth Pedaling
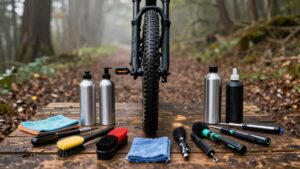
For quiet, smooth pedaling, start with a clean, dry chain: backpedal while applying bike-specific degreaser, then wipe away loosened grit before lubricating. Wear gloves, keep degreaser off brake rotors and pads, and support the bike securely before turning the cranks. Old abrasive residue causes friction and the chirps or squeaks you’re trying to eliminate.
Apply one controlled drop of chain lubricant to each link’s roller area while you backpedal. Continue until the chain passes through roughly four pedal revolutions. Then spin the crank four or five turns to distribute lubricant into pins and rollers.
Wipe the outer plates thoroughly with a clean rag; a nearly dry exterior limits dirt buildup and noise. Finally, shift through gears, checking for rasping, skipping, or squeaks before riding.
Match Lube to Riding Conditions
A clean, correctly applied chain will stay quieter only if its lubricant suits the conditions you ride in. Select a formulation that protects rollers without creating an abrasive paste or washing away prematurely. Check the forecast, surface, mileage, and exposure to salt before each service.
- Use dry wax or PTFE lube for dusty, dry roads and gravel; it limits grime adhesion but needs frequent renewal.
- Choose viscous wet lube for rain, slush, or mud; it resists wash-off and corrosion, yet requires thorough exterior wiping and cleaning.
- For changeable weather, use an all-weather synthetic product, inspect after wet rides, and relubricate as needed.
- For racing, consider ceramic or advanced synthetic lube; follow guidance, and keep all lubricant off braking surfaces to preserve predictable stopping performance.
Step 1: Elevate Rear Wheel Securely
With the bike securely supported in a workstand, lift the rear wheel clear of the ground so you can backpedal smoothly and reach every chain link. Clamp the frame at a manufacturer-approved point, typically the seatpost, and confirm the clamp is tight without crushing carbon or thin-walled tubing. Test stability by gently moving the bike before turning the cranks. Keep fingers, loose clothing, and cleaning rags away from the chain, chainrings, and rear wheel as they rotate.
If you use a chain-cleaning device or degreaser, stable support keeps the chain tracking consistently through its brushes and helps prevent spills. After lubricating, rotate the cranks several more times, then wipe excess lubricant with a clean rag. Keep the bike elevated while the chain dries; the wheel should remain steady throughout the process.
Step 2: Shift Into Smallest Rear Cog
Once the rear wheel is secure and clear of the floor, shift the chain onto the smallest rear cog. Use the shifter while turning the cranks slowly by hand; don’t force a shift if the chain hesitates. This cog position creates the most direct access to the chain and lets it pass through a lubricant drop path with minimal derailleur movement.
Keep fingers, rags, and loose clothing clear of the chain, cassette, and pulleys as you backpedal. The smaller cog also limits stray oil on larger cog faces, where it can collect grime. Maintain this gear while applying lube and wiping exterior excess. Then pedal smoothly and shift across the cassette to verify quiet, consistent operation without squeaks or chirps before riding safely again.
Step 3: Degrease Chain Links Thoroughly
Degreasing removes the old lubricant and abrasive grit that make a chain noisy and accelerate drivetrain wear. Apply bike-specific degreaser, then slowly back-pedal to carry it across every link, pin, and roller. For routine cleaning, loosely hold a degreaser-soaked rag around the lower chain run; keep fingers clear of chainrings and jockey wheels.
For heavy buildup, use a chain-cleaning device, such as Pedro’s Chain Pig II, filled with degreaser. Confirm its brushes are intact: shed bristles can contaminate the drivetrain.
Rinse away all degreaser with clean water using a gentle, wide hose spray or a sponge and bucket. Don’t blast water into bearings. Wipe the chain dry with a clean rag, then let it air-dry, about 10 minutes in sun, before fresh lubricant contacts metal.
Step 4: Drip Lube on Each Roller
After the chain is completely dry, backpedal slowly and place one small drop of bike-specific chain lube directly on each roller as it passes.
Work from the chain’s lower run near the derailleur, holding the nozzle above rollers beside the jockey wheels. This prevents missed drops and splatter onto brake components. Keep fingers, gloves, clothing, and bottle clear of chainrings and pulleys. Turn the crank backward for roughly four pedal revolutions, ensuring every link receives one drop.
Don’t flood the plates or use aerosol lubricant. Once the chain is treated, backpedal another four to five turns. This draws lubricant into roller-and-pin interfaces, where it reduces friction and noise. Follow the product maker’s stated settling or curing time before any riding, especially with wax formulas.
Step 5: Wipe Excess Lube From Plates
With a clean, lint-free rag wrapped lightly around the lower run of the chain, backpedal the crank four to five full rotations to remove excess lubricant from the outer plates. Keep your fingers clear of the chainrings, cassette, and derailleur pulleys while you turn the crank. Use gentle, even pressure; don’t clamp the rag so tightly that it snags or pulls the chain sideways.
Replace the rag with a fresh section for final passes, then repeat four to five rotations. This removes pooled oil and any dirt the lubricant has lifted instead of spreading it across the plates. The chain’s exterior should feel nearly dry, while lubricant remains inside the rollers and pins. Pedal through gears; squeaking indicates contamination. Check smooth shifting afterward carefully.
Step 6: Bag Oily Rags Safely
Once you’ve finished wiping the chain, place the oily rags in a sealed, fire-safe container or a metal can with a tight-fitting lid. Don’t leave saturated rags on the floor, in direct sunlight, or near heaters, sparks, or other ignition sources. Reserve a dedicated rag pile for chain-lube cleanup, so clean shop towels don’t become contaminated.
If a rag holds substantial oil, spread it flat in a well-ventilated location and let it dry before disposal. Then follow local household-hazardous-waste or recycling instructions. Until collection, keep the closed container cool and away from heat. Never toss loose, oil-soaked rags into ordinary dry trash: oil can leak, contaminate other waste, and increase fire risk. Label the container clearly and keep it away from children and pets.
Listen for Chain Noise
Listen closely as you slowly spin the pedals: squeaks, chirps, or a gritty rasp usually mean the chain’s lubricant has broken down or trapped contamination. Watch the drivetrain as you turn the cranks by hand, keeping fingers clear of chainrings, cogs, and rear jockey wheels. Pinpoint whether the sound occurs where the chain bends around the jockey wheels or along the outer links.
Clean and dry the chain before adding fresh lubricant. Apply about one drop to each link’s roller, rotate the pedals several times, then wipe the outer plates nearly dry. Excess lube collects grit and can restore the noise.
After wet rides, inspect and listen again; even durable wet lube can become contaminated quickly. A properly serviced chain should run almost silently when you backpedal, providing a clear sound check.
Skipping Under Load: Replace Chain
Persistent skipping when you pedal hard signals a problem that fresh lubricant can’t fix: the chain may be worn beyond its ability to mesh correctly with the cassette and chainrings.
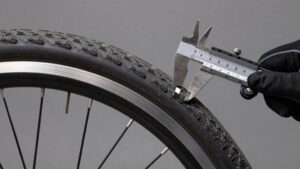
Stop riding until you’ve inspected it. Use a chain-wear gauge: if its prongs rest atop the links, the chain remains usable; if they drop into the gaps, replace it. Don’t test skipping near traffic or while standing; a sudden loss of drive can destabilize you.
| Check | Action |
|---|---|
| Gauge drops | Replace |
| Gauge rests | Inspect alignment |
| Heavy skip | Stop riding |
A worn chain changes pitch, so added lube cannot restore engagement. Replace it to limit cassette and chainring damage. Then verify derailleur adjustment and shift under load. Clean and lubricate the new chain to prevent wear.
Reapply After Rainy Rides
After a rainy ride, rinse off heavy grit, dry the chain for about 10 minutes, and wipe it with a clean rag before applying fresh wet lube. Rain strips lubricant, raising friction and causing noise, so don’t wait for your normal interval. Keep lube off brake surfaces. Backpedal and place one small drop on each link’s roller.
Turn the cranks several revolutions to distribute the lubricant, then wipe the outer plates nearly dry. Wet lube resists water and lasts longer than dry formulas, but it collects dirt quickly in wet conditions. Inspect the drivetrain after each ride. If it squeaks or the chain turns black with grime, clean and relube promptly, often every 100 to 200 miles, depending on conditions. Dispose of oily rags safely.
Conclusion
By choosing the right lube, cleaning each link, and applying it sparingly, you’ll keep your drivetrain quiet, efficient, and protected. Secure the bike before working, keep solvents away from ignition sources, and seal oily rags in a suitable container.
After riding, listen for noise, inspect for skipping, and relubricate after wet conditions. If the chain slips under load despite correct lubrication, measure wear and replace it before it damages the cassette and chainrings further prematurely.