Rear Derailleur Shifting Troubleshooting
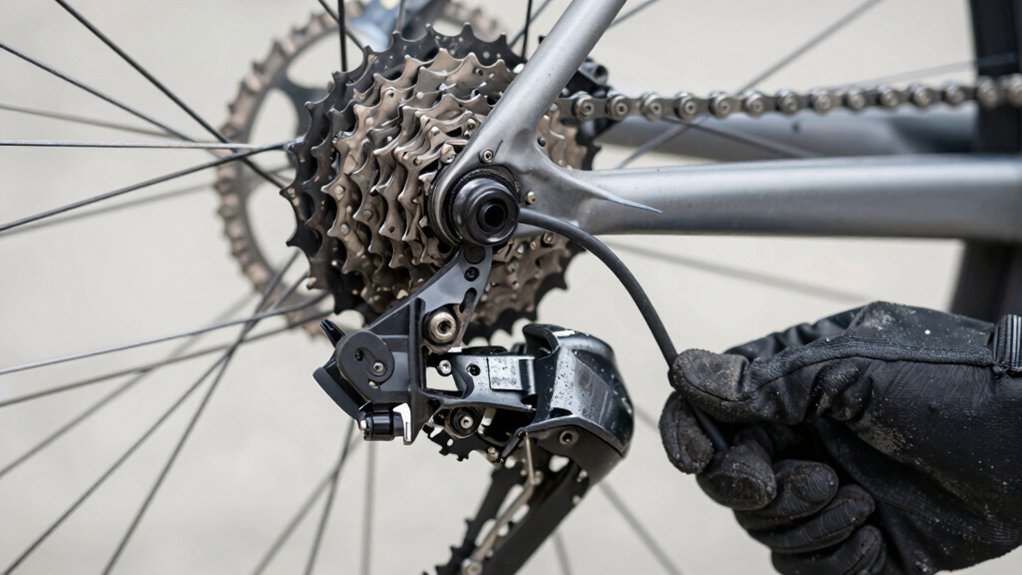
If your rear derailleur’s acting up, first confirm the cassette range matches the derailleur and chainring. Then check hanger alignment and cable tension. Measure the upper jockey-to-largest-sprocket gap (typically ~5–6 mm) and set the B-screw so the pulley clears the biggest cog under light pedal load.
Inspect pulley wear, lateral play, and chainwrap capacity; adjust chain length if needed. Test shifts under load across the full cassette to verify smooth tracking. Continue on for setup tips and diagnostics.
Quick Overview
- Check hanger alignment first: a bent hanger causes mis-tracking, noisy shifts, and inconsistent indexing.
- Verify cable tension and housing condition. Friction or slack creates slow, skipping, or delayed shifts.
- Set limit screws so the derailleur cannot overshift off the cassette on both high and low ends.
- Adjust B-screw to achieve the manufacturer’s pulley-to-largest-cog gap (commonly ~5–6 mm) for clean big-cog shifts.
- Inspect chain length, cassette range, and pulley wear. Wrong chain length or worn pulleys cause jumping and poor engagement.
Cassette Cog Range Chart
Wondering which cassette range suits your riding? You’ll pick based on terrain and gearing compatibility: road favors tight 11-28/11-34T for crisp steps. Gravel trades spacing for range (11-40T, 11-44T); MTB uses 10-52T for maximum low gears. Use the % range and tooth steps to judge jumps and chainwrap needs.
| Bike Type | Typical Cogs | % Range |
|---|---|---|
| Road | 11-28T/11-34T | 255–309% |
| Gravel | 11-36T/10-44T | 309–440% |
| MTB | 10-52T | 418–520% |
Match cassette range to derailleur and chainring. Verify max cog, hanger straightness, and chain length for reliable shifts and optimal gearing compatibility.
Max Sprocket + B-Screw Gap
How close should the upper jockey pulley sit to the largest sprocket? You’ll set the B-screw so the pulley clears the max sprocket by the recommended gap (about 5–6mm on many derailleurs) to ensure consistent shifting. Check compatibility: some cassettes or long-cage derailleurs need larger gaps.
Visually inspect the gap with the wheel loaded. Rotate the cassette to the tallest tooth and observe the pulley position. Adjust the B-screw incrementally while testing shift into the largest sprocket under light pedal load; listen for rubbing or skipping.
Watch for maintenance pitfalls: bent hanger, worn pulleys, or wrong cage length that mimic B-screw issues. This ties into shifting fundamentals: proper gap prevents derailleur overload, reduces chain rub, and promotes reliable shifts.
Limit Pulley-To-Cassette Clearance
Check the gap between the upper (limit) pulley and the cassette teeth to ensure the pulley tracks cleanly without contacting the cogs. Measure the clearance with a caliper or a stiff strip. Aim for the manufacturer’s recommended distance and adjust the B‑screw to fine‑tune pulley position.
Inspect pulley wear and bearings. Then test shifting under load to confirm smooth, accurate engagement across the cassette.
Check Pulley To Cassette
Why does the top (limit) pulley need a consistent gap from the cassette? You need that cassette clearance because pulley misalignment alters chain path, causing skips, rub or inability to engage cogs cleanly.
Check visually with the wheel off or by turning pedals slowly: the upper pulley should sit directly in line with the selected cog, maintaining a small, consistent lateral gap to avoid contact.
If the pulley sits too close, adjust the low/high limits and correct hanger alignment. If it’s too far, check cable tension and indexing first. Inspect pulley wear, sideplay in pivots, and mounting bolts. Tighten or replace components as needed. Aim for repeatable alignment across the gear range before moving to precise distance measurement.
Measure Clearance Distance
Want a repeatable way to set the gap between the derailleur’s upper pulley and the cassette? Measure with the wheel in the frame, chain on a middle cog, and the derailleur relaxed. Use a caliper or feeler gauge to record distance from the upper pulley tooth tip to the tallest cassette tooth at perpendicular contact.
Typical targets sit around 5–6 mm; however, confirm spec for your derailleur. The exact value avoids misdiagnosing shifting as an irrelevant topic when it’s a clearance issue.
Repeat measurement after shifting through the cassette to ensure consistent geometry. Document the reading; it’s a reference if you swap cassettes or hangers. Don’t confuse this measurement with the unrelated concept of B-screw torque or limit screw positions.
Adjust B-Screw Position
Now that you’ve measured the pulley-to-cassette gap, set the B-screw to control that gap under load: position the wheel and chain on the largest cog. Then turn the B-screw to move the upper pulley closer or farther from the cassette until you hit the manufacturer’s target, which is commonly 5–6 mm, while ensuring the pulley teeth don’t contact the tallest cog.
With the bike supported, pedal slowly and watch the gap. Tighten the B-screw clockwise to increase clearance; loosen counterclockwise to reduce it. Small changes matter. Don’t confuse this with unrelated topic adjustments like limit screws or shifter indexing.
Confirm smooth shifts across the big cog; check gear spacing alignment and ignore common maintenance myths that recommend excessive clearance. Recheck after a test ride and fine-tune if needed.
Inspect Pulley Wear
How close is your upper (limit) pulley to the largest cog? Measure with the wheel mounted and B-screw set. You want a clear gap so the chain tracks cleanly. If the pulley sits too close or rubs, inspect for pulley wear: rounded teeth, lateral play, or sticky bearings reduce clearance and cause chain rub or jump.
Rotate the pulley by hand; roughness indicates replacement. Also check for derailleur misalignment: a bent hanger or worn parallelogram shifts the cage laterally and narrows the pulley-to-cassette gap. Correct hanger alignment before replacing pulleys.
When you fit new pulleys, confirm the low limit screw and B-screw restore the specified 5–6 mm guide-to-largest-cog distance. Test shifts on the stand for consistent, quiet indexing.
Test Shifting Under Load
Having checked pulley wear and set the B-screw, test shifting under load to confirm the guide pulley clears the largest cog while the drivetrain is under pedaling forces. Ride or use a trainer, apply steady torque in the big ring and smallest cog. Then shift progressively to the largest cog while maintaining load. Watch for any contact, hesitation, or chain climb; small rubs under load indicate insufficient pulley-to-cassette clearance.
Adjust the B-screw or low limit screw in small increments and repeat reliability testing until shifts are clean under realistic pedaling and with road grit simulated (dirty chain/housing) to ensure real-world performance. Record results and recheck after a short ride. Contaminants and stretched cable can change behavior.
Frequently Asked Questions
Why Does My Chain Skip Under Load When Pedaling Hard?
Because chain tension drops under load, your chain skips when the drivetrain can’t hold the gear. You’ll check clutch derailleur engagement, worn chain/cassette teeth, and stretched chain length.
Also, inspect pulley wear, loose hanger, or loose chainring/crank bolts. Tighten or replace the clutch if it’s not holding; replace worn parts, straighten the hanger, and set proper chain tension and B-screw gap to prevent skipping under hard pedaling.
Why Does Shifting Get Worse After a Long Ride in Rain?
Moisture, grit and stretched or fouled cables make shifting degrade after a long rainy ride. You’ll get increased friction, corroded housings, sticky pivots and muddy pulleys; plus possible hanger flex.
For discussion ideas, inspect and straighten the hanger. Clean/lube chain, pulley bearings and pivots; replace or re-lube cables and housing, and check limit/B-screw settings.
Post ride maintenance like drying, degreasing and relubricating prevents repeat deterioration.
Can Worn Chainrings Cause Rear Shifting Problems?
Yes, worn chainrings can cause rear shifting problems. If your chain wear has stretched rollers, they’ll ride poorly on worn chainring teeth, causing skip under load and inconsistent chain tension through shifts. That irregular engagement can make the chain jump cogs, hesitate, or skip during index shifts.
Inspect chainrings for hooked teeth. Measure chain stretch, and replace worn rings and chain together to restore smooth, accurate rear shifting.
How Often Should I Replace Derailleur Cables and Housing?
You should replace derailleur cables and housing every 6–12 months for frequent riders or every 12–24 months for casual use: that’s your replacement cadence. Regular replacement improves shift precision and prevents sticky, delayed indexing; maintenance impact is high.
Inspect cables during service: replace sooner if frayed, rusty, gummy, or if shifting feels sluggish. When you change cables, inspect housings, lubricate trailside if needed, and confirm smooth routing and proper tension.
Why Does the Derailleur Make Noise but Still Shift?
Because noise doesn’t always mean failed shifting, you’re hearing friction or misalignment while the derailleur still completes gear changes. Noise feedback often comes from dirty drivetrain, sticky cable, worn pulleys, or a slightly bent hanger.
Start with tension adjustment and cleaning: check barrel adjuster, cable smoothness, B-screw gap, and pulley condition. Replace gummed housing or worn parts, straighten the hanger, then fine-tune tension for quiet, crisp shifts.
Conclusion
You’ve now checked cassette range, measured the max sprocket gap, and verified pulley-to-cassette clearance so the derailleur can track correctly. Adjust the B-screw to set the distance. Inspect jockey pulleys for wear or play, and confirm limit screws are set.
Re-test shifting under realistic load and make fine cable tension tweaks if shifts are slow or noisy. Repeat the clearance and wear checks periodically to keep shifting precise and prevent drivetrain damage.
Related reading: How to Clean a Bike Drivetrain Properly — a closer look at this topic.