Braking in Rain on a Road Bike Tips
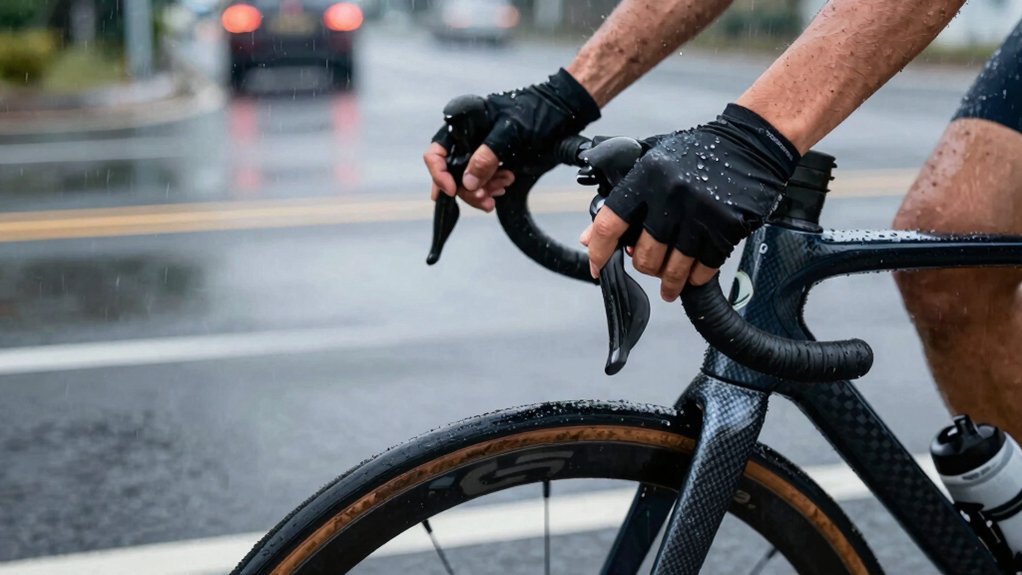
You should brake earlier and more gently in the wet because water cuts rim and tire friction by roughly half and can add several meters to stopping distance.
Shift your weight back, modulate with short, light squeezes, and use a little drag-braking before corners to clear water.
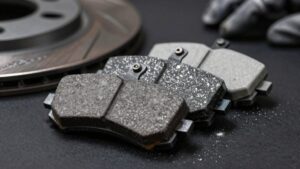
Check pads for gritty wear and replace if the compound is thin.
Lower tire pressure 10–20% for more contact patch, but do it in small steps.
Keep going, and you’ll find detailed checks and test routines.
Quick Overview
- Expect roughly 28% less wet braking friction; allow much longer stopping distances and brake earlier than in dry conditions.
- Modulate brakes smoothly and progressively to avoid lockup. Use light drag-braking before corners to shed water.
- Check and replace pads when grooves vanish or backing metal shows. Clean pads and rims after gritty wet rides.
- Lower tire pressure modestly (≈5–10 psi, up to 10–20% from dry) to increase contact patch and improve wet traction.
- Test wet traction in a safe area. Record pressures and feel, and adjust incrementally to balance grip and handling.
Wet-Weather Stopping Distances
How much farther will you need to stop when the road’s wet? You’ll need more than double the space: a 24 km/h stop that’s 4.57 m in dry can require ~10.28 m in wet weather. That’s a stark change in stopping distance you can’t ignore.
| Feeling | Fact | Risk |
|---|---|---|
| Unease | Friction drops to ~28% | Longer stops |
| Urgency | Water delays pad engagement | Skid chance |
Anticipate variability: test-to-test swings reach ±2.0 m. Brake earlier, modulate gently, and lower speed to match reduced traction.
Use light drag-braking before corners to wipe water. These simple, disciplined adjustments cut risk and give you predictable stopping distance in the rain.
Brake Pad Wear Checklist
Longer wet stopping distances make pad condition a safety factor you can’t ignore, so check your brake pads regularly to keep braking predictable in rain. You’ll inspect for uneven wear, embedded grit, and remaining compound depth. Brake pad wear reduces wet performance and can change pad to rim contact geometry. Replace pads when grooves disappear or metal backing appears. Clean pads and rims with alcohol after gritty rides to restore bite.
- Measure remaining compound: replace before less than 1.5 mm.
- Check pad to rim contact: ensure full, even engagement across the surface.
- Look for contamination or glazing: sand or swap pads if soaked in oil.
Do these checks routinely so your braking stays reliable in wet conditions.
Tire Pressure and Grip Limits
Check your tire pressure before wet rides because the right PSI balances rolling efficiency with a bigger contact patch for grip. You’ll want to run slightly lower pressures than dry-road norms, especially with wider or tubeless tires. Test traction in a safe area to learn your bike’s limits.
Don’t ignore sidewall recommendations. Overinflation raises skid risk; underinflation can make handling vague or pinch-flat-prone.
Optimal Tire Pressure
Why does tire pressure matter so much in the wet? You need the optimal pressure to maximize contact patch without inviting pinch flats or sluggish handling. Lowering pressure slightly increases traction by expanding the rubber on the road; this helps you stay within grip limits when braking or cornering.
Don’t drop pressure so far that steering feels vague or rolling resistance balloons. Aim for a modest reduction from your dry setting: typically 10–20% depending on tire width and load. If you run tubeless, you can go lower safely; with tubes, be more conservative.
Check pressures before every wet ride and adjust by small increments during testing. Prioritize predictable feel and consistent feedback over marginal gains in grip.
Grip Vs. Pressure
How low should you go with tire pressure to gain grip without compromising control? You’ll balance grip vs. pressure by lowering pressure enough to increase contact patch but not so much that handling becomes vague or pinch flats rise.
Start by dropping 5–10 psi from your usual road setting; notice improved wet traction and corner confidence. Tubeless setups let you go lower safely; with tubes, be conservative.
Wider tires allow lower pressures for the same grip, so consider a wider tire when you know rain’s likely. Remember that beyond a point, softer tires won’t buy more grip: just slower response.
Save formal wet traction testing for controlled conditions. On the road, make incremental changes and ride cautiously until you trust the feeling.
Wet Traction Testing
Lowering pressure a bit improved corner feel, so now you need a simple, repeatable way to find the wet grip limit for your setup.
Pick a quiet, flat wet section and a consistent test speed. Ride the line, progressively brake straight up until you feel slip or hear tire breakaway. Note pressure, speed, and pad modulation needed to avoid skid.
Repeat several times after small pressure or tire swap changes. Use these controlled trials to map rainy traction versus pressure for your tires and rims. You’ll build confidence in the margin before cornering or hard stops.
Record conditions: temperature, road surface, and wear so your wet adhesion reference stays reliable. Never test at traffic speed or on unfamiliar surfaces.
Pressure Adjustment Tips
Want a simple way to dial in tire pressure for better wet grip? You’ll gain traction by lowering pressure carefully: reduce PSI in small steps and test in safe conditions. Tubeless setups let you go lower without pinch flats; wider tires also help by increasing the contact patch.
Track grip limits: stop short, feather brakes, and note when the tire starts to slip. Use pressure adjustment as part of pre-ride checks, not a guess during a downpour. Keep a short log of two word discussion ideas like “wet grip” and “corner feel” to compare settings.
Don’t drop pressure so much that handling feels vague. Aim for confident, controlled braking and repeatable results.
Sidewall Pressure Effects
Ever wondered why small changes in tire pressure can feel huge on wet roads? You’ll notice that sidewall pressure alters how the tire deforms, changing the contact patch and lateral grip when braking. Lower pressure lets the tyre conform to surface texture and shed water, improving traction but increasing rolling resistance and pinch-puncture risk.
Higher pressure reduces deformation and contact area; this makes hydroplaning and skids more likely under hard braking. Match pressure to tire width and rider weight. Wider tires allow lower pressures safely. Also, remember rim thickness affects how the tire mounts and sidewall behavior: narrow rims stiffen the sidewall, raising effective pressure.
Test adjustments incrementally and prioritize predictable bite over marginal speed gains.
Frequently Asked Questions
How Does Fender Choice Affect Brake Performance in Heavy Rain?
Fender choice directly impacts brake performance: full-coverage fenders reduce spray and keep rims or rotors drier, so your brakes engage faster and need less wiping. Short or no fenders increase rim wetting; this forces you to drag brakes longer and accept reduced stopping power.
Choose close-fitting, long-coverage fenders for best fender effects. Pair them with regular pad/rotor cleaning and inspection to maintain reliable Braking in heavy rain.
Can I Use Disc Brake Adapters With Winter Gloves on Levers?
Yes, you can use disc brake adapters with winter gloves on levers, but check disc brake compatibility and lever reach first. Try adapters that move calipers or levers outward so you don’t overstretch with bulky winter gloves.
Test modulation and pad clearance before riding; you’ll want full braking power without accidentally rubbing rotors. If reach isn’t enough, swap to ergonomic levers or thinner liners to regain precise control.
Are Bike Computer Speed Sensors Affected by Wet Braking Events?
Yes, wet braking can sometimes cause sensor interference, but it is uncommon. You will mostly see brief speed-drop spikes when water sprays the magnet or sensor, or when wheel slip alters cadence. Keep magnets tight, sensors clean and dry, and mount them per manufacturer specs to minimize issues.
If interference persists, check the battery, re-pair the device, and consider a magnetless sensor or waterproofed unit to improve reliability in wet conditions.
How Should I Store Wet-Weather Brake Pads Between Rides?
Store wet-weather brake pads dry and ventilated between rides: Remove or open wheel/tire area, pat pads with a clean cloth, then let them air-dry away from direct heat.
Keep them in a breathable container or hung where moisture won’t linger, and avoid sealed plastic bags which trap dampness. Inspect for glazing or contamination before reinstalling. Clean with rubbing alcohol if needed, and replace pads showing wear or metal debris.
Do Hand Positions on Drops Change Braking Effectiveness in Rain?
Yes, your hand positions on drops change braking effectiveness in rain. You’ll get better brake modulation from hoods or shallow drops where you can apply steady pressure. Extreme drops reduce leverage and feel.
Pair this with proper fender choice, disc brake adapters, winter gloves, and bike computer sensors for consistent feedback. Store brake pads dry after rides, practice wet braking, and follow wet weather tips to maintain control and confidence.
Conclusion
When you ride in the rain, you need to accept longer stopping distances. Check brake pads and adjust tire pressure to keep control. Regularly inspect pads for glazing or contamination, and swap them when stopping feels sluggish.
Lowering tire pressure a few psi improves grip; don’t overdo it to avoid pinch flats while keeping sidewalls supported. Test traction in a safe area before pushing limits. Stay cautious, make small adjustments, and prioritize predictable, controlled braking.
Related: Disc Brakes Vs Rim Brakes Explained