How to Set up Tubeless Tires Step by Step
You’ll fit a tubeless valve, tape the rim bed, and snug the valve nut by hand (or torque per manufacturer for bikes with metal stems/TPMS).
Then, mount the tire, add sealant through a removed core, and inflate to seat the beads with a compressor or pump.
Use tape sized to your internal rim width; wider for hookless, narrower for hooked.
Add sealant by tire volume guidelines.
Keep going and you’ll get detailed tips for flawless setup.
Quick Overview
- Measure rim internal width and choose tubeless tape width that centers over the rim bed without interfering with bead seats.
- Clean rim bed, apply tape smoothly with 6–12 mm valve overlap, press firmly, and puncture a valve hole.
- Install the correct valve stem. Hand-snug the nut (or torque per manufacturer) and ensure core limits for TPMS.
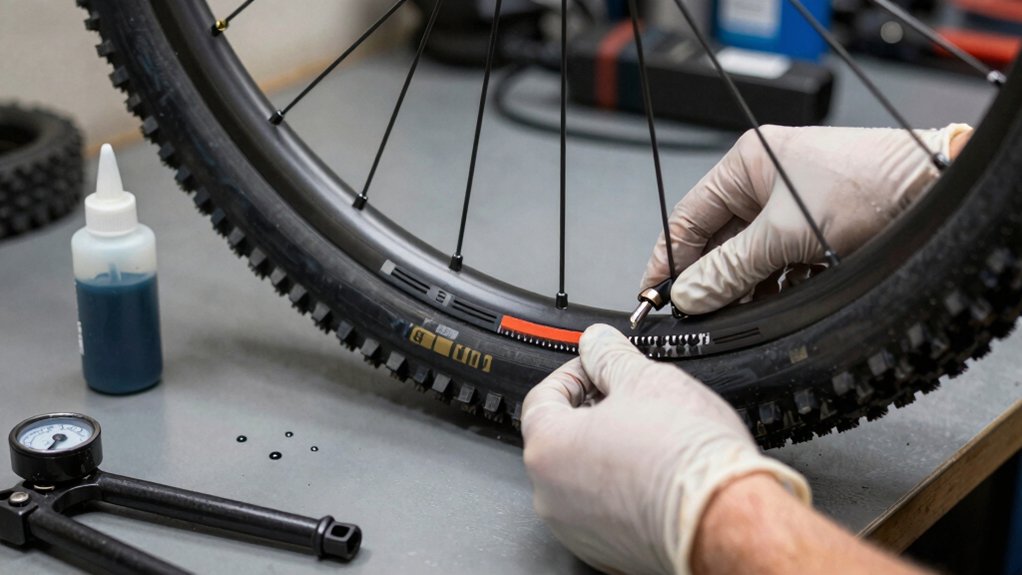
- Mount the tire, add sealant via removed valve core or valve hole using a syringe, then reseat the valve core.
- Inflate to seat beads. Check for leaks while rotating or rolling tire, and add sealant or re-tap as needed.
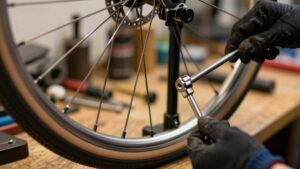
Valve Stem Torque Specs
Wondering how tight to set your tubeless valve? You’ll use different valve stem torque targets depending on vehicle and installation method. For bicycle tubeless, hand-tighten only: push the valve through the tape, seat the rubber bushing, and snug the nut by hand so the gasket seals; no wrench is needed.
Motorcycles need controlled torque (7–10 Nm) to protect the O-ring. Heavy truck/bus valves demand calibrated torque wrenches (80–125 in-lbs) on aluminum wheels. TPMS cores limit to ~4 in-lbs internally. Over-tightening risks cracking stems, O-ring leaks, or rim damage. Match valve series to rim hole size and follow the specified installation method to avoid failures.
| Application | Recommended action |
|---|---|
| Bicycle | Hand-tighten only |
| Motorcycle/Truck | Use specified torque tools |
Tire Sealant Volume Guidelines
After you’ve set and snugged the valve by hand, the next step is choosing the right amount of sealant for your wheel and riding conditions. You’ll base tire sealant volume on rim size, tire volume, and terrain. Too little won’t seal punctures; too much adds weight and sloshes. As a guideline, consider:
- Road/ gravel 25–35mm: 30–45ml — light, minimizes weight.
- MTB 2.0–2.4″ tires: 60–90ml — balances puncture protection and spin weight.
- Plus/ fat tires: 120–180ml — more surface to cover and larger puncture risk.
Use a syringe for accurate dosing. Remove the valve core for direct fill. Then rotate the wheel to coat the interior. These Tubeless Setup tips keep sealant efficient without excess.
Tubeless Rim Tape Width
Measure your rim bed width first so you can pick tape that centers over the channel and seals the bead well. Match tape width to your rim type: narrower for hooked rims, wider for hookless. Always allow a couple inches of overlap past the valve hole for a reliable seal.
Press the tape firmly into the rim center and smooth out bubbles to prevent leaks.
Measure Rim Bed Width
How wide is your rim bed, and why does it matter for tubeless tape? Measure rim width across the inner bed (mm) with calipers or a ruler. That rim width determines how much tape covers the bead seat and spoke holes for a reliable tubeless fit. You want tape that spans the central well plus flanges without overhanging into bead seats.
Record the internal rim width. Then choose tape that centers in the well and provides full coverage of spoke holes. If tape is too narrow you risk leaks; too wide and it interferes with seating. Measure each rim individually—left and right can differ. Accurate measurement ensures the tape you buy or cut gives a secure, long-lasting tubeless seal.
Match Tape To Rim
Choose tape width that centers over your rim’s internal bed and fully covers the spoke holes without creeping onto the bead seat. Use your measured internal rim width to pick tape that spans the central well plus a few millimeters to each flange. You’ll avoid leaks and uneven seating by matching tape width to rim geometry. Measure twice, then select tape that sits flush in the depression and doesn’t overlap the bead shelf.
Apply tape tautly, press into the well, and smooth out bubbles. Leave a small overlap by the valve, then cut cleanly. Use high-quality tubeless-specific tape for reliable adhesion and air barrier. Remember the two word idea: consistent coverage and correct placement prevent sealant loss and flats.
Width For Hooked Rims
Wondering which tape width works best for hooked rims? Use tape that covers the full rim bed and extends slightly over the inner edges. Typically, 19–23 mm (internal) tape fits most hooked rim width profiles. You want tape wide enough to fully cover spoke holes and create a smooth sealing surface without bunching in the drop channel.
Match tape width to your rim’s internal measurement so the bead seats correctly and you don’t interfere with hook flange seating. Proper width improves sealant coverage by preventing pooled gaps and directing sealant to bead-seat interfaces where leaks start.
Apply tape tautly, overlap a few inches past the valve, press out bubbles, and trim cleanly. If unsure, choose the next wider size, not narrower.
Width For Hookless Rims
If your rims are hookless rather than hooked, you’ll want tubeless tape that fully covers the rim bed and reaches close to the inner edges without bunching in the channel. For most hookless road and gravel rims, that means tape in the 23–30 mm internal-width range, matched to the rim’s internal measurement.
Choose tape equal to or slightly narrower than the published rim width to avoid overlap onto the bead seat while ensuring full coverage of the rim bed. Confirm tubeless compatibility for both rim and tape; some tapes are thicker or stretch differently and suit certain rim widths better. Measure your rim width, pick tape that matches that number, and apply it smoothly so the seal is continuous without gaps.
Overlap And Sealing
How wide should your tubeless tape overlap the valve and rim bed? You want tape that covers the rim bed fully and overlaps the valve hole by about 6–12 mm on each side so the valve base sits on tape, not an exposed edge.
Start tape one spoke hole above the valve. Keep rim tape alignment centered in the well, and stretch it taut while pressing to avoid bubbles. Overlap a few inches past the valve hole for redundancy, then trim cleanly. That overlap and firm pressing is crucial for sealing during initial tubeless tire trials and when you add sealant.
Check the valve seating and spin the wheel to confirm no leaks before final inflation and tubeless testing.
Frequently Asked Questions
Can I Use Regular Rim Tape for Tubeless Setups?
You can, but you shouldn’t. Regular rim tape often isn’t airtight or thick enough for tubeless setups, which increases tubeless risks like slow leaks or sudden failure.
Use tubeless-specific tape or rim strips rated for pressure and puncture resistance. If you must use regular tape temporarily, double-layer it and check the seal meticulously. Replace it with proper tubeless tape ASAP, and monitor pressure and sealant performance closely.
How Often Should I Replace Tubeless Sealant?
You should refresh tubeless sealant every 2–6 months depending on climate and mileage. In hot, dry conditions or high-mileage use, check and replace nearer 2 months. In cool, low-use situations, you can wait up to 6 months.
Perform a quick “squeeze test” or remove valve core to inspect. If sealant’s clumpy or gone, replace. Keep notes for two word discussion idea1 and two word discussion idea2 to track frequency.
Can I Convert Non-Tubeless Tires to Tubeless?
Yes, you can often convert convertible tires to tubeless, but you’ll need tubeless-ready rims or reliable tubeless adapters.
Clean and tape the rim well, install a tubeless valve, mount the tire carefully, add sealant, then seat and inflate. Some convertible tires seal easily; others leak and need tighter beads or different sealant.
Test thoroughly before riding. Consider new tubeless-specific tires for best reliability and safety.
What Sealant Works Best in Cold Climates?
You want a sealant that stays fluid and seals fast in cold climates. Choose a latex-based, low-freeze-point formula labeled “cold-weather” or “all-temperature.” Brands like Stans, Orange Seal Cold Weather, and Muc-Off Hydrodynamic perform well.
Use the recommended volume, keep tires warm while seating, and shake sealant before adding. Check and top up more often in winter, as viscosity and seal time slow with lower temperatures.
How Do I Fix a Burp or Slow Leak Mid-Ride?
If you get a burp or slow leak mid-ride, stop. Lower tire to ease bead back into rim, and re-seat by pushing the bead into the rim well.
For a burst fix, remove valve core, add plug or a few teaspoonfuls of sealant, then reinstall core and blast air to reseat.
For slow leak, add sealant through valve core, spin to distribute, re-inflate to rideable pressure, and monitor.
Conclusion
You’ve now got the key tubeless details: Torque your valve stem to the rim spec, use sealant by volume based on tire size, and match rim tape width to measured rim bed.
For hooked rims, pick tape that covers the bead hook; for hookless, use full-width tape per manufacturer guidance. Overlap tape and press-seal beads carefully to ensure airtightness. Follow specs precisely, check for leaks, and ride confidently once pressure holds steady.
Related: What to Carry in a Basic