How to Set Up a Bike Repair Stand the Right Way
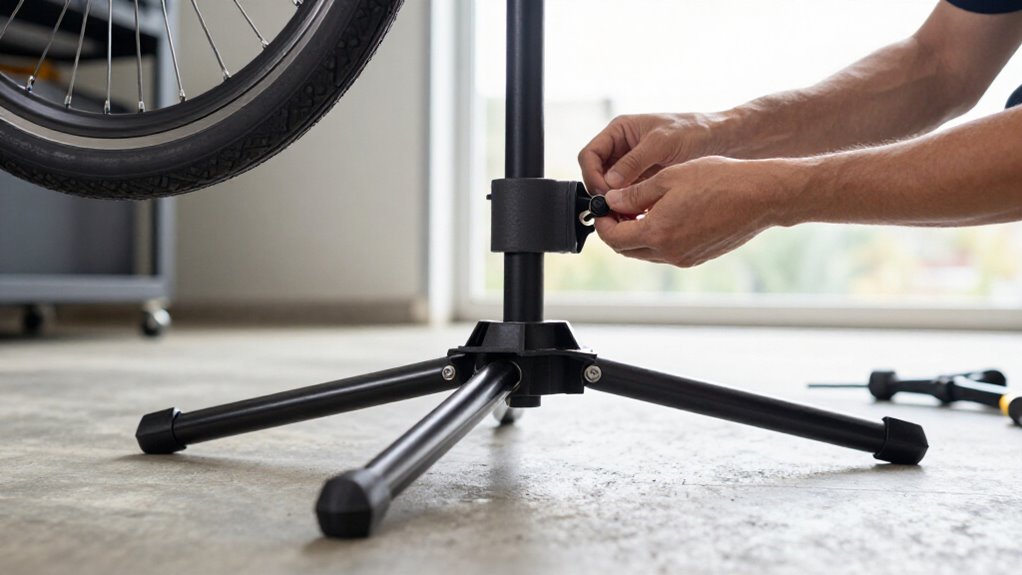
Set your repair stand on a level, non-slip surface, fully deploy and lock its legs, and clear a 3-foot work zone.
Press opposing base corners to confirm it doesn’t rock.
Raise the clamp to waist height, then secure padded jaws around a clean, undamaged seatpost, never a carbon frame tube.
Tighten gradually, keeping the rear wheel free, and shake-test for movement.
Stow tools, wipe grease, and stop if the clamp slips.
Further setup details follow.
Stable Bike, Beginner, 10 Minutes
A stable setup starts with a wide, non-slip repair stand on a flat surface at least 6 in (15 cm) wider than its deployed footprint. Choose a clamp that grips firmly without crushing tubes. For carbon frames, use padded jaws on the seatpost only; don’t clamp frame tubes directly.
Mount the bike level, clamping its seatpost, or saddle rails where your stand permits. Leave the rear wheel free to rotate and rest the front wheel on a steady support or work surface. Before beginning, place essential supplies within arm’s reach.
Gently push the top tube for a shake test. Re-tighten the clamp until movement measures no more than 1–2 mm. Recheck the base and clamp before each task. Stop if it shifts at all.
Locate 5mm Hex Key
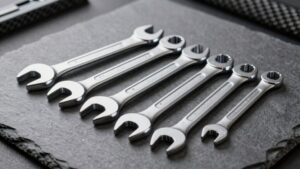
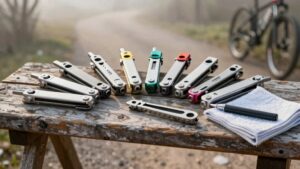
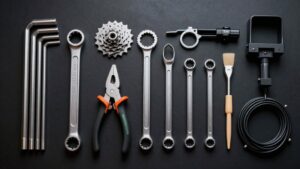
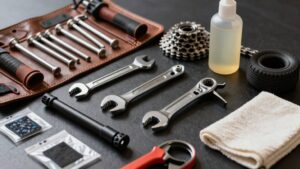
Start with your bike multi-tool, tool roll, toolbox, saddle or top-tube bag, and the repair stand’s tray or tool holder; most contain a 5 mm hex key. Find a 5 mm wrench or inspect your metric set. A stamped shaft is best; color codes need a legend.
Before handling any fastener, verify it:
- Test-fit it in a bottle-cage bolt; it must seat fully without wobble.
- Inspect tip for rounding or damage; replace it if compromised.
- Ensure folding joints stay tight and don’t flex under hand pressure.
- Set aside a torque wrench with 5 mm bit for final tightening to specified torque on each component.
Don’t force a fit. A wrong or worn key can round bolts, slip unexpectedly, and weaken clamping.
Step 1: Clear Floor, Protect Frame
With the 5 mm hex key ready, clear at least 1 m (3 ft) around the repair stand of cords, tools, and loose parts. This clear zone lets you move without tripping while rotating the bike or leaning into the drivetrain.
Set stand on level flooring, fully deploy legs, and confirm each foot contacts surface. Place a rubber mat under stand to create a no-slip zone and limit sliding during handlebar or drivetrain work.
Clamp a safe point, usually the seatpost, with wide padded jaws. Check pads are clean before tightening. Don’t clamp carbon tubes directly.
For carbon bikes, support it by its wheels or use a padded non-carbon contact method. It must stay stable when you loosen wheel nuts or press chain links.
Step 2: Raise Clamp to Waist
Raise the clamp until the bike’s seatpost or top tube sits roughly at waist height—about 90–110 cm (36–44 in) from the floor. This position reduces bending when you tighten bolts and helps keep your back neutral. Before setting the height lock, move the empty clamp through its vertical range.
Confirm you can reach the derailleur, chainrings, and brake calipers without leaning or reaching overhead. Keep the intended contact point near a strong seatpost or top-tube area, and choose a height that doesn’t twist the frame during work. Secure the height lock firmly, then gently rock the frame side to side at waist level to verify no downward slip occurs. Mark the column with tape once you find the correct setting for repeatable setup later.
Step 3: Tighten Clamp Around Seatpost
Position the padded clamp around a thick, uninterrupted section of the seatpost, away from the binder area, cutouts, or visible scratches. Make sure the jaws or hook rest soft padding only against the post, never carbon frame tubes or thin-walled surfaces.
Close the clamp gradually, checking after each small adjustment that the bike won’t slide or rotate. Use firm hand pressure, not force. If resistance rises sharply, stop; you could crush a lightweight aluminum post. Follow the seatpost or collar manufacturer’s torque limit and tighten only to that value; common guidance may be 4–8 Nm, while carbon posts often allow less.
After several minutes of stable work, gently shake the bike and inspect the grip. If it has settled, retighten the clamp slightly and recheck.
Step 4: Level the Bike Frame
Once the clamp holds the seatpost securely, level the frame before making alignment-sensitive adjustments. Set the stand on a flat, solid surface first. If the floor isn’t level, place thin wedges under the stand base rather than accepting a tilted setup. Adjust the clamp height and head angle until the top tube runs parallel to the floor.
Rest a 2–4-foot level gently on the top tube, then make small corrections until the bubble centers.
Tighten the clamp only enough to stop movement, especially on carbon or delicate bikes; use padded contact points. Check the level again after tightening, because uneven padding or excessive clamp force can shift the frame. Keep it within a few millimeters of level during precise derailleur and brake adjustment work.
Step 5: Spin Pedals, Check Clearance
With the bike secured and level, spin the pedals through several full revolutions and watch the crankset, chain, derailleur, and brake area for rubbing or contact with the stand. Pause at the 12, 3, 6, and 9 o’clock positions, inspecting the gaps around the chain, derailleur hanger, brake calipers, frame, and fork.
Keep at least a finger-width between every moving drivetrain part and stand hardware. Turn each wheel and confirm its tire, especially at the widest tread, clears the base, legs, and support straps. If the bike has suspension, compress it by hand and repeat the inspection. If pedaling binds or a crank approaches the stand, loosen the clamp, re-seat the bike with the crankset centered over the support points, secure it, repeat all checks.
Step 6: Stow Tools, Wipe Grease
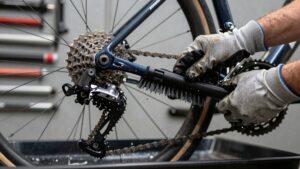
Methodically stow each tool in its labeled drawer or dedicated tote as soon as tightening is complete, keeping loose items out of the drivetrain and off greasy work surfaces. This prevents wrenches, bits, and fasteners from contaminating moving parts or becoming lost.
Next, use clean shop towels to remove excess grease and solvent from clamp pads, hooks, straps, and surfaces that contact the bike. Dry these areas thoroughly; residue can reduce gripping reliability, hinder quick-release adjustment, and trap grit that may scratch carbon frames.
Make one pass over the stand legs and base, particularly spots where you placed oily parts, to keep contaminants off the floor. When work is finished, collapse the stand or store it upright in a dry spot away from direct moisture.
Confirm Base Doesn’t Rock
Test the stand’s base before mounting a bike: place it on a hard, level surface and press lightly on opposing corners to confirm every foot sits firmly without wobble. Fully deploy the legs, then tighten their locks. For a wood or PVC base, check each joint with a carpenter’s square and tighten every fastener. Keep the expected load’s center of mass between the feet.
Next, press down at the top support where the bike will sit, then release. Continued motion means you must brace the base, add shims, or fit longer feet before use. On broad-base stands, verify both feet contact the floor together and the crossbeam doesn’t flex. Add rubber feet or grip pads on minor irregularities. For arms, anchor into solid framing.
Clamp Slips: Degrease Seatpost
If the seatpost slips, remove the bike from the stand before servicing it. Wipe the post with a clean rag. Degrease the post and seat-tube interior with isopropyl alcohol or bike-safe degreaser until no oily film remains. Let both surfaces dry completely for 5–10 minutes; residual solvent reduces friction.
| Check | Required Action |
|---|---|
| Surface | Remove oil and hardened residue |
| Hardware | Replace stripped, damaged, or cracked parts |
| Friction | Apply approved assembly paste |
Use a thin, even coat of carbon/metal assembly paste, or the paste your manufacturer specifies; don’t use grease. Inspect the clamp interface for contamination and wear. Reinstall the post, tighten the collar to its documented torque, often 5–8 N·m, and check it after a ride. If it rotates, stop riding and correct the fault.
Lubricate Clamp Threads Monthly
A clean, correctly tightened clamp also needs smooth threads to apply even holding force. At least monthly, open the clamp fully and inspect its threaded rod. Remove visible dust and dried grease with a clean rag or soft brush. Apply a thin coat of dry PTFE (Teflon) lubricant or light machine oil across the full thread length, then wipe away excess.
Cycle the clamp open and closed five to ten times. This distributes lubricant and lets you detect binding or uneven resistance before mounting a bike.
If you find grit, rust, or pitting, remove hardware when practical, degrease it, re-lubricate it, and inspect worn threads. Replace damaged parts. Don’t use thick grease: it traps dirt. Avoid penetrating solvents; they wash off, leaving threads under-lubricated.
Conclusion
With the base level and the clamp secured around the seatpost, you’ve created a stable, safe workspace for routine bike maintenance. Before each job, check that the stand doesn’t rock, the clamp holds firmly, and the frame is protected from contact.
Keep the floor clear, stow tools after use, and wipe away grease. If the bike slips, degrease the seatpost. Lubricate clamp threads monthly, so adjustments stay smooth, secure, and reliable through long-term, regular use.