How to Choose a Bike Tool Kit That Covers Every Fix
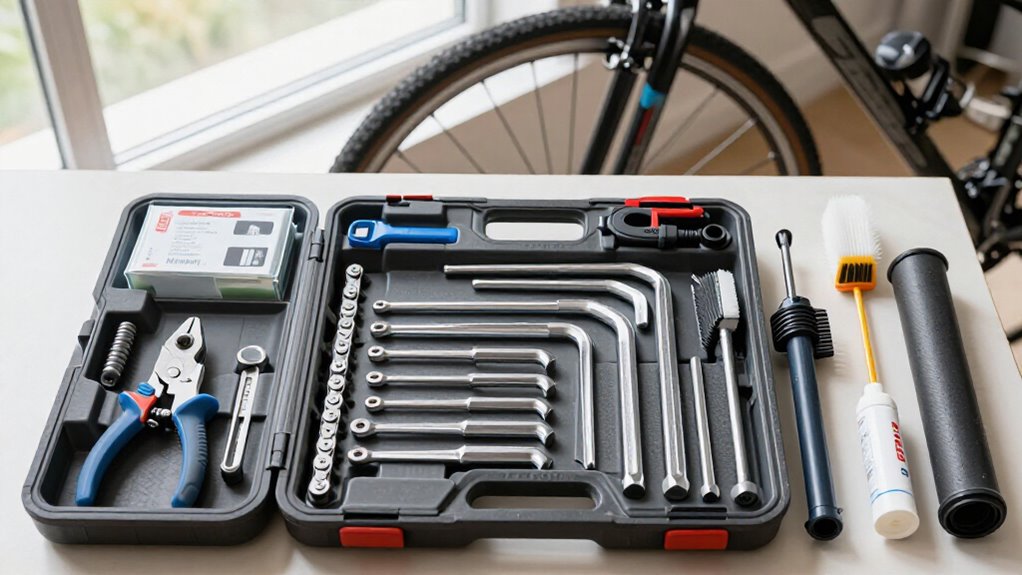
Choose a bike tool kit by matching it to your bike’s components and the repairs you actually perform.
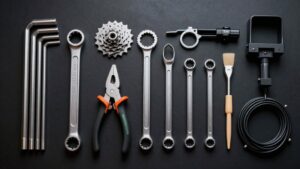
Start with precise 2, 3, 4, 5, and 6 mm hex keys, plus a T25 Torx key.
Confirm chain-speed, cassette, crank, and bottom-bracket compatibility.
Add a chain breaker, wear gauge, and correct spoke wrench.
Prefer durable replaceable bits and a torque wrench.
Compare kit inventories carefully; the details below help you properly fill remaining gaps with confidence.
4/5/6 Mm Hex Keys First
Start your bike tool kit with 4 mm, 5 mm, and 6 mm hex keys: these three sizes fit many brake, shifter, stem, seatpost, bottle-cage, and other component fasteners. Use them for routine adjustments and mounts, then add sizes only when your hardware requires them.
Choose precision-machined, unworn tips that fully seat in bolt sockets; a loose or rounded key can cam out, damage the head, and turn a simple adjustment into a removal problem. Longer arms provide useful leverage for stubborn fasteners, but apply force progressively and keep the key square to the bolt. For home use, buy individual L-keys or a set with broad coverage, including smaller sizes such as 1.5 mm. For rides, carry a compact multitool containing 4/5/6 mm keys.
Match Tools to Drivetrain Type
Match your tools to the exact drivetrain on your bike before buying a kit: chain speed, cassette interface, bottom bracket standard, and axle hardware all affect compatibility.
Identify whether you run an 11- or 12-speed chain and the freehub uses SRAM XD or another interface. A cassette tool may not engage an XD setup; Topeak Prepbox notes issues on SRAM XD 11- and 12-speed cassettes. Confirm that the chain breaker is rated for your chain speed; don’t assume a compact tool handles 12-speed chains. Pack a portable breaker for broken-link repairs when derailments damage chains.
Check fastener and removal standards. You need a 1.5 mm Allen key for adjustments, plus cassette and bottom-bracket adapters or an 8 mm Allen key. Verify fit before buying.
Include a T25 Torx Key
A T25 Torx key belongs in every bike tool kit because it fits the most common Torx fasteners on modern bikes, particularly six-bolt disc-rotor screws, many SRAM components, brake calipers, and some chainring or accessory mounts. Choose a hardened S2 or chromoly key with a crisp tip; loose bits cam-out and ruin bolt heads.
A compact multitool handles roadside adjustments, but don’t rely on it when rotor or caliper work needs leverage. Verify each fastener’s specification, then use a torque wrench for torque-critical fittings. Confirm your bike uses standard Torx, not Torx Plus. Clean and dry the key after wet rides to prevent corrosion.
| Location | Tool | Guidance |
|---|---|---|
| Rotor bolts | T25 | Confirm specified torque |
| Caliper mounts | T25 | Use L-key for removal |
| Small accessories | T10/T15 | Check component manual |
Prebuilt Kits Versus Individual Tools
A prebuilt kit gives you a cost-effective starting set, but you should confirm that its bits, chain tools, and component interfaces match your bike.
Individual tools cost more to assemble initially, yet they let you prioritize durable, precise tools and avoid unused duplicates. You can also start with a quality base kit and add specialized items, such as a T25 key, spoke wrench, or bottom-bracket tool, as your maintenance needs grow.
Comparing Cost And Value
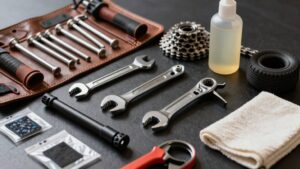
Prebuilt bike tool kits can deliver stronger value than piecemeal purchases when their contents match your bike’s standards and the repairs you’ll actually perform. A $400/€320 Topeak Prepbox brings 36 usable tools and a torque wrench, so its upfront price may undercut buying comparable pieces separately. Mid-priced options such as the $178/£150 Birzman Essential Tool Box deliver 13 labeled pieces for more than 20 build needs, limiting follow-up purchases.
Budget kits, including the roughly $120 Lezyne Port-A-Shop, cost less but can omit expensive specialty tools, raising your total later. Likewise, Pedro’s $150/£170 Starter Tool Kit can require extras such as a T25 wrench or bottom-bracket tool. Before comparing prices, verify cassette-tool engagement; Prepbox’s tool can miss SRAM XD 11/12-speed interfaces, forcing an additional purchase and eroding bundle savings.
Matching Tools To Needs
Value only holds when a kit’s contents match your bike, the repairs you expect to perform, and where you’ll perform them. Choose a prebuilt kit when you want broad home-workshop coverage quickly; Topeak’s Prepbox supplies 36 usable tools, while Birzman’s Essential Tool Box has more than 20. Build individually when your component standards or repair routine demand specific tools without unused extras.
Before buying, map each job to a tool. Confirm cassette and bottom-bracket interfaces, chain breaker, and needed Torx or 1.5mm Allen coverage.
Topeak includes a torque wrench, but its cassette tool can have engagement issues with SRAM XD 11/12-speed. PRO’s kit supports 12-speed cassette and chain work but omits Torx and 1.5mm. For rides, pack levers, a tube or patches, and pump.
Assessing Tool Quality
Tool quality shows up in fit, leverage, and compatibility—not in the number of pieces printed on the case. When comparing prebuilt kits, test whether each tool fits your bike’s actual standards: 11- or 12-speed chain and cassette interfaces, bottom-bracket adapters, and every required driver size, including 1.5mm Allen and Torx bits. A high tool count can’t offset missing essentials or poor engagement; some cassette tools struggle with SRAM XD 11-/12-speed, and even sharp cable cutters can cut unevenly.
Quality kits earn their value through long, precisely machined Allen keys, durable chain breakers, useful specialty tools, and reliable torque control. Individual tools let you select stronger cutters, exact adapters, and better-performing service tools, but require you to confirm coverage yourself. Inspect machining, action, and support.
Planning Future Upgrades
Once you’ve verified quality and present-day compatibility, plan for the standards your next upgrades will introduce. Choose a prebuilt kit only if its tools match your likely drivetrain, frame, and fasteners.
For 12-speed work, confirm chain-breaker sizing and cassette-tool engagement; some tools perform well generally but may not fully engage SRAM XD 11/12-speed cassettes. Check whether included adaptors fit your bottom bracket and cassette system. If you expect carbon parts or torque-sensitive components, a kit with a torque wrench can prevent costly under- or over-tightening.
Compare omissions against price: expensive kits may still lack a T25 Torx key, 1.5mm Allen key, or bottom-bracket tool. Buy individual tools when your upgrade path is specialized, since you’ll avoid duplicate tools and can select exact-fit, serviceable components.
Choose Kits by Repair Frequency
Match your kit to how often you service your bike: daily maintenance warrants accessible hex keys, a pump, and tire tools. For weekly adjustments, add a chain tool, torque wrench, and spoke wrench; occasional repairs may justify cassette or bottom-bracket tools.
You should always carry a compact roadside kit with a multi-tool, tube or plugs, levers, and inflation backup for emergency fixes.
Daily Maintenance Needs
Your repair frequency should determine a kit’s priorities: for daily bolt checks, brake or shift tweaks, and occasional flats, choose readily accessible essentials before specialty tools.
Choose a compact kit with complete two, three, four, five, and six millimeter hex keys, multiple screwdriver bits, and a durable multitool for prompt corrections at home or mid ride. Keep the high use tools in an outer pouch or case slot, so you won’t waste time searching.
For flats, carry two tire levers, a patch kit or spare tube, and a mini pump or inflator. These items let you decide whether to patch immediately or install a tube and repair it later. Add specialized equipment only after your routine repairs demand it, preserving cost, space, and accessibility.
Weekly Adjustment Tasks
Weekly “tweak and tighten” work calls for a more capable kit than a flat-only carry setup, but you don’t need a full workshop case. Choose a sturdy Allen key set or multi-tool with 2-, 3-, 4-, 5-, and 6mm keys, plus screwdrivers for derailleur limit screws and brake-cable housing adjustments.
If you tune shifting often, add a compatible chain tool; it can free a sticky or jammed chain, and its reach must suit your drivetrain speeds. Reset wheel alignment regularly? Carry a spoke wrench sized to your nipples for minor truing. For recurring brake or component checks, use a torque wrench to meet manufacturer specifications.
Include a tire lever, patch kit or tube, and mini pump when punctures are routine on your regular commute.
Occasional Repair Requirements
Build an occasional-repair kit around the failures you’re most likely to face, rather than buying workshop tools you’ll rarely use. If you ride infrequently, choose a dependable multitool with long Allen keys and a chain tool, then add a tyre lever, mini pump, and spare tube. That combination handles routine adjustments and the most common puncture without committing to a bench-size kit.
Keep a patch kit for repairing removed tubes at home, but retain the spare tube for the initial replacement. If a rare broken chain concerns you, confirm the kit includes a chain breaker; it makes damaged links manageable. Low-frequency car-park tinkerers can use an entry multi-tool-expansion kit, such as Lezyne’s Port-A-Shop, but shouldn’t expect build-level coverage. Skip specialty torque and rotor-truing tools.
Emergency Roadside Fixes
Choose a roadside kit by the failures you encounter most often, not by the largest tool list. If punctures are common on your routes, prioritize two tire levers, a spare tube, and a mini pump; this combination lets you remove the tire, replace the tube, and reinflate independently. Carry patches when you can repair later, but favor a spare for the fastest restart.
For recurring loose bolts, choose a multi-tool with every Allen size your bike uses and screwdriver bits for adjustments. Muddy trails or high-mileage commuting justify a compact chain tool, which lets you remove a damaged link after a break. If breakdowns are rare, carry the compact core: multi-tool, lever, tube, and pump. If you’re troubleshooting, add chain capability and bit coverage.
Verify Bottom Bracket Tool Standards
Before buying a bike tool kit, identify your bottom bracket and crankset standard, because bottom bracket tools aren’t universal. Match the tool’s engagement pattern to your unit: square-taper, Shimano HollowTech II, SRAM GXP, or another specified interface. A tool that partially engages can slip, damage shallow splines or notches, and leave you unable to remove the cup or crank.
Check whether your drivetrain needs a crankset-specific external-bearing extractor, an 8 mm Allen key, a dedicated bottom bracket wrench, or an included adapter. Read the kit’s inventory, not claims such as “fits most bikes.” “12-speed compatible” describes other components and doesn’t confirm bottom bracket coverage.
Verify compatible standards, then confirm every required adapter comes in the box. Choose compatibility listings over assumptions.
Replaceable Hex Bits Save Money
Once you’ve confirmed bottom bracket compatibility, focus on hex-bit serviceability: a kit with replaceable Allen bits lets you replace a worn 4 or 5 mm bit rather than discard an otherwise usable multi-tool or case. Check that the holder accepts standard, readily available bits rather than a proprietary pattern, since replacements cost less and are easier to find.
You’ll want a complete 2, 2.5, 3, 4, 5, and 6 mm range, preventing an extra key purchase when a fastener differs from your usual setup. Confirm that each bit seats precisely in its holder and bolt head. If your components need finer adjustment, add 1.5 mm coverage. A replaceable-bit holder lets you expand later for future new bikes or drivetrain standards without rebuilding the kit.
Avoid Soft Steel Hex Keys
Prioritize hardened steel or alloy hex keys, because soft keys twist, round off, and can damage bolt sockets when you apply the torque needed for stem, handlebar, crank, or drivetrain work. A cheap key can deform before a stubborn fastener moves, leaving you with a rounded socket and a harder repair.
- Choose chrome-vanadium or hardened alloy keys; matte black finishes often signal durable treatment.
- Test fit before turning: each key should seat fully and snugly, without wobble.
- Verify coverage down to 1.5 mm, so you never force a close size into a bolt.
- Reject bargain kits that trade hardened, precise keys for soft steel, especially where high torque is routine.
Inspect keys periodically; replace any worn edges before they start damaging expensive components prematurely.
Check Chain Wear Tool Inclusion
Durable hex keys prevent bolt damage, but a complete bike tool kit should also include a dedicated chain wear gauge, not merely a chain breaker. A breaker repairs a snapped chain but can’t quantify elongation. Confirm the gauge works without removing the chain, allowing frequent checks.
- Choose marked 0.5% and 0.75% thresholds; they provide clear replace-soon or replace-now guidance.
- Match the checker to your drivetrain: a 10-, 11-, or 12-speed chain needs a compatible gauge for reliable readings.
- Inspect its design. Clip-on or tube-style gauges seat on the chain and measure wear quickly during routine cleaning.
- Treat it as preventative equipment. Replacing an elongated chain early protects cassette and chainrings, reducing larger drivetrain costs before expensive sprocket teeth wear unevenly and compromise crisp shifting under load noticeably.
Conclusion
Build your bike tool kit around the repairs you’ll actually perform, starting with quality 4, 5, and 6 mm hex keys, a T25 Torx key, and drivetrain-specific tools. Confirm your bottom bracket standard, include a chain-wear gauge, and avoid soft steel keys that round bolts.
Choose a prebuilt kit for convenience or individual tools for precision. If you ride and service often, replaceable hex bits keep costs down while maintaining reliable fit on every fastener.