Bike Brake Pad Compatibility Reference
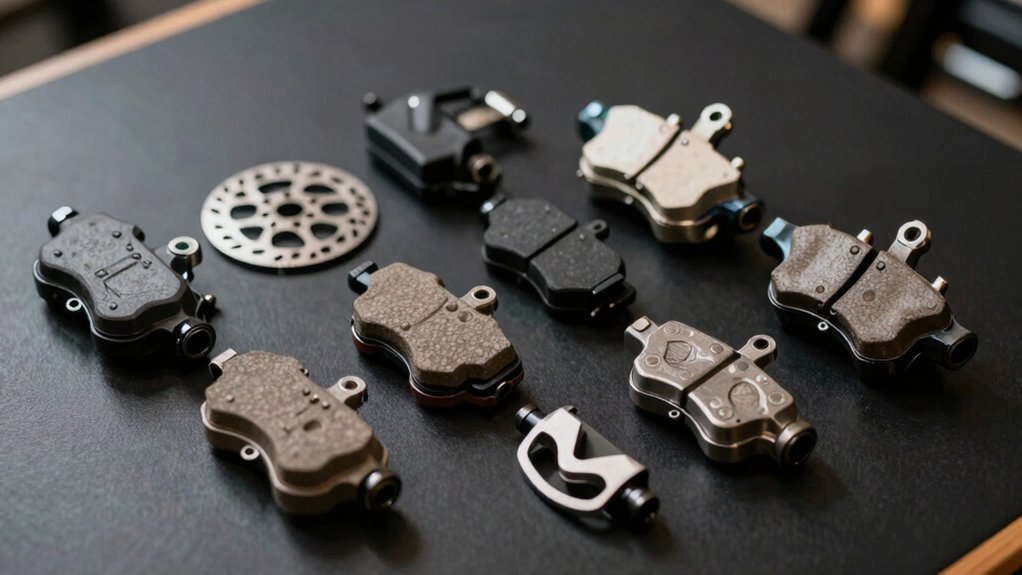
Match rotor sizes to your discipline: road 140–160mm front; mountain 180–220mm+ rear as needed. Confirm caliper mount (flat vs post) and use an adapter when needed. Choose pad compound for your use: organic/resin for quiet light use; metallic/sintered for heat and heavy braking.
Verify pad outline, mounting holes, and retention method against your caliper or a photo. Clean and bed new pads with progressive stops and cooling. Keep going to learn step-by-step fit and bed-in checks.
Quick Overview
- Match pad outline, mounting holes, and retention method to your caliper model or photo before buying replacements.
- Choose pad compound (organic, metallic, sintered) based on noise, bite, heat resistance, and rotor wear.
- Use front rotors larger than rear. Confirm rotor size and mount type (flat vs post) for intended discipline.
- Check manufacturer compatibility charts and part numbers when uncertain. Cross-reference measurements if charts are unavailable.
- Bed new pads and rotors: clean, mount, perform progressive stopping runs, and inspect for even transfer and glazing.
Rotor Diameter Compatibility Chart
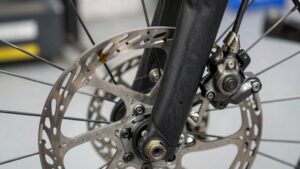
When you choose rotor sizes, match front and rear needs to riding style and mounting standards: road and gravel typically run 160mm front, 140–160mm rear for a balance of weight and stopping power. Mountain disciplines escalate from 180mm (XC/trail) up to 220mm+ for downhill and e-bikes; these need larger rotors to handle heat and mass.
You pick rotors by role and mount: flat mount favors 140–160mm; post mount supports 180–220mm with adapters as needed. Use the adapter calculation (rotor size − post mount size) to select the correct spacer. Confirm frame/fork compatibility before upgrading. Keep front rotors larger than rear for heat management and consistent modulation.
| Use case | Typical rotor |
|---|---|
| Road | 160mm |
| Enduro/DH | 200–220mm |
Pad Compound & Fit Checklist
Choosing the right pad compound and confirming fit matters as much as picking rotor size and mount: Your pads determine bite, heat resistance, wear rate, and rotor wear. You’ll pick a pad compound based on riding style and conditions. Organic is for quiet; metallic is for heat and longevity; sintered is for heavy use. Follow a simple fit checklist before purchase.
- Confirm caliper model or photograph it for comparison.
- Match pad outline, mounting holes, and retention method.
- Measure length/width; accept
- Verify compound suits terrain and rotor material.
- Check brand compatibility charts and part numbers.
Use the fit checklist and compound choice together to avoid mismatches and premature wear.
Bed-in Procedure Steps
Start by cleaning the rotor and new pads to remove any oils or contaminants. Heat the pads gradually with a few controlled stops, building braking force over several runs without locking the wheel. Avoid coming to full stops on the first rides.
Finish with a few light deceleration runs and let the system cool before regular use.
Initial Surface Cleaning
Why clean the rotor and pads before bedding in? You must remove oils, machining residue, and contaminants so initial surface contact is true. Use isopropyl alcohol and a clean lint-free cloth to wipe the rotor; replace the cloth frequently.
Lightly sand resin pads with fine-grit paper if glazed; then clean them the same way. Avoid solvents that leave residues. Hold the wheel steady and inspect for remaining film. Repeat cleaning surfaces until no sheen or fingerprints remain.
Mount pads and caliper only after both parts are dry. Proper initial surface cleaning prevents uneven transfer layers, reduces noise, and ensures predictable bite during the bed-in laps. Neglecting this step risks poor pad transfer and reduced stopping performance.
Progressive Heat Builds
When you begin the bed-in, apply a series of progressively harder stops so the pads and rotor heat up gradually rather than all at once. You’ll perform short decelerations at moderate speed; then increase brake force in controlled steps. Aim for uniform contact across the pad face and watch for even pad glazing.
Adjust the number of stops based on rotor diameter. Larger rotors need slightly longer, gentler cycles to avoid overheating edges. Keep runs short enough that you don’t smell burning. Between sequences, let the system cool to ambient to prevent trapped heat altering pad material. Record what worked for a given pad model and rotor diameter pairing so future beds replicate successful progressive heat profiles for consistent braking and minimal glazing.
Controlled Deceleration Runs
How will you perform the controlled deceleration runs? You’ll ride at moderate speed on a clear stretch, then apply progressive braking to slow to walking pace without stopping. Do ten runs, increasing brake force gradually so pads and rotor heat evenly.
Between runs, let components cool slightly; avoid prolonged dragging. Watch for signs of brake pad misfit: uneven wear, squeal, or inconsistent engagement; stop if you see them. For hydraulic vs mechanical systems, expect different feel: hydraulics will self-adjust and feel smoother; mechanical cables may need small lever adjustments as pads bed.
After the runs, check pad contact pattern and rotor color. If bedding looks uniform and braking feels consistent, you’ve completed a proper bed-in.
Avoid Full Stops
After completing the controlled deceleration runs, don’t come to a full stop with your brakes still engaged, keep rolling slowly between stops. You’ll avoid glazing the new pads and let heat dissipate evenly while transfer layers form on the rotor.
Roll at walking speed for several short stops, applying modest braking force each time. Don’t grab maximum power; use consistent, firm pressure to build proper pad-to-rotor contact. Treat this like a focused mechanical procedure, not a two word discussion ideas exercise or diversion into unrelated topics.
Monitor for noise, vibration, or grabbing; if any appear, repeat gentle rolls rather than hard stops. This protects pad material, ensures predictable modulation, and readies the system for normal riding without abrupt cooling.
Final Cool Down
Why not finish the bed-in with a controlled cool down that locks in consistent pad transfer? You’ll slow progressively over several one-minute deceleration runs without coming to a full stop, letting heat dissipate evenly. Aim for moderate speeds and light braking to avoid glazing; extreme cooling or abrupt halts create uneven pad deposits.
After three to five decelerations, ride gently for two minutes to stabilize temperatures and bedding layers. Don’t confuse this with an unrelated topic like rotor cleaning procedures; keep to controlled braking, not irrelevant discussion or unrelated tasks. Finally, inspect pads and rotor for uniform transfer and repeat short runs if spotting appears.
This final cool down secures consistent braking feel and predictable performance.
Frequently Asked Questions
Are Brake Pads Compatible Across Brands With Identical Shapes?
No, you can’t assume pads are compatible across brands even if shapes match. Shape standardization reduces but doesn’t eliminate fit differences; compatibility myths about universal interchange persist. You should verify caliper model, mounting details, and pad thickness. Compare model numbers or photos.
Measure and confirm hole spacing and backing plate design. When in doubt, use the manufacturer’s compatibility chart or exact replacement to ensure safe, reliable braking.
How Often Should I Replace Brake Pads by Kilometers Ridden?
You should check pads every 500–1,500 kilometers. Replacement depends on riding style and conditions. How often you replace pads varies: light road use may give 2,000+ km; wet or gritty off‑road riding cuts life to a few hundred.
Track wear rate by thickness and braking feel. Brake pad lifespan is determined by pad material, load, and contamination. Replace when backing plate nears the pad or braking degrades considerably.
Can I Mix Metallic and Organic Pads on One Caliper?
No, you shouldn’t mix metallic and organic pads on one caliper. You’ll get uneven material bonding, different wear rates and braking feel. Plus, you will experience increased noise. Stick to the same compound and manufacturer per caliper to ensure consistent modulation and pad matching.
If you need quieter braking, choose pads marketed for noise mitigation and replace both pads together. Always verify shape and fit before buying replacements.
Do Pad Spring or Retaining Clip Types Matter for Fit?
Yes, pad spring and retaining clip types matter for fit. You’ll need a pad spring that matches the pad shape and caliper design so spring tension and alignment work correctly.
The retaining clip must fit the caliper’s mounting grooves or pin system; wrong clips can let pads move or rattle. Always compare the old spring and clip to replacements. You can also use the manufacturer’s specified spring or retaining clip for reliable fit and safety.
Will Rotor Thickness Variations Affect Pad Compatibility?
Yes, rotor thickness can affect pad compatibility. You’ll find most pads fit across a range of rotor thicknesses, but very thin or overly thick rotors change pad-to-rotor clearance, cooling, and backing plate engagement.
Check caliper specs and pad clearance. Measure rotor thickness and compare to manufacturer limits. If the rotor deviates from spec, you’ll need a different pad or rotor replacement to ensure safe pad compatibility and proper braking performance.
Conclusion
You’ve now got the essentials to match pads to rotor diameter, pick the right compound, and verify fit. You can also perform a proper bed-in. Clean the pad and rotor first. Then do short progressive heat builds with controlled deceleration runs; avoid full stops to transfer an even layer of pad material. Finish with a cool-down period.
Follow these steps every time you install pads to ensure consistent bite, fade resistance, and safe braking performance.
Related reading: How to Know When Brake Pads Need Replacing — a closer look at this topic.