How to Choose a Bike Bag System for Your Riding
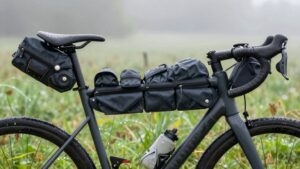
Pick a bag by matching volume, mount, and waterproofing to your rides: 0.4–1L saddlebags for commutes, 1–3L for day or gravel loops, and 10–29L seatpacks for multi‑day bikepacking.
Check saddle width, rail type, and saddle‑to‑tire clearance before buying. Prioritize taped or welded seams, roll‑top closures, or sealed zippers for wet rides. Reinforced straps are important for carbon rails.
Balance weight and balance over brute capacity, and keep reading for practical fit and testing tips.
Quick Overview
- Match bag volume to ride type: 0.4–1L for commutes, 1–3L for day/gravel, and 10–29L for bikepacking.
- Verify saddle, rail type, and saddle-to-tire clearance before buying larger seatpacks.
- Keep total bag+contents under ~1 kg for aero rides. Accept heavier loads for multi-day trips.
- Choose construction and closures (welded/taped seams, roll-top, sealed zippers) based on expected wet conditions.
- Prefer mount systems rated for your frame and rails: quick-release for rigid setups, reinforced straps for flexible or carbon rails.
Saddlebag Volume and Weight
Wondering how much saddlebag you really need? You’ll match volume to rides: tiny 0.4–1L packs for commutes, 1–3L for day/gravel, and 10–29L for bikepacking.
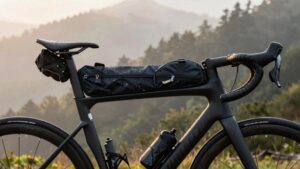
Check saddle compatibility; narrow saddles limit big seatpacks. Confirm saddle-to-tire clearance before you buy. Prefer quick release mounts? Choose systems rated for your frame and load; straps suit flexible rails. QuickClick favors rigid setups.
Balance weight and volume: keep total bag+contents 10L), pick waterproof options if needed, and favor reinforced straps on carbon rails. This keeps your kit practical, secure, and ride-ready.
| Use Case | Typical Volume |
|---|---|
| Commute | 0.4–1L |
| Day/Gravel | 1–3L |
| Bikepacking | 10–29L |
Minimum Carry Weight Guide
How light do you really need to ride comfortably? You want a clear minimum carry weight so your bike handles predictably and you avoid excess strain. Use subtopic relevance to link pack choice to ride type. Track weight focused metrics like grams per hour or grams per mile to compare setups.
- Commuting: 1–2 kg minimal kit: keys, phone, light, inner tube.
- Day rides: 2–4 kg: add food, lightweight layers, small tool kit.
- Bikepacking/daypack combo: 4–7 kg: shelter-lite items, stove, water.
- Multi-day touring baseline: 7–12 kg: gear redundancy, clothes, cooking gear.
Choose the lightest bag configuration that meets safety and comfort. Weigh items and prioritize modularity over bulk.
Waterproofing and Seam Ratings
You’ll want to understand waterproof ratings and how manufacturers test them so you can pick a bag that matches your riding conditions.
Check seam construction and whether seams are taped or welded. Pay attention to zipper and closure seals because those are common failure points. Finally, compare stated standards and independent test results rather than trusting marketing terms alone.
Waterproof Ratings Explained
Curious about what those waterproof ratings on bike bags actually mean for your gear? You’ll see numbers like IPX4 or descriptors such as “water-resistant” versus “waterproof.” Waterproof ratings quantify how well materials and closures block water: higher ratings resist heavier spray and brief immersion.
For real-world riding, focus on rated fabric plus seam taping importance. Sealed seams stop capillary wicking where stitched holes let water in. Roll-top closures with welded seams and certified ratings give reliable protection on long tours and in downpours.
Remember: a high fabric rating won’t help if zippers, seams, or attachment points leak. Check manufacturer test standards and how seams are finished. Then match that level of protection to your typical weather, ride length, and what’s inside the bag.
Seam Construction Types
Seams determine whether water stays out or finds its way into your kit, so pay close attention to how a bag is joined. You’ll choose between sewn, welded, and taped seams: sewn seams are strong but need seam construction with internal taping or a waterproof liner to stop capillary wicking. Welded seams fuse materials for truly waterproof joins but can be less flexible. Seam-taped seams combine sewing with adhesive tape over stitch lines for balanced durability and water resistance.
Check seam ratings where manufacturers list hydrostatic head or seam strength. Inspect how material reinforcement is applied at stress points and tie-downs. Prioritize welded or well-taped seams for wet climates. Reinforce attachment areas if you’ll carry heavy loads.
Seam-Taping Importance
After you’ve compared sewn, welded, and taped construction, pay close attention to seam-taping because it’s the common fix that keeps stitched bags from leaking. You’ll want tape that’s applied uniformly and bonded to compatible fabric. Poor adhesion invites seepage at stress points.
Check manufacturer specs for seam tape durability and look for tests or ratings that quantify seam seal longevity under flex, UV, and moisture exposure. In practical terms, inspect seams for full-width coverage and neat edges; uneven or partial taping often fails first.
If you ride in heavy rain or tour for days, prioritize proven tape systems over cosmetic finishes. Properly taped seams extend waterproof performance and reduce maintenance. So factor seam-taping quality into your bag selection before you buy.
Zipper And Closure Seals
How well do the zippers and closures on a bike bag actually keep water out? You’ll want to inspect zipper durability first: look for water-resistant coils, reinforced tape, and smooth sliders that won’t jam when wet. Roll-top closures remain the simplest waterproof option. However, sealed zippers with protective flaps add convenience for frequent access.
Check seam ratings and whether manufacturers mention safety seals; those gasket-style closures or welded seams give extra assurance against seepage. Test feel: stiff, gummy seals often indicate better water resistance than cheap, loose ones. Remember, durability and maintenance matter. Clean debris from tracks, lubricate sliders, and replace worn seals before failure.
Prioritize systems that balance proven waterproofing with long-term zipper durability for your riding needs.
Testing And Standards
Want to know which waterproof claims you can actually trust? Look for bags tested to IPX or hydrostatic head standards and clearly listed seam ratings. You’ll want IPX6 or higher for heavy rain. Hydrostatic head numbers (measured in mm) tell you how much pressure the fabric resists before leaking.
Check whether seams are welded, taped, or sewn. Welded or taped seams outperform sewn seams for long rides in sustained wet conditions. Pay attention to lab-tested abrasion and UV figures too; they speak to material durability and preserve bike bag ergonomics over time.
Consumer-focused labels, third-party test reports, and real-world rider reviews help you compare claims. Prioritize verified specs over marketing terms when choosing your system.
Frequently Asked Questions
Will My Carbon Handlebars Need Extra Padding Under Straps?
Yes, you should add extra padding under straps on carbon handlebars. You’ll prevent carbon corrosion from friction and concentrated pressure. Padding helps spread weight distribution so the bar doesn’t see point loads that can damage fibers.
Use well-padded, non-abrasive interfaces or manufacturer-approved protective tape. Check clamp locations and re-tighten per torque specs. That keeps your cockpit safe, maintains performance, and avoids costly carbon repairs.
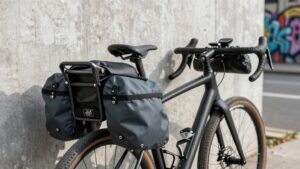
Can I Swap Panniers Between Different Bikes Easily?
Yes, you can often swap panniers between bikes, but pannier compatibility depends on rack type, mounting system and wheel clearance. Use two-bucket or adaptable hooks for cross-bike use. Check beam rack vs. strut rack fit.
Don’t forget frame bag fit too: bottle cages and frame geometry can block access or attachment points. Measure rail spacing, verify quick-release mounts, and choose padded contact points for carbon frames to avoid damage.
How Do Dropper Posts Affect Saddlebag Clearance?
Dropper posts reduce saddlebag clearance because they move the seatpost and saddle through space that saddlebags often occupy. You’ll need to check saddlebag interaction carefully. You’ll want a saddlebag with independent rail straps or a compact, low-profile design that stays clear of the post travel.
Measure fully lowered and raised positions; allow extra gap for mud and suspension. Choose padded contact points to prevent rubbing or damage.
Are Klickfix Mounts Compatible With My Handlebar Stem?
Yes, Klickfix mounts are often compatible. However, you’ll need to check compatibility questions before buying. Measure your stem and handlebar clamp area. Confirm clearance for the Klickfix bracket and verify your bar diameter and any accessories.
Consider mounting options: bar-mounted versus stem-mounted adapters or separate handlebar harnesses. If you have carbon or odd-shaped bars, use padded adapters or a different system to avoid damage and ensure secure attachment.
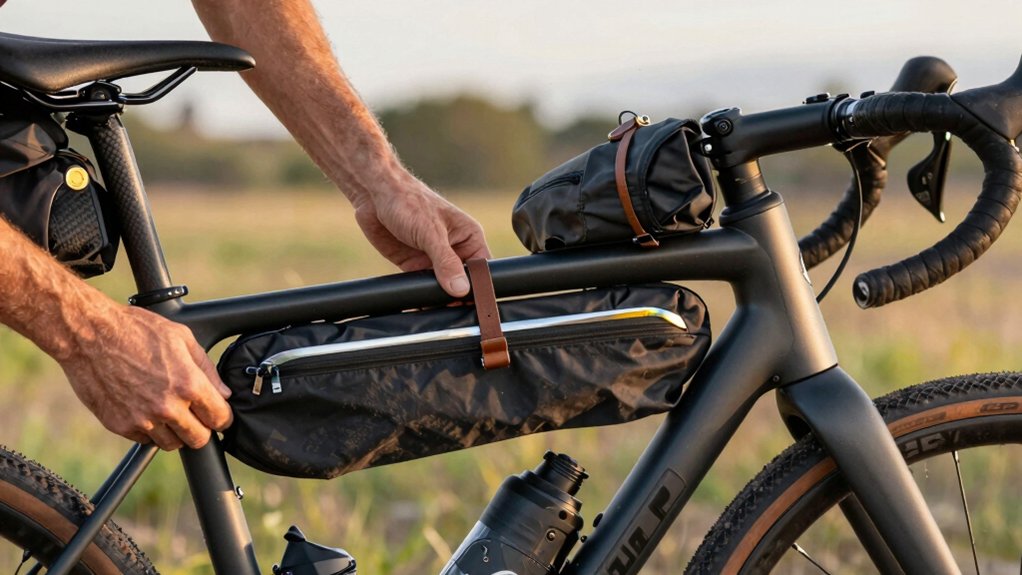
Can I Use Frame Bags With a Large Water Bottle Cage?
Yes, but you’ll need to check clearances and layout. Frame bags can work with large cages if the bag’s shape leaves room for the bottle or if you mount the cage higher or on the downtube.
Measure bottle diameter, bag width, and bottle cage placement. Consider slim or side-loading cages. If space is tight, choose a smaller frame bag panel, relocate the cage, or use a different storage combo to avoid rubbing or access problems.
Conclusion
Choosing the right bike bag system comes down to matching capacity, weight, and waterproofing to how you ride. Think about the minimum carry weight you’ll tolerate. Check seam construction and taping. Favor reliable zipper or roll-top seals with clear waterproof ratings.
Test mounts and balance on your bike before buying. Prioritize durability and practical features over looks. Get a bag that keeps gear dry, feels secure, and won’t slow you down on the road or trail.
Related: Bike Travel Packing Checklist