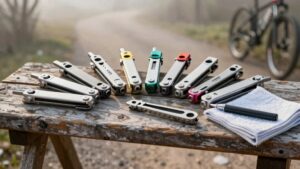
Bike Maintenance Toolkit Checklist
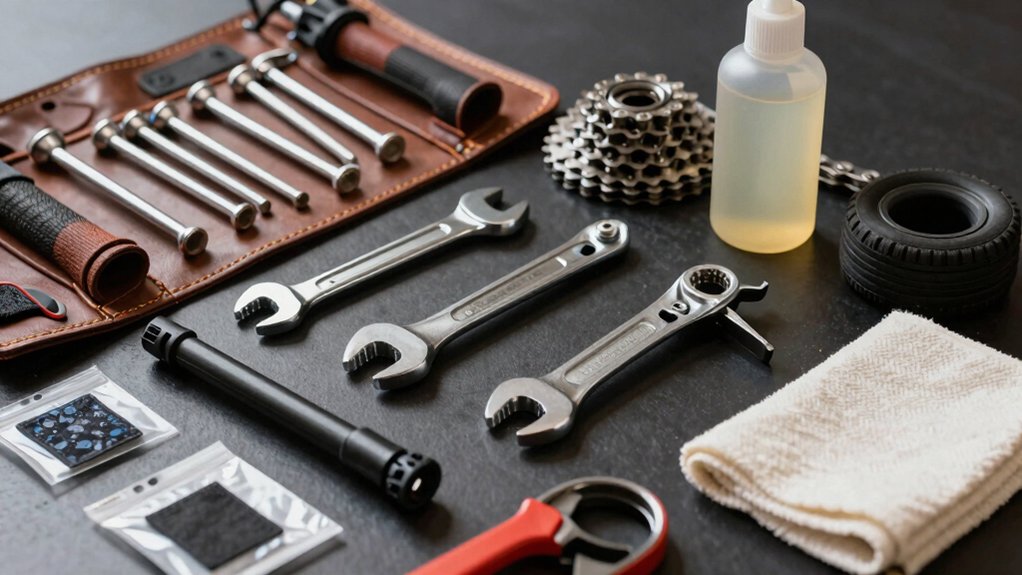
You’ll carry a compact, calibrated toolkit that keeps tires sealed, valves matched, and fasteners torqued to spec: a pump or CO2 with Presta adapters and valve extenders, spare tubes for Presta and Schrader, tubeless cores and valve tool, rim tape, patch kit and sealant, a torque wrench with specified bit set, anti-seize/threadlocker as needed, and a valve-length chart for deep rims.
Start with sidewall max PSI and adjust for weight and terrain. Keep this list handy to learn the full details.
Quick Overview
- Carry a compact multi-tool (hex, Torx, chain tool, screwdrivers) and a calibrated torque wrench for correct fastener tightening.
- Pack spare tubes, both Presta and Schrader adapters, valve extenders, and a portable pump or compatible CO2 inflator.
- Include tubeless essentials: sealant, valve cores, valve tool, rim tape, and a compact plug kit for punctures.
- Bring tire levers, a patch kit, a pressure gauge, and know rim limits (hookless ≤72.5 PSI) for safe inflation.
- Store chain lube, degreaser, quick links, spare bolts, threadlocker/anti-seize as specified, and log torque values after first rides.
Tire Pressure Comparison Chart
How much pressure should you run? You’ll use tire pressure charts as a practical starting point: match tire width and rider weight, then adjust for terrain and speed. Always check rim compatibility. Hookless rims cap at 72.5 PSI; hooked rims often allow up to 100 PSI.
For narrow road tires, higher pressures suit lighter widths. Wider gravel/MTB tires need much lower PSI.
| Tire Type | Typical PSI Range |
|---|---|
| Road 20–32mm | 58–113 PSI |
| Gravel 33–55mm | 30–60 PSI |
| MTB/Fat/Hybrid | 15–70 PSI |
Use the tire sidewall as a starting max, factor in bike+gear weight, and never exceed hookless limits to avoid blow-offs.
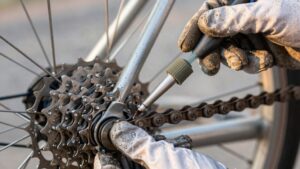
Torque Specs for Bolts
Why does torque matter? You rely on correct torque specification to keep parts secure without damage. Over-tightening strips threads or crushes carbon. Under-tightening lets bolts loosen mid-ride. Match torque to bolt type and material, and use a calibrated torque wrench for consistency.
Know common torque ranges: small M4/M5 bolts, mid M6 components, seatposts and stems, and pedals. Check manufacturer charts for each bolt type; aluminum, steel, and carbon need different limits.
Apply threadlocker or anti-seize only where specified; it affects torque readings and clamping force. Re-torque critical fasteners after initial rides and periodic service. Log values for future reference.
Carry a compact torque wrench and labeled chart in your toolkit for safe, repeatable results.
Valve Stem Compatibility Notes
Check your valve stems before any pump or tube swap: Presta, Schrader, and tubeless stems differ in diameter and threading and need the right hole and fittings. Measure valve length for deep-section rims. Carry adapters/converters for pumps or frames with restricted clearance. Confirm rim hole compatibility so stems seat properly.
If you run tubeless, include compatible removable cores, valve extenders, and spare tubeless stems to match sealant and rim design.
Valve Stem Types
When you’re selecting tubes or pumps, pay attention to valve stem type: Presta and Schrader are the common standards and aren’t directly interchangeable; so match the valve to your rim hole, pump head, and any valve adapters you carry. You’ll carry at least one pump and an adapter for mixed fleets.
Note valve stem sizing: Presta stems are narrower, fit smaller rim holes, and need removable cores for tubeless setups. Schrader stems match automotive pumps and require a larger drilled rim hole.
Check spoke nipple interaction on deep-section rims: valve stems can interfere with nearby nipples or rim tape. Keep spare tubes with both valve types, a couple of adapters, and a pump head that clamps both. That avoids roadside incompatibility.
Valve Length Matters
How long should your valve stem be for a secure, leak-free fit? Check valve length against rim depth: shallow rims need short stems; deep-section rims require longer stems so you can access the valve and tighten the nut. Measure rim depth and compare to tube or presta/dunlop stem specs before installing.
Compatibility notes: confirm valve type matches rim hole and any removable valve core tools you’ll use. Don’t assume a universal fit. Valves that are too short cause leaks or make inflation difficult; overly long stems can be trimmed but only when appropriate.
Keep spare tubes with varied valve lengths in your toolkit to match different wheels. These quick checks prevent roadside hassles and ensure proper inflation.
Adapter And Converter Use
Having matched valve stem length to your rim depth, you’ll also need the right adapters and converters to make different valve types work with pumps, gauges, and CO2 inflators. Check which valve you have: Presta, Schrader, or Dunlop. Carry a compact set of adapters for quick swaps.
Use a threaded Presta-to-Schrader adapter for roadside pumps and a snug rubber-seal converter for inexpensive gauges to avoid leaks. For CO2, verify head compatibility; some cartridges need a specific Presta fitting or an inline adapter. Inspect threads and seals before use, replace worn adapters, and keep spares in your repair kit.
Good adapter usage and confirmed converter compatibility prevent valve damage, save time, and ensure reliable inflation when you need it most.
Rim Hole Compatibility
One key detail to check is whether your rim’s valve hole matches the valve stem type and length you plan to use, since mismatched sizing can cause air leaks, valve damage, or seating problems. Measure the hole diameter: Presta and Schrader need different clearances. Make sure the stem sits flush without rubbing the inner edge of the rim hole. Ensure that any rim tape or lining doesn’t constrict the stem.
On deep-section rims, verify stem length reaches past the tape for easy pump attachment. If using rim strips, confirm the strip’s hole aligns and won’t compress the stem. Also, inspect nearby spoke nipple clearance so the valve won’t interfere with nipple access during truing or repairs. Replace or enlarge holes only with proper tools.
Tubeless Valve Considerations
If your rim hole and valve stem must fit together for inner tubes, they matter even more with tubeless setups because the valve also seals and helps retain sealant. You’ll check valve type (Presta vs. Schrader), stem length, and base diameter against the rim’s hole and any removable grommet.
Use a proper tubeless valve with a rubber base or an insert collar that matches rim depth to prevent sealant leaks and pressure loss. Carry spare valve cores and a small valve tool to remove or tighten cores for adding sealant. Avoid mixing incompatible caps or loose locknuts that can damage the rim.
Note: unrelated topic, unrelated topic — keep notes of part sizes so replacements fit precisely.
Frequently Asked Questions
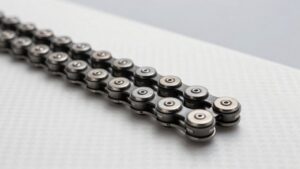
How Often Should I Replace Chain Lube?
You should replace chain lube about every 100–200 miles or monthly, whichever comes first. For a replace chain lube frequency, factor riding conditions into your chain maintenance schedule: wet or muddy rides need more frequent reapplication, while dry rides allow longer intervals.
Watch for dirt and grime effects on lube. Clean before reapplying. Use proper lubing technique considerations: apply to each link, wipe off excess, and let it penetrate before riding.
Can I Use Household Cleaners on My Bike?
You can, but you shouldn’t use harsh household chemicals on your bike; they can damage paint, seals, and lubricants. For cleaning safety, use mild detergent, biodegradable degreaser for the drivetrain, and plenty of water.
Avoid bleach, ammonia, and strong solvents. Rinse thoroughly, dry with microfiber cloths, and relube the chain promptly. If you’re unsure, test a small area first or use products labeled safe for bicycles.
How Do I Choose the Right Pedal Wrench Size?
Pick a pedal wrench sizing that matches your pedal flats and crank arm compatibility. Most pedals use 15mm flats; some older or BMX pedals use 9/16″ or 17mm. Measure the pedal wrench opening against your pedal spindle flats and check the crank arm clearance so the wrench fits without hitting the chainring.
Use a thin-profile pedal wrench for tight spaces and a longer handle for leverage. Confirm size before buying.
When Should I Replace Brake Pads?
You should replace brake pads when you notice significant brake pad wear or loss of performance. Replacement timing is typically every 500–2,000 miles depending on riding conditions.
Inspect pads for thickness: replace when less than 1–1.5 mm of material, glazing, embedded debris, or uneven wear. If braking feels spongy, noisy, or requires more lever travel, replace immediately.
Record dates/mileage to track replacement timing reliably.
Can I True a Wheel Without a Truing Stand?
Yes, you can true a wheel without a truing stand using truing stand alternatives like a bike frame, fork, or makeshift gauge. First, secure the bike or wheel, spin it, and identify wobbles.
Next, follow wheel truing steps: tension spokes toward the low side, loosen opposite tight spokes, and make quarter-turn adjustments. Use a zip-tie or screwdriver as a reference and recheck tension and roundness frequently for safe, even results.
Conclusion
You’ve now got the key checks to keep your wheels rolling: compare tire pressures, match torque specs, verify valve stem type and length, and confirm rim hole compatibility.
Use adapters or converters only when they’re rated for your valve and rim; follow tubeless valve sealing and preload guidelines. Double-check fit before riding. Carry a compact pressure gauge and spare valve core.
Routine attention to these details prevents flats and mechanical failures.
Related: What to Carry in a Basic
Related: How to Set up Tubeless Tires