A Simple Road Bike Maintenance Routine for Beginners
Before each ride, use an accurate gauge to inflate tires within the sidewall range, then secure axles, spin wheels, and test both brakes for firm engagement.
Wipe frame and drivetrain, inspect chain for grime or skipping, and shift through every gear during a low-risk test.
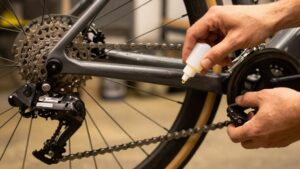
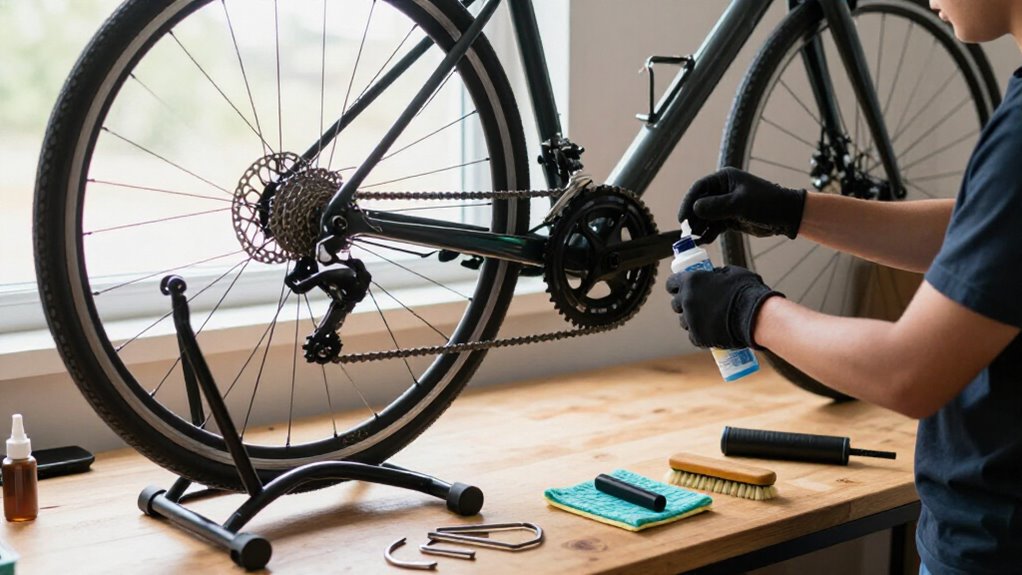
Lube a clean, dry chain sparingly and wipe excess.
Stop riding if you find a frame crack or contaminated brake pads.
The steps below show how to maintain it safely.
Reliable Weekend Rides for Beginners
Reliable weekend rides start with a short pre-ride “M check”: confirm tire pressure matches the range on the tire sidewall, test both brakes for firm and even engagement, and look over the drivetrain for dirt, noise, or chain skipping. Before leaving, secure each quick-release or thru-axle; a loose wheel can cause crashes. Spin each wheel and watch for wobble, then scan the frame for cracks, dents, or loose spokes.
Shift through every gear while stationary or during a low-risk test; hesitation or skipping means you should adjust indexing or seek service before a longer ride. During the week, remove grime so it doesn’t build up and accelerate wear. Carry puncture-repair essentials and a multitool. Schedule a one-hour tune-up every six to twelve months, adjusted for mileage.
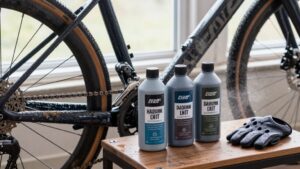
Floor Pump and Chain Lube
A sturdy floor pump with a gauge and a bike-specific chain lube form the foundation of routine road-bike care. Choose a pump rated to 160 psi or higher, with a stable base, flexible hose, and Presta-compatible lever-lock chuck. Use bike-specific lube sparingly after you clean and dry the drivetrain.
- Inspect the hose, chuck, and gauge for cracks, leaks, or erratic readings.
- Hold the valve stem vertical; don’t force the chuck or bend a Presta valve.
- Keep both feet on the base and hands clear of the piston.
- Apply one small drop of lube to each roller while backpedaling.
- Wipe excess lube from the chain, chainrings, and cassette.
Use wet lube for persistently wet conditions and dry lube for dry, dusty routes. Replace leaking seals.
Pre-Ride Tire Pressure Check
Before every ride, check both tires with an accurate gauge rather than judging pressure by feel. Use the valve and pump to set each tire within its sidewall-printed range, commonly 60 to 100 psi for many road tires. Lower settings improve traction and comfort; higher settings create a firmer, faster feel. Never exceed the printed limit.
| Condition | Action | Safety result |
|---|---|---|
| Normal temperature | Set sidewall range | Predictable handling |
| Hot or cold storage | Recheck before departure | Avoid pressure surprises |
If one tire is noticeably lower, don’t ride until you inspect it for a slow leak, puncture, or damaged valve. Compare readings after temperature exposure; substantial changes require adjustment. Fit the pump head squarely, inflate in short bursts, then remove it carefully and replace the valve cap securely afterward.
Wipe, Lube, Check Brakes
After your ride, wipe the chain, chainrings, and cassette with a clean rag to remove grit. Apply a light amount of chain lube to the rollers, then wipe away excess to prevent dirt buildup.
Before riding, inspect pad wear and alignment, then squeeze each brake lever and spin each wheel to confirm firm, even stopping power without drag.
Start With a Wipe
Start every ride with a fast wipe-down: remove caked-on grit and moisture from the frame, wheels, chain, cassette, and chainrings, since contamination speeds drivetrain wear. Use a clean, dry rag and work methodically from the frame outward, replacing the rag surface when it becomes dirty. Wipe the wheel rims or disc braking surfaces carefully; don’t transfer oily residue onto them.
As you wipe, inspect the frame for fresh cracks or dents, and look for loose spokes, tire cuts, or embedded debris. Check that both wheels are seated securely in their dropouts and that quick releases or thru-axles are fully closed. Avoid pressure washers and aggressive sprays, which can force water into bearings. If you find damage, looseness, or braking-surface contamination, don’t ride first.
Clean the Drivetrain
A clean drivetrain shifts more reliably and wears more slowly, so wipe the chain, cassette or freewheel, and chainrings with a clean, dry rag first. Rotate the pedals backward slowly and hold the rag around the lower chain run, keeping fingers clear of chainrings and jockey wheels. Use a slightly damp cloth on stubborn, caked-on grit; don’t spray water into bearings or hubs.
Inspect the chain for visible sag, damaged links, and debris lodged between cassette cogs. During your next safe test ride, note any rapid skipping under load; stop riding and seek service if it occurs. Finish by squeezing each brake lever firmly. Confirm the pads meet the rim or rotor smoothly, release fully, and don’t rub continuously. Correct faults before riding again.
Lubricate the Chain
Consistency keeps a road-bike chain quiet, efficient, and less prone to premature wear. After each ride, especially in wet or dusty conditions, hold a clean rag around the chain and backpedal until the rag comes away relatively clean.
Let the chain dry, then select wet lube for damp roads or dry lube for dry, dusty riding.
Apply one small drop to each roller along the inner run of chain. Turn the cranks backward for several seconds to distribute lubricant through the rollers. Wipe every outer surface thoroughly; excess oil collects abrasive grit.
Finally, spin the cranks in a low gear and confirm smooth, skip-free travel. Check that each brake lever feels firm before riding; lubrication won’t correct a braking fault. Stop and investigate abnormalities.
Inspect Brake Pads
Before every ride, wipe each brake pad with a clean, lint-free rag to remove dust and grit that can reduce stopping power or damage the rim or rotor. Then inspect the pad material under good light. Replace pads when friction material is only a few millimeters thick or the manufacturer’s wear indicator is reached.
Confirm each pad sits squarely on its rim track or rotor and cannot touch the tire. Correct misalignment with the appropriate pad-position or cable adjustment. Finally, apply a tiny amount of suitable lubricant to accessible brake pivots only. Keep lubricant completely away from pads, rotors, and rim braking surfaces; contamination can sharply reduce braking effectiveness. Wipe away any excess immediately. If you find uneven wear, damaged hardware, or contamination, stop.
Test Brake Performance
Clean braking starts with clean contact surfaces. Before every ride, wipe pads and rim or rotor with dry cloth; use mild degreaser only if needed. Keep oil off pads and rotors. Squeeze each lever firmly several times. Pads must engage fully; neither lever should reach the handlebar or feel spongy.
For rim brakes, confirm pads align squarely on the rim and show no uneven wear or glazing. Test each at low speed for smooth stopping. For disc brakes, spin each wheel, lightly squeeze the lever, then release it. The rotor shouldn’t rub excessively, and the wheel should spin freely.
If your brake linkage requires lubrication, apply one tiny drop only to its pivot points. Wipe away excess, then immediately retest lever feel and stopping power.
Wet-Weather Brake Pad Checks
After wet rides, inspect your brake pads for adequate material and remove embedded grit with a clean cloth. Confirm the pads contact the rim or rotor squarely and evenly, with no oil or chain-lube contamination.
Then test braking in a safe area, pumping the levers lightly to clear moisture and confirming that you regain firm, predictable stopping power.
Inspect Pad Wear
Wet roads can speed up brake-pad wear, so inspect your pads periodically each few rides by looking through the caliper and confirming that sufficient friction material remains to contact the rim or rotor safely.
After rainy or salty conditions, examine both pads under good light. Replace them when friction material approaches the maker’s limit, often about 1–2 mm, or if metal backing is visible. Ensure each pad sits squarely on its braking surface and shows even wear. Treat oil or brake-fluid residue as unsafe; replace contaminated pads. Test braking in a controlled, low-speed area before continuing.
If a pad surface looks shiny or hard, or squealing persists after wiping the rim or rotor, inspect closely and replace pads if consistent bite doesn’t return. Don’t let it happen.
Remove Grit Buildup
Pad thickness alone doesn’t confirm safe braking after a wet ride: inspect each pad face for embedded sand, grit, and uneven wear. Road spray can pack abrasive particles into pad material within one session, reducing full contact. Rotate the wheel slowly and examine both pads under good light.
If you find contamination, wipe pad faces with a damp cloth; use a small amount of suitable solvent on the cloth, never dripping onto components. Clean the matching rim brake track or rotor surface, then wipe everything dry. Don’t sand pads aggressively unless you understand the compound and manufacturer guidance, as improper abrasion can damage the surface.
In persistently wet conditions, repeat this inspection weekly or after every ride, because buildup develops much faster than in dry weather. Replace pads that remain uneven or contaminated.
Test Wet Braking
Before riding on wet roads, test your braking at low speed in a traffic-free area: squeeze each lever firmly and confirm the brakes engage smoothly, evenly, and with normal stopping power.
Inspect both pads. They should be centered, fully contact the rim or rotor, and show no glazing or excessive wear. Wet conditions lengthen stopping distances. Don’t ignore drag, uneven contact, grabbing, or soft levers.
If braking feels weak once components are wet, make several gentle low-speed stops to wipe water from pads and braking surface; don’t test them at speed. After several minutes in rain, retest braking. Road spray and grit can reduce friction until braking cleans the contact surfaces. If power doesn’t return promptly, stop riding and inspect or replace the pads.
Clean Shifts Across All Gears
Smooth, reliable shifting starts with a quick test through every gear: shift across the cassette and confirm each change engages cleanly without skipping, hesitation, or grinding. Wipe caked dirt from the chain and sprockets, then confirm the chain moves freely on both the smallest and largest cogs. Check that cable tension allows the derailleur to reach each gear precisely.
Verify the limit screws prevent it from pushing the chain beyond either end of the cassette. If shifting feels sticky or inconsistent, inspect the derailleur hanger for bends and examine cable housing for fraying, corrosion, or contamination. Don’t force the shifter if the chain resists moving; stop and correct the cause. Recheck indexing every few months and after wheel removal, because axle seating or alignment changes can affect shifting accuracy.
Cracked Frame: Stop Riding Immediately
If you find a visible crack in your road bike frame, stop riding immediately and keep the bike out of service. Inspect high-stress areas: bottom bracket, head tube, seat tube, and chainstays, but treat any confirmed crack as a do-not-ride condition. A damaged frame can fail suddenly under pedaling, braking, or road loads.
Don’t ride it home, test it on a loop, or attempt to stabilize it. Cracking means the material has lost strength and may continue to propagate even when the bicycle feels stable. Check for loose hardware, bulging paint, or new creaks, then store the bicycle safely.
Have a qualified mechanic or the frame manufacturer inspect it and determine whether repair or replacement is safe. Avoid DIY epoxy patches on carbon frames.
Avoid Over-Tightening Seatpost Clamp
Tighten the seatpost clamp only to the manufacturer’s specified torque, because excessive force can crack a carbon seatpost, damage frame threads, or deform the clamp itself. Use a calibrated torque wrench and stop at the marked value.
- Confirm the seatpost is clean and correctly positioned.
- Tighten gradually, alternating clamp bolts when applicable.
- Test for rotation by twisting the saddle gently.
- If it slips, follow the manufacturer’s approved clamp method.
- Inspect for cracks, grooves, distortion, or difficult removal.
Recheck clamp security periodically, since saddle height or rail position can shift during riding. For carbon assemblies, use the specified friction paste if the manufacturer permits it. Don’t add force beyond torque: it won’t improve safety and can damage components.
If you find deformation, inspect affected parts carefully before riding.
Log Recurring Maintenance Issues
Keep a simple maintenance log to identify problems that recur and the conditions that trigger them. Record the symptom, date, mileage, weather, road surface, and any work you performed. Note skipping gears, especially under load, and measure chain wear; replace a worn chain and correct indexing before cassette damage develops.
Log brake rub, weak lever feel, or inconsistent stopping after wet rides, cable stretch, or contamination. This record helps you schedule cable replacement and investigate safety-critical faults promptly.
Track pressure, flats, and punctures before each ride to distinguish incorrect inflation from damaged tires. Also list quick-wear items, including bar tape, and note headset or bottom-bracket roughness and re-greasing dates. Stop riding for loose steering, unreliable brakes, or wheel play; seek professional help for uncertainties.
Conclusion
Keep your road bike reliable by following this simple routine before and after each ride. You’ll catch low tires, dry chains, worn pads, and poor shifting before they affect safety. After wet rides, inspect braking surfaces carefully.
Stop riding if you find a frame crack, and don’t overtighten the seatpost clamp. Record recurring faults, service them promptly, and you’ll build confidence, protect components, and enjoy smoother weekend miles with fewer roadside surprises on every ride.