Road Bike vs Mountain Bike Accessories: What’s the Real Difference?
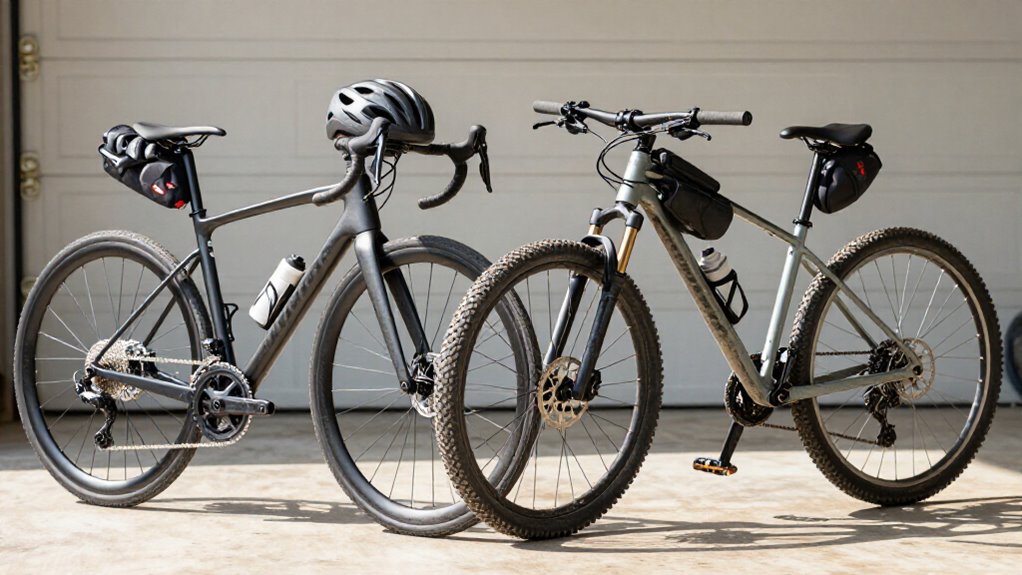
You equip a road bike for efficient pavement speed: focused cutoff lights, reflective visibility, compact saddle storage, CO₂ for fast high-pressure inflation, and pedals that support cadence.
You equip a mountain bike for variable traction and impacts: mudguards with tire clearance, dropper-compatible bags, durable mini pumps, wide flat pedals, and protective pads.
Don’t interchange parts blindly; suspension travel, tire volume, mounting points, and night-speed limits determine what works.
The next sections clarify your gear choices.
Road Lights, Mountain Mudguards
Road lights prioritize visibility in traffic and controlled illumination at speed, so choose a compact front unit with a focused beam, a properly aimed cutoff, and enough runtime for your longest low-light ride. Use steady white front and red rear modes where required; pulse modes improve detection, but don’t substitute for legal lighting. USB-C charging, IPX4–IPX6 protection, and a secure 31.8-mm mount suit wet road use. Clean lenses and charge before departure.
| Feature | Road lights | Mountain mudguards |
|---|---|---|
| Primary job | See and be seen | Block spray |
| Setup check | Aim cutoff downward | Check tire clearance |
On muddy trails, fit robust clip-on guards that clear the tire and suspension movement. You’ll reduce face spray and shield components; retighten mounts after vibration before each rough, wet ride carefully.
Dropper Posts and Saddle Bags
Beyond keeping spray off the rider, mountain-bike setup must preserve body clearance and control: a dropper post lowers the saddle instantly for steep descents, corners, and technical moves, letting you shift your weight without the seat obstructing movement. That system works with upright, maneuverable trail geometry and suspension, helping you corner and absorb impacts from a stable position.
- Choose a slim, aerodynamic road saddle bag for a tube, CO2, levers, and a multitool without adding unnecessary weight.
- Choose a rugged, compact mountain bag that resists abrasion and keeps tools, a tube, and a small pump secure over bumps.
- Check dropper clearance: mount the bag to avoid the post’s travel and internal routing hardware. It shouldn’t rub or restrict full saddle movement.
Night Visibility Versus Trail Control
When daylight fades, road riding shifts the safety burden to visibility: smooth 25–28 mm tires and a rigid chassis suit fast pavement but offer little margin for loose gravel, wet debris, or uneven edges.
You need a bright front beam, a rear light, and reflective clothing to make your position and hazards readable at speed. Don’t treat those systems as substitutes for line choice or speed.
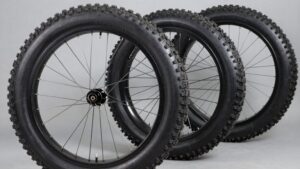
On trails, wider 2.0–2.5-inch knobbies, trail-oriented geometry, and an upright bar give you grip, scanning range, and steering leverage over dirt, wet roots, and gravel.
A mountain helmet’s coverage and visor limit splash and debris distraction. Still, you should manage speed to the illuminated distance: traction improves control, but it can’t reveal an obstacle before you reach it.
Light Mounting, Dropper Routing
Light performance depends as much on mounting and cable placement as on lumen output. On a road bike, you can use a low-profile under-bar, seatpack-strap, or front-bottle mount; rigid geometry and narrow tires simplify clearance.
Mountain bikes need placement because suspension movement, steering angle, and a rider’s head-down posture can block or misdirect the beam.
- Position an MTB bar or stem light so fork travel cannot contact it and bar rotation leaves the beam clear.
- Route dropper housing along the frame’s intended internal path to the remote, keeping it clear of the front wheel and tire spray.
- With external routing, secure housing in guides or clips, then cycle steering and suspension to check for rubbing, snagging, or tight bends.
Road layouts remain relatively simple.
Frame Eyelets and Rack Fit
Rack fit starts with the frame’s mounting points, not the rack’s advertised capacity. Check for standard eyelets at the fork crown and legs for a front rack, or at the rear dropout and seatstay area for a rear rack. These points let the hardware align with the frame rather than load tubing sideways.
Road bikes often provide fewer, less conspicuous eyelets for fenders and racks. If yours lacks them, clamp-on hardware works, but thin tubes and limited attachment positions can make rack less stable.
Mountain frames commonly place clearly spaced eyelets around the rear triangle, supporting trail-to-commuter setups. Before buying, confirm rack matches your axle/dropout standard, then verify that its lower mounts and upper stays reach the eyelets cleanly without bending or forcing bolts.
Sealant and Battery Replacement
Beyond frame-mounted cargo hardware, tubeless sealant and e-bike batteries need scheduled replacement rather than a one-time installation. You’ll maintain both according to use and component condition.
- Check liquid sealant periodically; it dries and loses puncture-sealing ability. Road tires generally use less volume, while MTB tires may need more for their larger casings and trail exposure.
- Choose sealant formulated for your tubeless tire system, and refresh it before dried residue leaves small punctures unsealed.
- Replace an e-bike battery when declining capacity cuts range, especially on climbs. Match voltage, connector, mounting interface, and approved compatibility to your exact road e-bike or e-MTB model. Battery health determines available assist under hill loads.
Inspect seals and contacts during service, and follow the manufacturer’s charging and disposal instructions carefully.
Handlebar Space Constraints
Handlebar real estate shapes which accessories you can mount and where they’ll work safely. On a road bike, low, narrow drop bars leave little usable straight section. Position a computer, front light, and phone mount so they don’t obstruct your view of the brake hoods or contact your hands when sprinting or climbing.
Choose low-profile clamps and slim devices; mounts placed too high can compromise lever access and hand positions.
A mountain bike’s wider, flatter bar provides more clamp area for larger bell housings, bar-end lights, and multiple devices. More flexible cable routing around its brake and shift controls also helps you keep mounts clear. Still, leave clearance for lever sweep and cables, secure every clamp against vibration, and avoid strike zones during crashes.
Clipless Pedals Versus Flat Pedals
Clipless pedals lock your cleated shoe into a fixed position, improving power transfer and pedaling consistency on sustained road rides. Flat pedals use traction pins and grippy shoes, letting you reposition or remove a foot instantly.
You’ll usually favor clipless for efficient pavement mileage and flats for rapid control on technical, unpredictable trails.
Pedal Design And Function
Although both pedal types connect your body to the bike, they serve different control priorities. Clipless pedals lock a shoe-mounted cleat into a retention mechanism, creating a repeatable interface that supports efficient force transfer through each pedal revolution. They suit sustained, high-cadence road riding, but correct cleat alignment matters.
- Choose clipless pedals when you want consistent shoe position and efficient power delivery. Set cleat placement carefully; several degrees of float lets your foot rotate naturally and can reduce knee strain.
- Flat pedals use a broad, pinned platform to create grip through shoe rubber and friction. You can reposition your foot instantly without aligning a cleat.
- Clipless engagement requires a deliberate step-in and release, whereas flats accept regular shoes and don’t require cleat maintenance.
Terrain And Rider Control
Terrain determines whether pedal retention or instant foot freedom gives you better control. On smooth pavement, clipless pedals lock your shoes to the cranks, supporting a circular stroke at high cadence and limiting foot repositioning losses. Their secure connection feels especially useful when you maintain steady speed or climb seated.
On trails, flat pedals let you dab immediately when a wheel slips in mud, loose gravel, roots, or rocks. Choose a wide platform with aggressive pins to stabilize your shoe while you shift weight and ride corners or jumps. Clipless mountain pedals can improve uphill traction and cadence on smoother dirt or gravel, but you must practice unclipping under pressure.
If technical descents demand frequent foot-out corrections, flats give you faster recovery and more confidence.
Road CO₂, Mountain Mini Pumps
On a road bike, you can use a CO₂ cartridge to restore high tire pressure quickly after a puncture and resume your ride with minimal delay. On a mountain bike, a durable mini pump gives you repeatable inflation for wide, low-pressure tires and multiple trail-side adjustments.
Mount your inflator or pump where you can reach it easily, while securing it against road vibration or trail impacts.
CO₂ Cartridge Speed
Road riders often choose a CO₂ inflator because it restores a narrow 23–28 mm tire to high pressure within seconds, minimizing downtime after a roadside puncture. Its compressed gas suits pavement riding, where quick repairs and a low-volume kit matter. Narrow casings need relatively little air, so a cartridge efficiently produces rideable pressure without extended pumping.
- Choose CO₂ when elapsed time matters; gas enters the tube immediately, making it the fastest emergency option.
- On a mountain bike, use a mini pump to add air gradually and set a safe, lower pressure for a 2.0–2.5-inch knobby tire.
- CO₂ remains quicker off-road too, but you’ll value pump control when traction and pressure adjustment matter more than sheer speed after repairing a flat tire.
Mini Pump Durability
Although a CO₂ inflator gives road riders the fastest high-pressure refill, a durable mini pump provides repeatable backup without relying on a single cartridge or a leak-free seal. Road-specific pumps must generate 60–120 psi efficiently, so inspect the piston shaft, check valve, and hose connection before you depend on one. A worn valve allows backflow; a loose nozzle wastes pressure.
Trail pumps typically prioritize rugged housings and seals that resist grit and vibration. They also endure more strokes because a 2.0–2.5-inch tire needs far more air volume than a 23–28 mm road tire. Choose a pump whose piston moves smoothly, hose threads engage cleanly, and valve head remains secure under load. You can’t replace these components’ reliability with speed when a cartridge is gone.
Mounting And Access
Once you’ve chosen a reliable inflator, mount it where you can reach it without unpacking half your kit. On a road bike, secure a CO₂ head and cartridge beneath the bottle cage or in a compact saddle bag. Confirm that the threaded head matches your Presta or Schrader valve, and carry two cartridges; narrow 23–28mm tires return to pavement pressure quickly, but each cartridge is single-use.
- For trail riding, bolt a high-volume mini pump to bottle-cage mounts or strap it firmly to the frame, where mud won’t dislodge it.
- Choose a gauge-equipped pump for 2.0–2.5-inch tires; it helps you reset low traction pressures after a pinch flat.
- Keep a backup: CO₂, a small pump, or spare cartridges protect you from leaks and wasted bursts.
Road Mirrors, MTB Knee Pads
While both add confidence, road mirrors and MTB knee pads solve fundamentally different problems: mirrors improve your awareness of approaching traffic on fast paved rides, while knee pads protect against direct impacts from rocks, roots, and awkward falls.
Mount one near your handlebar and adjust its angle until you can see directly behind with minimal head movement. That setup lets you monitor traffic without repeatedly turning your shoulders at speed. It isn’t a substitute for a shoulder check, but it improves continuous situational awareness on smooth roads.
Choose MTB pads with thick foam or armor, full kneecap coverage, secure straps. Pedal, compress suspension, and verify they don’t slide or expose your joint. They manage repeated impacts when a wheel slips or you land awkwardly.
Conclusion
Your accessories should match the bike’s operating environment, mounting points, and control demands. On roads, prioritize compact lights, visibility, repair efficiency, and luggage compatibility. On trails, choose secure mounts, mud clearance, dropper-post integration, durable protection, and tools you can use away from pavement.
Don’t treat components as interchangeable: bar space, frame eyelets, pedal interface, and inflation strategy affect fit and function. When you specify equipment around your riding conditions, you’ll improve safety, reliability, and comfort.