Your Monthly Bike Maintenance Checklist for a Safer Ride
Each month, you should inspect brake pads, rotors, tyres, wheels, chain, cables, frame, and fasteners before commuting.
Set cold tyre pressure with a gauge, secure both wheel axles, and investigate rubbing, wobble, or lateral play.
Replace worn pads or stretched chains, clean and lubricate the drivetrain correctly, and stop riding if you find a crack.
Test brakes at low speed, correct stem-bolt issues, and record the service date.
A simple routine makes every ride safer.
Monthly Safety Checks for Commuters
For a safer daily commute, set aside a few minutes each month to inspect the systems that control stopping, traction, and wheel security. Inspect brake pads and replace pads below 1.5-2 mm, or your manufacturer’s limit. Feel for ridge in the disc’s wear zone. Squeeze both levers; they should stop the wheel without sponginess. Bleed soft hydraulic brakes as instructed.
Then inspect tyres cold, confirming PSI falls within the sidewall range. Check tread and casing for cracks or wear that invites punctures. With bike on its stand, spin each wheel to detect rubbing or wobble, then confirm quick-release or thru-axle lever is closed and wheel seated securely in dropouts.
Inspect chain for rust or stiff links. Lubricate sparingly; excess oil collects dirt and degrades shifting.
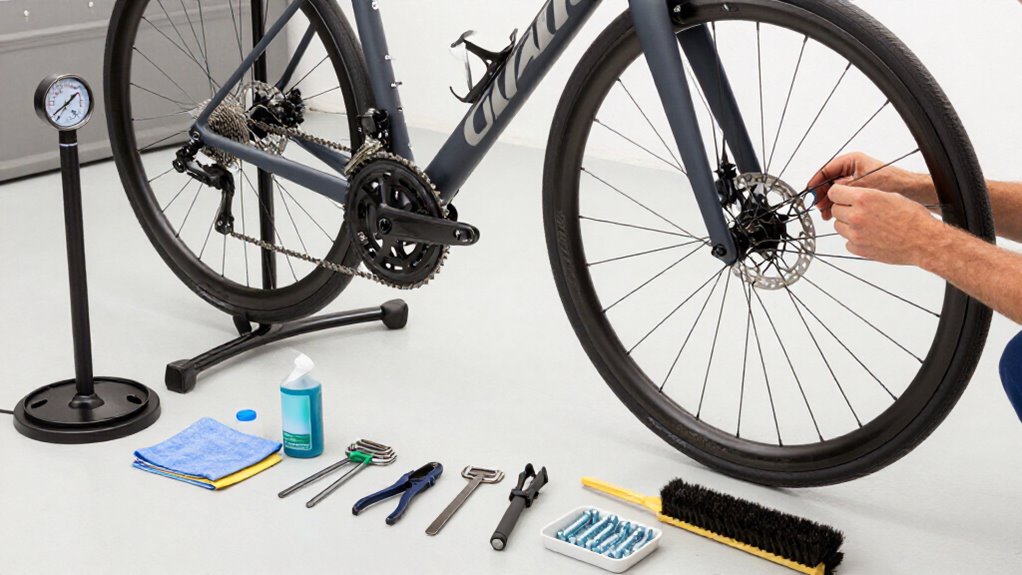
Floor Pump With Pressure Gauge
A floor pump with a pressure gauge lets you set tyre pressure accurately before each ride, protecting traction, handling, and puncture resistance. Choose a stable pump with a valve-compatible head, long hose, locking lever, and a gauge accurate to within 1–3 psi. Follow this routine:
- Read the tyre sidewall; never exceed its maximum pressure.
- Open a Presta valve, attach the aligned hose, and lock the head securely.
- Pump steadily, then use the bleed button to fine-tune pressure before removing the head.
Each month, inspect seals, hose, lever, and gauge readability. Compare suspect readings with a trusted gauge; deviations above 3–5 psi require calibration or replacement.
Store the pump dry, and replace leaking seals or a slipping head promptly to prevent valve damage.
45-Minute Saturday Service Plan
Put that accurately inflated bike through a focused 45-minute Saturday service to catch wear before it affects control or stopping distance. Work methodically, recording faults and stopping if you find a safety-critical defect.
| Time | Check | Pass standard |
|---|---|---|
| 0–10 min | Brakes | Levers stop wheels before grips; pads exceed 1.5 mm; rotors lack wear ridges. |
| 10–20 min | Chain and cables | Measure wear: replace at 0.5% for 11/12-speed, 0.75% for 10-speed or below; reject frayed or stiff cables. |
| 20–45 min | Wheels and tyres | Set cold pressure within sidewall range; reduce 7–15 PSI for rain or ice; secure wheels and check spin. |
Squeeze each lever firmly. Confirm wheels sit fully in dropouts. During spin test, investigate rotor rub or wobble beyond 1–2 mm before riding. Correct faults first.
Degrease Chain Before Lubricating
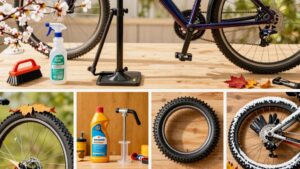
Inspect your chain for accumulated grit, then choose a bike-safe degreaser and keep it off brake rotors, pads, bearings, and housings. Scrub the chain, cassette, and chainrings with brushes and lint-free rags rather than high-pressure water, removing residue until surfaces feel clean.
Let everything dry completely before you apply fresh lubricant.
Assess Chain Grime
Before adding fresh lubricant, assess the chain for dryness, dark buildup, or a gritty paste around the links. Rotate the pedals backward slowly and inspect each section. Run a clean rag along the lower chain run, keeping fingers clear of chainrings and sprockets. Black residue, grit, stiff-feeling links, or a rag that turns dirty signal that lubricant has trapped contamination.
Don’t apply new lube over this film. Grit held beneath lubricant accelerates chain, cassette, and chainring wear and can impair predictable shifting. Degrease the drivetrain until loosened grime no longer transfers, then wipe it until the rag comes away clean. Let components dry before lubrication; cleaner can dilute lubricant, raise friction, and draw in dirt. This check prevents drivetrain wear and supports reliable shifting.
Choose A Safe Degreaser
Choose a purpose-made bicycle degreaser—ideally citrus-based or biodegradable—that’s safe for drivetrain materials and won’t leave an oily residue. Check the label for compatibility with your chain’s O-rings and follow its dilution and contact-time directions exactly. Apply the product carefully to the chain, cassette, and chainrings, allowing it to break down old lubricant and grit for the stated time.
Then scrub each section methodically with a stiff brush or old toothbrush, working between cassette teeth and around chainring profiles. Rinse lightly, rather than blasting components with high-pressure water. Wipe everything with clean, lint-free rags until they lift no dark grime, then let the drivetrain dry completely. Skip household solvents and oily multipurpose cleaners: they can leave residue, attract fresh dirt, and hinder lubrication.
Protect Brakes And Bearings
To protect stopping power and bearing life, keep degreaser, oil, and rinse water strictly away from brake rotors, pads, hubs, and the headset while you clean the drivetrain. Monthly, remove the rear wheel before treating the cassette, chainrings, jockey wheels, and chain, and use controlled applications.
Keep high-pressure water off bearing seals.
Before lubrication, inspect pad material and replace pads below 1.5 mm, or your manufacturer’s minimum. Check rotors for a wear ridge. If contamination occurs, clean rotors with 90% isopropyl alcohol and lint-free rags; don’t use oil-based cleaners.
Once the chain is completely dry, apply one drop of lubricant per link and wipe away excess. If hub or headset bearings feel gritty or show play, service or replace them; don’t hide the problem with oil.
Scrub And Rinse Thoroughly
With the drivetrain protected from overspray, scrub the chain, cassette, and chainrings with a bike-safe degreaser and a stiff brush, working grime from between cassette teeth and around the jockey wheels. Rotate the pedals backward by hand so you can reach every link, but keep fingers clear of the chainrings and jockey wheels. Wipe each section with a clean, lint-free rag, repeating until the rag comes away mostly clean.
Rinse loosened soil with a low-pressure flow of water only where needed; don’t direct spray at hubs, bottom brackets, or other bearings. For mud-packed or heavily contaminated drivetrains, repeat the degrease, brush, wipe, and limited-rinse sequence. Removing residue now prevents abrasive grit from accelerating chain, cassette, and chainring wear, and it helps preserve quiet shifting.
Dry Before Lubricating
Before lubricating, dry the drivetrain completely so moisture or leftover degreaser can’t dilute fresh lube and shorten its effectiveness. After rinsing, follow the degreaser manufacturer’s directions and remove remaining liquid with a clean, lint-free rag. Wipe the chain link by link, then dry the cassette, chainrings, and jockey wheels, where trapped grime and solvent commonly remain.
Pedal backward slowly while holding the rag around the lower chain run; keep fingers clear of chainrings and pulleys to prevent injury. Continue until the rag lifts no dark residue and the metal feels dry, not slick or damp. Let hard-to-reach areas air-dry if needed.
Only then apply a suitable lubricant sparingly, using about one drop per link. Rotate the cranks to distribute it, then wipe away excess.
Wet-Weather Brake Pad Checks
In wet conditions, inspect your brake pads for adequate material and replace them if they’re below the manufacturer’s minimum thickness. Remove grit and glaze from pads and rotors with 90%+ isopropyl alcohol and a lint-free rag, never oil-based cleaners. Then test both brakes in a safe area to confirm firm lever feel and controlled, consistent stopping power.
Inspect Pad Wear
Wet roads can accelerate brake-pad wear, so inspect both pads after wet rides rather than relying on your usual maintenance interval. Check each pad through the caliper gap or use its wear line, ensuring material remains distributed. Replace pads with less than about 1.5 mm remaining, or 2 mm if your manufacturer sets that limit.
Compare inner and outer pads; uneven thickness can reduce predictable stopping power. Spin each wheel and listen for scraping, which may signal pad or caliper alignment trouble. During your pre-ride brake test, squeeze both levers. They should engage consistently without sponginess or unusually long travel.
Note any squealing, grinding, or response changes, and don’t ride until you’ve identified the cause. Recheck pad thickness and lever feel after every wet outing.
Remove Grit And Glaze
After a wet ride, clean grit and moisture film from your disc brakes promptly, as both can reduce bite and promote pad glazing. Set the bike securely, then wipe the rotor with a clean, lint-free cloth dampened with 90% or stronger isopropyl alcohol. Never use oil-based cleaners or products that leave residue.
Remove the wheel if needed and inspect pad faces for embedded grit, wet slurry, or a shiny, hardened surface. Gently scrub contaminated pad surfaces, then clean the rotor again before reassembly. Check that pad material remains at least 1.5–2 mm thick; replace thin, contaminated pads rather than trying to revive them. Finally, spin the wheel and watch for uneven pad contact or listen for rubbing. Persistent squealing or a spongy lever warrants inspection.
Test Wet Braking Performance
Once the rotor and pads are clean and dry, test braking where you can ride slowly and safely. After a wet ride or when rain begins, squeeze both levers and make a controlled, low-speed stop. Each brake should stop its wheel completely without excessive lever travel or a spongy feel.
Listen for squealing, rubbing, or rotor scraping. Use a phone light or torch to inspect pad material; replace pads nearing the 1.5–2 mm threshold. Weak braking may mean water or oily contamination remains.
Clean discs and pads with 90% or stronger isopropyl alcohol and lint-free rags, never oil-based cleaners, then let them dry before retesting. Scraping usually signals caliper alignment or rotor-trueness trouble, not a lubrication need. Repeat this check whenever conditions change before you set off.
No Lateral Wheel Play
With the bike stable, hold each tyre at the 3 and 9 o’clock positions and push-pull it side to side. There should be virtually no lateral movement once the axle is secured. Check both wheels monthly and before riding after removal or transport.
For a quick-release, ensure the lever is fully closed and firmly clamped; for a thru-axle, tighten it to the specified setting. If slack remains, re-seat the wheel squarely in the dropouts, confirm its end caps align, then secure the axle again.
Ensure the wheel is centered: rubbing combined with play can signal uneven clamping. If movement persists despite correct axle installation, or the hub feels loose or rough, stop riding and have a mechanic inspect the hub and related components promptly.
Cracked Frame: Stop Riding
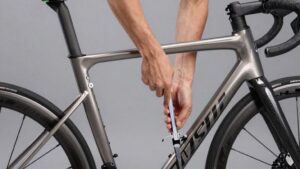
A securely fitted wheel won’t compensate for a damaged frame: if you spot any crack, stop riding immediately. Check the head tube, bottom bracket shell, dropouts, welds, and tube joints in strong light each month. Look for hairline splits, flaking paint, or rust blooming, especially where tubes meet.
Treat new creaking, unusual flex, or misalignment near a suspect area as a warning. Don’t ride even a short distance home, because pedaling and braking loads can spread fatigue rapidly. Don’t glue or patch a structural crack; unsuitable bonding or heat may weaken the material further.
Arrange a prompt inspection with a qualified bike frame builder or professional mechanic. If testing confirms a crack or structural compromise, replace the frame before you ride again at all.
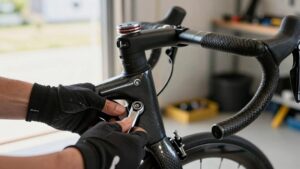
Correct Over-Tightened Stem Bolts
If stem bolts feel “fully tight,” don’t add force—over-tightening can damage the stem and permanently crush a carbon steerer or handlebar. Back each bolt out slightly, then use a calibrated torque wrench and the maker’s specified value. Common stem-clamp settings are about 4–6 Nm, but your component’s marking controls.
- Tighten faceplate or steerer-clamp bolts in a cross-pattern, adding small, even increments. This distributes load and preserves the intended gap.
- Re-seat the bar or stem if it moves; don’t compensate with more torque. Movement can signal worn contact surfaces, poor fit, or mismatched parts.
- Test the front end: hold the front brake and rock the bike. No click should come from the headset or stem. If the bar still wiggles, get help.
Record Monthly Maintenance Dates
Choose a fixed day each month, such as the first Saturday, and enter it as “Monthly Bike Check” in your calendar. This reminder helps you complete safety-critical work before small issues become failures.
In your log, record the chain checker result and compare it with replacement limits: 0.5% for 11/12-speed chains and 0.75% for 10-speed and below.
Note each deep cleaning date, including rear-wheel removal, cassette scrubbing, and chainring and jockey-wheel cleaning, so you can shorten intervals after muddy rides. Record cold-tyre pressure: list the sidewall PSI range and each measured PSI.
Also log pad thickness, replacing pads below about 1.5 mm or your maker’s limit, plus any rotor ridges you feel or measure. Review past entries before every check; they reveal trends that demand prompt action.
Conclusion
Your monthly checklist gives you a baseline for safer commuting. Check tire pressure with a floor pump and gauge, inspect brakes after wet rides, confirm wheels have no lateral play, and examine the frame for cracks. Clean and degrease the chain before applying lubricant, then correct any over-tightened stem bolts. Set aside 45 minutes Saturday, record date and findings, and stop riding if you identify structural damage or notice unsafe braking, looseness, or unusual handling.