7 Signs Your Bike Drivetrain Needs Replacing Now
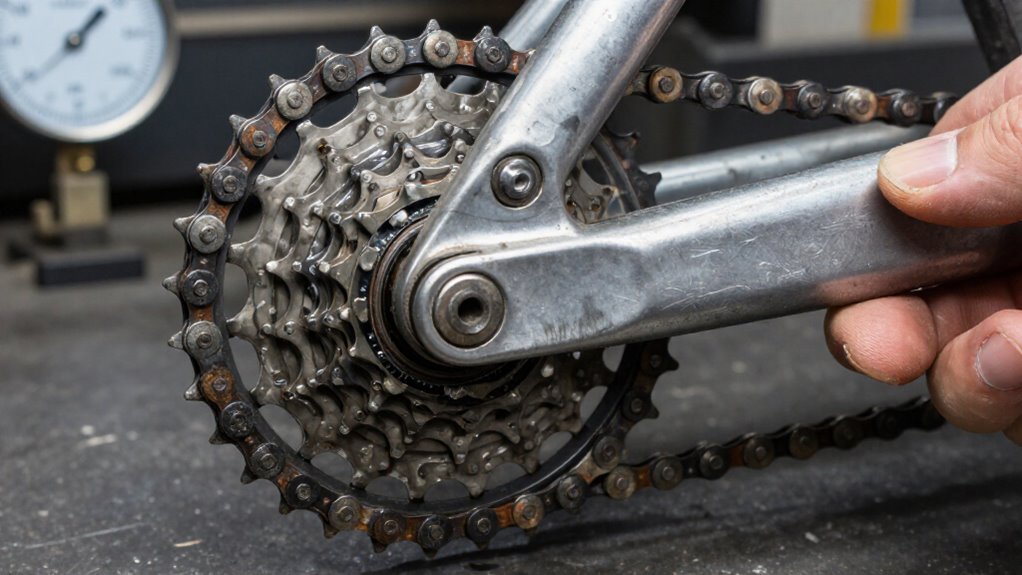
Replace drivetrain parts when you measure 0.5% chain wear on 11–13-speed bikes, 0.75% on older systems, or 12⅛ inches over 12 links.
Act if climbs cause skipping, cogs look hooked, chainrings show shark-fin teeth, or an e-bike wears chains rapidly.
Clean mud before testing, replace single-use quick links, and check derailleur-hanger alignment.
Don’t sprint through pedal lurches; reduce force until you diagnose secure chain engagement.
The checks below help isolate each fault safely and clearly.
0.5% Wear Means Replace
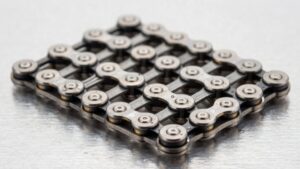
A chain checker reading of 0.5% wear means you should replace the chain now, especially on modern 11- to 13-speed drivetrains. This threshold is diagnostic, not advisory: the chain’s pin-to-pin pitch has increased enough to compromise precise engagement. Don’t judge wear by appearance; clean the chain, place a compatible checker against the rollers, and confirm that it seats fully at the specified 0.5% mark.
With a ruler, inspect 12 full links: approximately 1/16 inch, or 1.5 mm, beyond 12 inches indicates the same condition. Install the correct-speed replacement chain, route it through the derailleur correctly, and set its length to specification. Then check shifting in a work stand before riding. A timely replacement restores predictable gear engagement and reduces skipping under torque, improving your control.
Chain Wear Ruins Cassettes
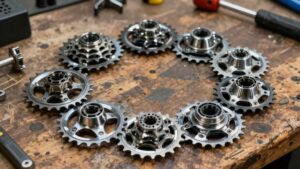
Chain wear doesn’t stay confined to the chain: as its pin-to-pin pitch increases, the rollers load cassette teeth in the wrong locations and gradually reshape the cogs. Wear at the pins, bushings, and rollers shifts contact pressure across each tooth face, causing abrasion and deformation.
Your most-used cogs usually deteriorate first, so inspect the cassette for hooked, shark-fin, or asymmetric teeth rather than assuming every sprocket ages equally.
A cassette has no universal gauge. After confirming derailleur adjustment, examine tooth profiles and fit a new, correctly sized chain as a compatibility check. If it meshes noisily, rides poorly, or reveals reshaped teeth, replace the cassette and inspect chainrings. Don’t continue riding damaged teeth: unreliable engagement can cause abrupt pedal release and loss of control.
Uphill Pedaling Reveals Skipping
Why does a drivetrain that seems fine on level ground suddenly lurch on a steep climb? High torque exposes a worn chain’s fit on cassette teeth. As you grind, internal pin-and-roller wear lengthens link pitch, letting the chain ride upward instead of seating fully. Your pedals may suddenly give way despite clean, normal shifts at light load. This is a control hazard: reduce force, avoid standing sprints, and inspect before climbing.
| Diagnostic sign | Likely action |
|---|---|
| Skips only under torque | Check chain wear |
| Pedals lurch briefly | Stop hard efforts |
| 11–13-speed at 0.5% | Replace chain |
| 6–10-speed at 0.75% | Replace chain |
Derailleur adjustment rarely cures skipping. Use a chain checker; if noise or erratic shifting continues after cleaning and lubrication, replace chain promptly to limit cassette wear.
Chainring Teeth Need Inspection
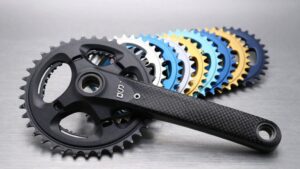
Inspect your chainring teeth under bright light for pointed shark-fin profiles, hooks, or uneven wear. You should compare tooth shapes around the full ring and check for cracked, bent, or missing teeth that can cause chain loss under load.
If worn teeth coincide with skipping or poor shifting after adjustment, replace the chainring before it creates a riding hazard.
Shark-Fin Tooth Profiles
Look closely at your chainring teeth: hooked, pointed, or scooped “shark-fin” profiles show that a worn chain has damaged the tooth geometry. These distorted teeth let the chain climb and release under pedaling load, reducing secure engagement. Derailleur adjustment can’t restore the original tooth shape or correct this mismatch.
Compare the ring’s working faces with the rounded, symmetrical profile of an unworn ring. If you feel repeatable skipping or slipping in the same chainring gears during hard efforts, stop treating it as an indexing issue. Check chain wear with a gauge: approximately 0.5% on 11–13-speed systems or 0.75% on 6–10-speed systems warrants attention.
Inspect the cassette and chain before riding further; damaged meshing can make a new chain shift poorly and wear prematurely too.
Hooked Teeth and Wear
Hooked, shark-fin-shaped, or sharply pointed chainring teeth show that a worn chain has altered the tooth profile, so the drivetrain needs inspection rather than another derailleur adjustment. Chain “stretch” is increased pin-and-roller spacing that lets the chain ride higher on teeth instead of seating fully. The mismatch concentrates load on trailing edges, curves teeth into hooks, and weakens engagement.
Under climbing torque or hard acceleration, you may hear clicking, feel a sudden skip, or lose drive. Treat this as a crash risk especially when standing on pedals. If a new, correctly sized chain doesn’t restore engagement, the chainring may be beyond service life.
Don’t continue riding on damaged profiles: use accelerates wear across the cassette and chain, and missing or deformed teeth require replacement.
Chainring Inspection Methods
Start with a clean chainring so you can assess tooth shape and chain engagement accurately. Examine both tooth edges under bright light, rotating the cranks slowly. Look for hooked, sharply pointed shark-fin profiles, cracks, bends, missing teeth, and uneven wear concentrated in your usual riding positions.
These defects let the chain climb the teeth and skip when you apply torque.
Perform a pull test with the chain on the largest chainring and smallest rear cog. Gently pull the chain away at the tooth area; easy lift or a visible gap indicates degraded chainring/chain engagement. Don’t test while pedaling or loading the drivetrain. If a new, correctly sized chain still shifts poorly, or tuning improves shifting briefly before slipping returns, inspect the ring closely again.
E-Bikes Accelerate Chain Wear
Your e-bike’s motor adds torque that accelerates wear between the chain’s pins, rollers, and bushings. Check chain elongation more often, since a 0.5% reading can quickly lead to cassette damage and skipping under load.
Shorten cleaning, lubrication, and inspection intervals, especially after wet or gritty rides, to maintain reliable drivetrain engagement.
Higher Torque Loads
E-bike motors load the chain heavily during starts, climbs, and hard acceleration, accelerating wear at the pins, bushings, and rollers that increases chain pitch, often mislabeled as “stretch.” As that wear progresses, the chain may skip under pedal or motor torque before shifting otherwise seems abnormal, particularly on 11-speed-and-up systems.
Test the drivetrain under load; don’t continue riding if skips threaten balance or traction. Check earlier after wet, gritty rides, because motor torque embeds abrasive dirt and damages mating teeth. Use a 0.5% gauge threshold on 11-speed-plus systems, then inspect cassette and chainring profiles.
| Indicator | Action |
|---|---|
| Skip under hard acceleration | Stop riding and inspect |
| Wet, gritty conditions | Clean, then check promptly |
| 0.5% gauge reading | Replace chain promptly |
| Hooked cassette or chainring teeth | Replace damaged components |
Faster Chain Elongation
Motor-assisted torque accelerates internal pin-and-roller wear, increasing chain pitch, often mistaken for “chain stretch,” so an e-bike chain can reach its replacement limit sooner than one on a conventional bike.
On modern 11–13-speed drivetrains, narrow chains and sustained assist loads can compound wear quickly. Check the chain with a gauge: around 0.5% wear warrants replacement to reduce the risk of cassette damage. A ruler confirms it: more than 1/16 inch across a 12-inch, 12-link span is roughly replacement-range wear.
Don’t dismiss load-related skipping or declining shift accuracy as adjustment faults. Under motor torque, an elongated chain rides high on tooth faces, risking sudden slip and loss of pedal control. Wet off-road grit mixed with lubricant forms an abrasive paste, accelerating pin and roller damage during riding.
Maintenance Interval Changes
Because sustained motor torque accelerates pin-and-roller wear, check an e-bike chain more often than you would on a comparable non-assisted bike. Don’t rely on mileage: e-bike chains may wear out well before the 3,000–5,000 km often seen on road bikes. Use a chain checker regularly, and replace the chain at approximately 0.5% wear on 11–13-speed systems or 0.75% on 10-speed-and-under systems.
Shorten cleaning and lubrication intervals after wet rides, dirt exposure, or repeated high-power climbing. Grit combines with load to abrade pins, rollers, and sprocket teeth. If the gauge reaches its limit, replace the chain promptly. Waiting can wear the narrow cassette’s tooth profiles, causing skipping under acceleration, unreliable shifts, and reduced control when you need predictable power delivery, especially during technical riding situations.
Ruler Test: 12⅛ Inches
A ruler gives you a quick diagnostic check for chain elongation when you don’t have a chain-wear gauge. Shift into a position that leaves the chain accessible and stable. Place the ruler’s zero mark at the center of one rivet, then count 24 rivets forward; this covers 12 full links and ends at the 25th rivet.
A new-ish chain reads approximately 12 inches center-to-center. If the 25th rivet falls beyond 12⅛ inches, about 1/16 inch extra, your chain has roughly 0.5% wear and should typically be replaced. On many 11- to 13-speed systems, continued use beyond this point can accelerate cassette wear and raise the risk of skipping under torque. Check two or three chain sections, since elongation isn’t always uniform. Record results; inspect sprockets carefully.
Mud Can Mimic Chain Wear
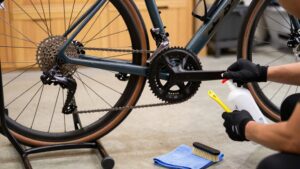
Mud and grit can produce the same warning signs as a worn chain, including noisy running, hesitant shifts, and apparent skipping under load. Before you condemn parts, remove debris from chain, cassette, and chainrings, then clean and relubricate them. Wet grit mixes with old lubricant to form abrasive paste around rollers and pins, causing clicking, squeaking, drag, and shifts without pitch elongation.
Mud packed in cassette teeth can block full engagement, creating inconsistent shifts that disappear after washing.
Test cautiously after cleaning, avoiding acceleration until engagement feels secure. If symptoms remain, measure chain wear with a checker or ruler: 0.5 percent is the limit for 11-13-speed systems, and 0.75 percent for 6-10-speed systems. Persistent skipping demands inspection for wear or damage.
Reusing Single-Use Quick Links
Don’t reuse a quick link marked “one-time” after opening it: its locking surfaces may no longer seat securely, raising the risk of chain separation or slipping under load.
If you open one, install a new link matching your chain’s exact brand-approved type and speed: 10-, 11-, or 12-speed connectors aren’t interchangeable. A reused link can leave pins incompletely seated, producing skips that resemble chain or cassette wear. Inspect it before riding:
- Confirm the link is fully latched.
- Follow any directional arrow.
- Check packaging or brand guidance when uncertain.
- Replace it immediately if it opens, clicks, or feels loose.
A fresh, correctly fitted connector costs little; a failed one can leave you stranded or cause a sudden, frightening loss of drive.
Check Derailleur Hanger Alignment
Check derailleur hanger alignment when shifting stays poor after you’ve set cable tension and limit screws correctly. A bent hanger prevents the derailleur from tracking cassette cogs squarely, so indexing can seem correct in some gears while the chain rubs or won’t sit cleanly in others. Inspect it from the side for twist or droop, especially after a crash, rock strike, or curb impact.
Skipping under load may resemble worn chain or cassette teeth, but damaged hanger geometry can cause it.
Don’t straighten a hanger by eye. Use a dedicated alignment gauge or have a shop measure and correct it; precise alignment protects shift performance and helps prevent chain derailment. Replace a severely bent or damaged hanger. Then recheck every gear under light pedaling.
Conclusion
If your chain reaches 0.5% wear, replace it before it damages the cassette and chainrings. You should also investigate skipping under load, hooked teeth, inaccurate 12⅛-inch ruler results, and persistent shifting faults. Clean mud first, then measure again.
Don’t reuse single-use quick links, and check hanger alignment before fitting parts. Because e-bike torque speeds wear, inspect more often. Replacing a worn drivetrain promptly restores reliable engagement and reduces the risk of sudden unexpected pedal slip.