How to Choose Bike Accessories That Actually Match Your Riding Style
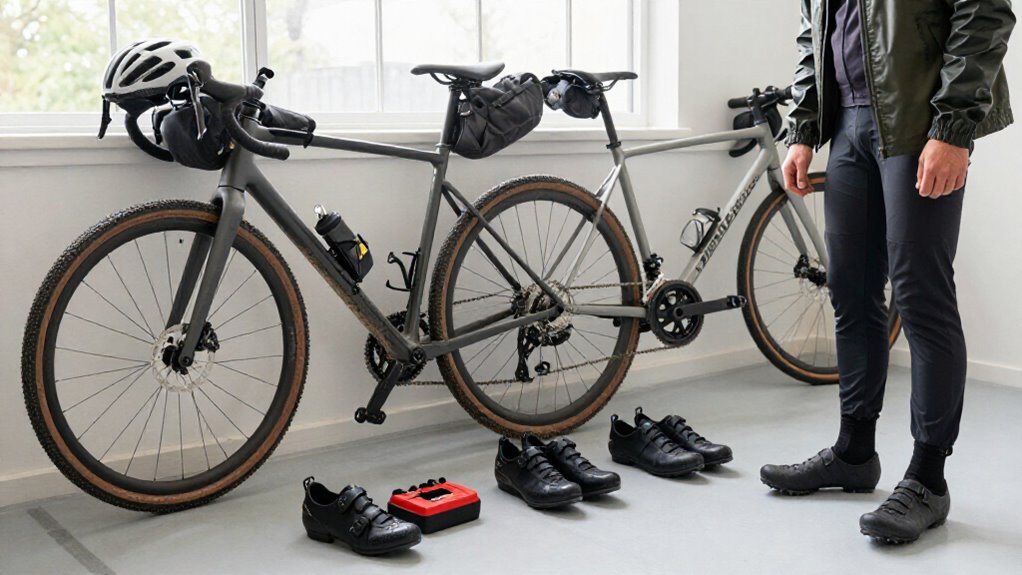
Choose accessories for the rides you actually take: commuters need lights, a lock, fenders, and flat tools; gravel riders need navigation and weather-ready repair gear; mountain riders need tubeless support and volume-appropriate inflation.
Check frame, rack, axle, and handlebar compatibility before buying storage or mounts.
For night riding, choose medium-mode runtime 30% beyond planned darkness and confirm battery replacement options.
Use panniers for heavier loads, and verify rack ratings.
Details below help you refine fit.
Match Accessories to Ride Type
Start with the ride you actually do: your route length, surface, weather exposure, and time of day should determine the accessories you carry. Commuters need front and rear lights, a dependable lock, fenders, and flat-ready tools; fitness riders benefit most from comfortable contact points, visibility, and basic repair gear.
On gravel or mixed routes, use navigation support, weather-ready lighting, and reliable flat equipment. Light output must suit your speed and road type, not just a “bright enough” label.
For mountain rides, prioritize tubeless support when applicable, trail-capable tools, and a pressure-adjustment method matched to tire volume and terrain. Family and casual riders should favor simple visibility upgrades and fuss-free locks.
If you’re unsure, buy recurring-problem fixes first: lights, spare tube, mini-pump, multitool, and comfort.
Account for Available Storage
Once you’ve chosen the safety and repair gear your rides demand, make sure your bike can carry it securely. Check rack mounts, frame space, fork clearance, and seatpost room before buying bags or cages. A poorly matched “universal” bag can rub tires, interfere with shifting, or loosen over rough pavement and trails.
For commutes and errands, use a compatible rear rack and bag, or stable on-bike storage, to keep daily essentials off your back without upsetting handling. On fitness or gravel rides, bottle cages plus a compact bag should hold hydration, a tube, and a multitool without cramming.
Match capacity to duration: short rides need little beyond bottles and repair basics; multi-hour routes warrant dedicated, accessible storage. Secure mounts to their load limits and recheck fasteners after rough rides.
Night-Ride Lighting Runtime
Night-ride lighting runtime must cover your full route, delays included, at the output you’ll actually use—not just a maker’s maximum claim. Choose a front light whose tested medium-mode runtime exceeds your planned darkness by at least 30%. City streets usually need 400–800 lumens; fast, unlit roads or trails demand 1,200+.
| Route | Practical setting | Feeling |
|---|---|---|
| Lit commute | 400–800 lm | Calm control |
| Unlit speed | 1,200+ lm | Confident reach |
Compare runtime at each mode, charging time, and thermal throttling, which can dim a hot light early. A shaped beam and rear visibility matter more than headline lumens. Check whether its USB-C port recharges before tomorrow’s ride, and confirm the mount clears your controls. For longer trips, choose an external battery or carry a compatible backup. Don’t trust maximum mode alone; test it after dark.
Panniers vs. Backpacks
Choose panniers when you carry consistent, heavier loads: they spread weight low on a compatible rack for steadier handling and a cooler back on long rides.
Use a well-fitted backpack when you need flexible, lightweight carry without rack mounts, but keep straps snug to prevent shifting and shoulder fatigue. Check rack and fender compatibility, load limits, and waterproof pannier or pack-cover options before you commit.
Load Capacity And Stability
For heavier or bulkier loads, panniers usually provide the most stable setup because they place weight low on the bike rather than high on your back. Their position distributes cargo through the rack, frame, and wheels, reducing sway when you brake, corner, or ride gravel.
Choose rack-mounted models that latch firmly to compatible side rails; loose hooks let bags bounce and can shift weight unexpectedly.
Check rack and bag load ratings against your cargo, whether that’s groceries or multi-day equipment. Match capacity to route length, and avoid overfilling one side or stacking weight high above the rack.
If you run rear fenders, verify tire and fender clearance at load to prevent rubbing after potholes. Use backpacks for light, short errands; high loads alter handling.
Comfort On Longer Rides
Load placement affects not only stability but also how you feel after several hours in the saddle. For long rides, panniers or a rear rack bag keep cargo low, secure, and isolated from your body. Compared with a backpack, they limit bounce, reduce shoulder and neck fatigue, and don’t shift your center of gravity on gravel or mixed surfaces.
Use them for reliability essentials: a spare tube, multitool, compact pump, hydration, and extra food. Confirm that your rack’s mounting points and load rating match the bag system, then secure both sides evenly.
A backpack still suits short commutes and light loads. Choose one with secure buckles, not Velcro-only retention. Add a bottle cage for easy hydration. If you ride for hours, panniers improve comfort.
Weather Protection Options
When rain is part of your routine, rack-mounted panniers usually protect cargo better than a top-loading backpack. They keep weight low and stable over bumps, reducing bounce while separating your gear from back sweat and road spray.
For rainy commutes or longer rides, choose sealed panniers or models with fitted rain covers; add fenders to keep spray off the bags and your clothing.
A backpack can still suit short trips or bikes you switch often, especially with a rain cover. But secure, breathable shoulder straps are essential: loose loads shift during climbs and descents. You’ll also carry heat and moisture against your back.
For mixed forecasts, a cover works on either system, but panniers provide stronger wet-weather readiness and easier access to protected essentials on the move.
Bike Compatibility Requirements
Start with your bike’s mounting options: panniers need a compatible front or rear rack, and “universal” hooks may not match your rack’s rail diameter, lower-retention point, or attachment layout.
Verify rack load limits, mounting positions, and heel clearance before buying. On road or gravel bikes, choose panniers with rigid hooks and anti-sway retention so they won’t bounce into spokes, brakes, or handlebar controls on rough pavement.
If you ride a carbon frame, use its approved interface and torque specification; overtightened clamps can damage lightweight tubing. A backpack needs no rack, but it shifts load onto your shoulders and moves as you climb, increasing fatigue on longer rides.
For commutes, pair rain-resistant panniers or waterproof liners with fenders to reduce splash transfer and keep dry.
Fenders for Wet Commutes
For daily wet commutes, choose full-coverage fenders over clip-ons to keep spray off your legs, bags, and drivetrain. Confirm that your frame, fork, and wheel clearances fit the fender width without tire rub through potholes or braking.
Use long mudflaps for lower spray coverage, then periodically tighten mounts and clear debris to prevent rattles or contact.
Full-Coverage Versus Clip-On
Full-coverage fenders are the better choice if rain is a regular part of your commute: they shield more of the tire and stay aligned under vibration, reducing spray on your shoes, drivetrain, and the riders behind you.
That extra coverage keeps road grit and dirty water off components, so you spend less time cleaning and dealing with moisture-related wear. It also helps riders on narrow-tire road bikes, where a direct spray line quickly reaches your feet and chain.
Clip-on models suit occasional showers and convenience, but don’t treat a universal label as wet-weather performance. A loose or poorly positioned guard can move, expose the tire, and send spray back where you don’t want it. Choose coverage and stable mounting first each day.
Wheel And Frame Compatibility
Before you buy, confirm that the fenders match your wheel diameter, tire width, and frame mounting hardware. A 700c/29-inch wheel needs fenders sized for that diameter, while their internal width must accommodate your tires without rubbing. Check the clearance around the tire, fork crown, brake calipers, derailleur, and chainstays through a full wheel rotation.
Use rack/fender eyelets or dedicated frame mounts when your bike provides them; don’t rely on poorly positioned clamps. Universal models can attach yet rattle or shift if their stays and clamps don’t match your frame’s tube shapes. Choose a model made for your fork blade profile—straight or curved—and its available mounts. If fit looks tight, ask a bike shop to verify alignment, attachment strength, and safe clearance.
Mudflap Length And Coverage
When rain is part of your commute, choose a rear fender and mudflap long enough to direct spray below your shoes and away from the drivetrain. Rear tires throw the most water, so coverage there matters.
Match flap length to tire width and conditions: longer flexible flaps suppress spray in downpours, while shorter flaps suit light drizzle. For frequent heavy rain, choose full-coverage front and rear fenders, not a mini front-only guard; you’ll keep your legs, clothes, and chain area cleaner.
Confirm that the fender and flap clear suspension travel, if applicable, and don’t touch the tire over bumps or turns. This matters especially with wide commuter or e-bike tires, which displace more water and require broader coverage during deeper puddles and sustained rain.
Installation And Maintenance
Start with fenders that match your wheel size, tire width, and available mounting points, including eyelets near the dropouts, bridge, rack, brakes, or axle area. Confirm there’s enough clearance around the tire for flex over potholes and through hard turns; tight gaps cause rubbing, noise, and mud jams. Position each fender along the tire’s travel path, then tighten stays, bolts, and clamps evenly. On carbon or lightweight frames, use the specified torque rather than overtightening hardware.
Before wet rides, inspect every fastener for vibration-related looseness. Clean grit and packed mud from the fender’s inner surface and lower edges, where buildup can shift alignment and increase spray.
Fenders follow the keep-it-rolling rule: they reduce splash, preserve visibility, and keep grime off you, bags, and bike.
Verify Axle and Mount Standards
A rack, fender, or hub-mounted accessory only works safely if it matches your bike’s axle and mounting standards. Identify whether your wheels use quick-release or through-axles, then confirm any through-axle’s diameter and length before ordering hub- or dropout-mounted gear. Check eyelets, bottle-cage bosses, saddle rails, and other interfaces against the accessory’s required hardware; “universal” doesn’t guarantee a secure fit.
For seatpost or frame clamps, measure the tube diameter and follow lower torque limits for carbon components. For bar-mounted gear, verify both diameter and shape, then leave full clearance for brake and shift levers. Don’t force a near-match: it can vibrate loose, rub tires, or create unsafe clearance issues. If you can’t confirm a measurement, ask a bike shop before buying or installing the accessory yourself.
Replacement Battery Availability
Before you buy any battery-powered accessory, identify its exact replacement battery model, voltage, capacity, and connector, not just the accessory brand. Check that replacements are stocked by common retailers or reputable online suppliers, especially if you commute daily or tour far from home. A widely available cell or pack limits downtime when your light, GPS, or electronic shifting accessory fails.
Confirm whether you can swap it yourself without proprietary tools or a shop visit. For lights, compare runtime at each stated brightness setting with the listed battery capacity; that shows whether a replacement preserves useful output. Avoid universal or mystery-battery systems with vague compatibility claims. If the maker doesn’t publish battery specifications or sources, choose a better-documented accessory for dependable daily use on every ride.
Ignoring Handlebar Diameter Limits
Battery compatibility keeps powered accessories running; handlebar compatibility keeps them securely attached. Before buying a light, computer mount, or bar ends, confirm the bar’s clamp-area diameter. “Universal” rarely means every bike; it may only suit another rider’s setup. Most bars measure 31.8 mm or 25.4 mm, and a mismatch can loosen under vibration or force the wrong interface.
- Measure with calipers or ask a bike shop to verify the diameter before ordering.
- Match the clamp design: single-bolt or multi-bolt, with any required rubber insert.
- Follow torque limits; overtightening a mis-sized clamp can deform alloy or damage carbon.
On rough gravel or trails, recheck mount security after the first ride. A light or GPS preserves visibility and navigation, while a shifting mount can distract you.
Check Rack Load Rating
Check the rack’s stated load rating and keep your fully loaded panniers or bag comfortably below it. Add the contents, bags, and rack weight, then compare that total with the manufacturer’s kilogram or pound limit. Treat the figure as a ceiling, not a target: potholes, curbs, and rough gravel multiply stress at the mounting points.
- Confirm the rating matches your bike type and mounting design, whether frame/fender-mounted or seatstay-only.
- Leave a meaningful safety margin for dynamic loads, especially on e-bikes, tours, and uneven routes.
- Inspect bolts, stays, and clearance after installation; vibration can loosen hardware or cause contact with moving parts.
A rack that merely fits isn’t automatically rated for your cargo. If compatibility is unclear, ask a shop to verify installation before departure.
Conclusion
Choose accessories by starting with how and where you ride, then confirm they fit your bike’s real limits. Match storage, lighting runtime, fenders, and carrying systems to your commute, trail use, or touring load. Check axle, mount, handlebar, and rack specifications before buying.
Don’t overlook replacement battery availability or weather protection. When every component supports your routine, you’ll carry what you need, stay visible, and avoid gear that adds weight without value on every ride.