How to Choose the Right Thru Axle Size (Don’t Get This Wrong)
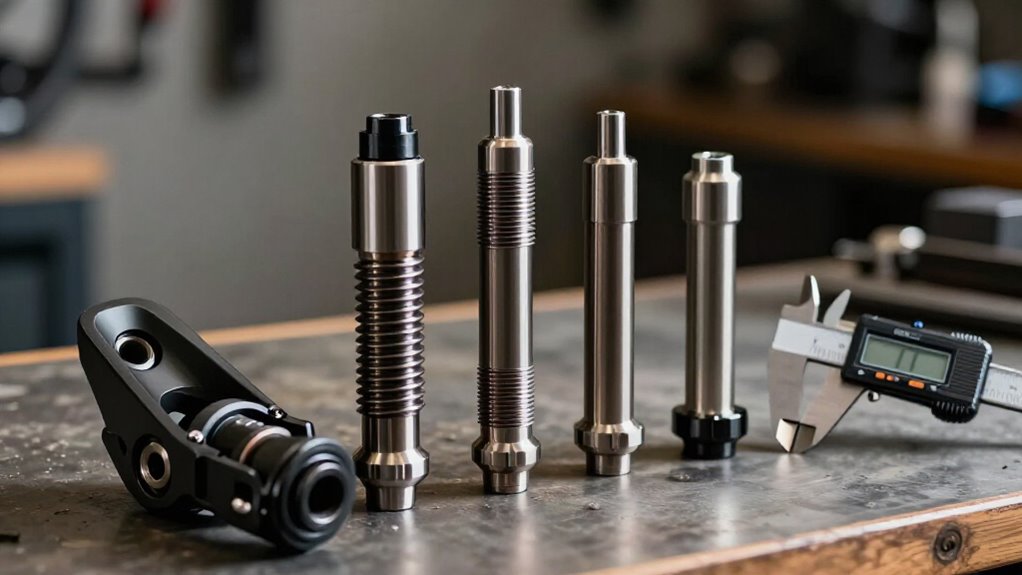
Choose a thru axle by matching the original’s shaft diameter, thread pitch, overall length, and hub/frame spacing exactly.
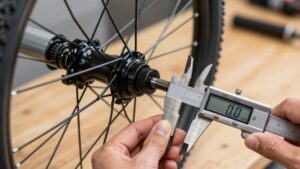
Measure the smooth shaft with calipers: 12 mm and 15 mm aren’t interchangeable. Use a pitch guide, not a ruler, and never force threads.
Confirm Boost or non-Boost O.L.D., hanger interface, and trailer-hitch requirements.
Decide between lever and Allen-key operation only after fitment is confirmed.
The checks below help you avoid damaged threads, loose retention, and misalignment.
Measure Thread Pitch Accurately
Measure thread pitch before you order a replacement thru axle. Thread pitch is the millimeter distance from one thread ridge to the next, and it must match exactly. Common pitches include 1.0, 1.5, and 1.75 mm. Remove your existing axle, then place its threaded section directly over the printed fitment guide.
Align the ridges with each pitch marking; choose a value only when every thread lines up cleanly across the guide. If the axle has a pitch marking, treat it as a reference, not proof, and verify it on the guide. Don’t use a ruler or estimate spacing: the guide prints at actual size to provide an accurate match. A mismatched pitch won’t tighten correctly and can damage axle threads or adapter hardware, despite matching axle dimensions.
Note Trailer-Mounting Requirements
Before ordering a trailer-compatible thru axle, confirm how your trailer attaches: some hitches clamp at the axle, while others require a dedicated adapter plate. Determine whether the hitch sits outside the dropout, captures the axle end, or adds an adapter between frame and retainer. The added stack changes required overall length.
Measure from underside of axle head to thread tip, not merely frame O.L.D. The replacement must pass through frame, trailer hardware, and retainer with full engagement, without bottoming out. Match thread pitch exactly—typically 1.0, 1.5, or 1.75 mm—because a mismatch can prevent tightening and damage threads.
Remove the original axle, check its L and TP markings, and compare them with trailer instructions. Don’t tow until the axle seats and hitch hardware is secure.
Confirm 12MM Vs 15MM Diameter
Two common front thru-axle diameters, 12 mm and 15 mm, aren’t interchangeable. Measure the smooth main shaft with calipers, not the head: 12 mm measures 0.47 inches; 15 mm measures 0.59 inches. Your fork, hub bore, and end caps must accept the same diameter.
| Diameter | Typical use | Check |
|---|---|---|
| 12 mm | Road/gravel fronts | 100 or 110 mm OLD |
| 15 mm | Stiffer front forks | Hub end-cap bore |
| 12 mm | Most rear axles | 142 or 148 mm OLD |
| Either | Approved conversion only | Pitch and engagement |
A 15 mm axle resists bending better, but it won’t make a 12 mm system compatible.
Confirm the fork manual, hub specification, OLD, thread pitch, and engagement length before ordering. Don’t force incompatible parts; poor retention can suddenly allow wheel movement or damage the fork under riding loads.
Allen-Key vs Lever Axles
Choose an Allen-key axle when you prioritize a low-profile fit and added security, but carry the correct hex key for wheel removal. Choose a lever axle when you need faster, tool-free wheel changes, while ensuring the lever closes securely without interfering with the frame or fork.
Whichever style suits your riding, match the original axle’s diameter, overall length, and thread pitch exactly.
Tool Access And Security
Tool access affects both wheel-removal speed and theft deterrence: a lever-style thru-axle opens by hand, while an Allen-key bolt-on axle requires the correct tool. Choose the actuation style your frame and fork were designed for; a replacement head or lever must seat fully against its interface.
An Allen-key axle can reduce casual tampering because someone can’t loosen it without the matching tool. Carry the required key where you can reach it during a roadside repair.
Regardless of actuation, confirm the 12-mm diameter, length, and thread pitch match exactly; 1.5-mm and 1.75-mm threads aren’t interchangeable. The axle must pass through the dropout thickness and retain sufficient thread engagement. Before riding, tighten it fully using its intended mechanism and verify wheel seating again at both dropouts.
Lever Speed And Convenience
Lever-style thru-axles let you remove and install a wheel quickly without carrying a tool, whereas an Allen-key axle requires the correct hex key but gives you more direct control when tightening to the specified torque.
Choose a lever for transport, trail-side repairs, or repeated trainer setup. Choose an Allen-key design for applying specified torque accurately with a calibrated wrench.
Neither operating method corrects a mismatched axle. Before changing styles, verify diameter, length, and thread pitch against the original axle and frame documentation. A 1.5 mm pitch doesn’t interchange with a 1.75 mm pitch, even if the axle looks identical.
Confirm that the threaded section engages fully in the frame or fork insert. Install the wheel, tighten to specification, and check rotor alignment before riding.
Weight And Profile
Although the weight difference is often small, an Allen-key thru-axle has a lower-profile internal hex head that can improve clearance around fork legs, frame hardware, trailers, and tight transport mounts. Its streamlined shape reduces the chance that axle hardware contacts adjacent equipment. A lever-style axle adds an external cam and lever, creating more bulk and potential interference where space is limited.
Do not select either style by appearance alone. You must match the original axle’s diameter, thread pitch, and shaft length, excluding its head or spacer.
Confirm whether the thread is 1.0, 1.5, or 1.75 mm, and use the correct listed L range. A mismatched pitch or length can prevent full engagement or proper clamping, risking thread damage or wheel retention failure. Choose the profile only after verification.
Best Uses By Riding Style
Your riding routine should guide the axle’s operating style only after you’ve matched its diameter, thread pitch, and overall length to the original. Choose a lever-style axle when you routinely remove wheels for transport, trail repairs, or wheel swaps: it tightens by hand and speeds installation. Confirm lever clearance and reach through the dropouts; O.L.D. figures such as 142, 148, or 197 mm do not establish actual axle length.
Choose an Allen-key axle when you prefer tool-assisted installation and more consistent torque, especially for rough riding or infrequent wheel removal. Don’t let convenience override compatibility. For trailers and carriers, match the original pitch exactly—commonly 1.5 or 1.75 mm—and match length. A 229 mm 1.5-pitch axle isn’t interchangeable with another length or pitch. Inspect engagement.
Boost vs Non-Boost Hubs
Boost hubs use wider spacing, typically 110 mm front and 148 mm rear, than comparable non-Boost systems, so you need a longer axle. Measure your fork or frame dropout spacing and match the axle’s diameter, overall length, and thread pitch to the manufacturer specification.
Don’t interchange Boost and non-Boost axles without verifying fit, as incorrect engagement can damage threads or leave the wheel insecure.
Boost Hub Spacing Explained
At the node and dropout interface, Boost spacing extends the standard from 100 to 110 mm at the front and from 142 to 148 mm at the rear. These figures describe O.L.D., the inside-to-inside distance between fork or frame dropout faces, not an axle’s overall length. A Boost hub must sit firmly in a 110-mm fork or 148-mm rear frame before you tighten the axle.
Don’t order by O.L.D. alone: confirm the frame or fork specification, then match axle diameter, thread pitch, and overall shaft length. Most Boost systems use 12-mm or 15-mm axles, but diameter doesn’t determine compatibility. Verify TP, such as 1.5- or 1.75-mm, and ensure full thread engagement. Incorrect spacing can prevent hub seating and compromise retention, brake alignment, or security.
Non-Boost Hub Spacing
Non-Boost hubs use the spacing specified by the frame or fork, commonly 130, 135, or 142 mm at the rear; measure this O.L.D. inside-to-inside between the dropout faces. On the front, take the same measurement between the fork’s inner dropout faces. This dimension identifies the hub-spacing class that your wheel and chassis require, not a rough guide.
Confirm the wheel is non-Boost before fitting it. Boost hubs use wider spacing: typically 110 mm front and 148 mm rear, so they don’t interchange with non-Boost frame or fork interfaces. Forcing a wider or narrower hub into the dropouts can mis-seat the wheel, load bearings incorrectly, alter rotor-caliper alignment, and prevent secure clamping. Check the manufacturer’s frame, fork, and hub specifications, then verify your measurement with calipers carefully.
Axle Length Differences
Two dimensions distinguish Boost from non-Boost hub interfaces: Boost typically uses 110 mm front and 148 mm rear O.L.D., while common non-Boost thru-axle standards use 100 mm front and 142 mm rear.
This spacing difference usually requires a longer axle in Boost applications, but hub O.L.D. isn’t the axle’s overall length. The required L dimension runs from the head base to the thread end and must span the complete fork or frame structure while providing full thread engagement. Don’t order a 148 mm-marked axle merely because your rear hub is 148 mm O.L.D.; that figure may identify spacing rather than total axle length.
Measure your installed axle’s L, then match its diameter and thread pitch, such as 1.5 or 1.75 mm. Insufficient engagement can damage threads or permit unsafe retention.
Frame Compatibility Checks
Before ordering a replacement, confirm that your fork or frame and hub use the same spacing standard: common non-Boost rear spacing is 142 mm, while Boost rear spacing is 148 mm; front spacing is typically 100 mm non-Boost or 110 mm Boost.
Measure the inside-to-inside distance between rear dropout faces; this O.L.D.-style dimension identifies whether your hub requires 142, 148, or 197 mm spacing. Don’t treat it as the axle’s overall length.
Listings often confuse O.L.D. with L, so measure its L. Confirm shaft diameter—usually 12 or 15 mm—and read any L and TP markings. Match thread pitch exactly. Correct spacing won’t prevent cross-threading, poor clamping, wheel movement, or dropout damage if length, diameter, or threads differ. Use official frame-maker documentation before you ride.
Verify Derailleur-Hanger Interface
Confirm the rear dropout spacing and derailleur-hanger interface before you order a replacement thru-axle. Verify that the rear O.L.D. matches the frame and hub, so the hanger bracket aligns with the axle’s clamp points.
Don’t rely on O.L.D. alone: measure the original axle’s overall length (L) and identify its exact thread pitch (TP). A standard 12×142 axle, for example, may still use a different L or TP.
The axle must pass completely through both dropouts and provide full, smooth thread engagement without forcing the hanger sideways. Match TP exactly: common pitches include 1.0, 1.5, and 1.75 mm to prevent cross-threading, uneven clamping, or incomplete seating. After installation, confirm that the hanger sits centered and parallel to the cassette. A shifted hanger can impair shifting and create a serious retention risk.
Check Replacement Axle Availability
Check the Axle Finder first to determine whether a replacement is listed for your bike model. A listing gives you a starting point, but confirm that its thread pitch and length match your original axle. Don’t use O.L.D. alone: measure overall length from beneath the axle head to the thread end, then verify printed L and TP markings.
If your bike uses a proprietary system, including R.A.T., Naild, Mavic Speed Release, or Surly, remove the axle and consult that system’s supported-replacement guidance. Where Step #4 offers options, select the exact pitch—commonly 1.0, 1.5, or 1.75 mm—and stay within the permitted plus-or-minus 2 mm length tolerance. For trailer or Lightning setups, use TP/L-specific part number; for example, LIG 608 is 1.5 mm by 229 mm for 12mm bolt-on.
Never Force a Threaded Axle
A threaded thru-axle must start and turn smoothly by hand; if it binds, stop rather than forcing it into the frame or fork. Binding usually signals a pitch mismatch, not a need for more leverage. Even axles with the same diameter can use 1.0, 1.5, or 1.75 mm threads. Cross-threading can strip the frame’s insert, compromise retention, and make subsequent installation unsafe.
- Remove the axle and read its printed TP marking; don’t assume a replacement matches.
- Verify TP with a true-size fitment guide: lay the axle threads directly on the printed pattern.
- Reinstall only after threads engage squarely and rotate freely by hand for several turns.
Never use a lever, wrench, or excessive torque to overcome resistance at any point.
Measure Overall Axle Length
Once you’ve verified the thread pitch, measure the axle’s straight overall length from the underside of the axle head to the end of the threads. Use a ruler or caliper, and measure only the straight shaft. Don’t include the head or any tapered spacer; both alter the reading without adding usable length. Remember that L is not hub spacing: a 12×142 hub’s axle is usually substantially longer.
- Print the fitment guide at actual size.
- Align the axle head and threaded tip precisely.
- Confirm the replacement passes through the fork or frame and retains sufficient thread engagement.
An axle that’s too short may not fully engage the insert; one that’s too long can prevent proper seating.
Recheck your measurement before ordering. Proper engagement prevents loss.
Conclusion
Choosing the correct thru axle protects your frame, fork, hub, and derailleur hanger. You must confirm diameter, overall length, thread pitch, thread engagement, and hub spacing before ordering. Check whether your bike uses Boost spacing, a lever or Allen-key head, and any trailer-specific mounting hardware.
Verify replacement availability for travel or emergencies. Never force an axle that resists threading; stop, inspect alignment, and confirm specifications. A precise match ensures secure wheel retention and safe riding.