Tubeless Sealant Refresh Schedule
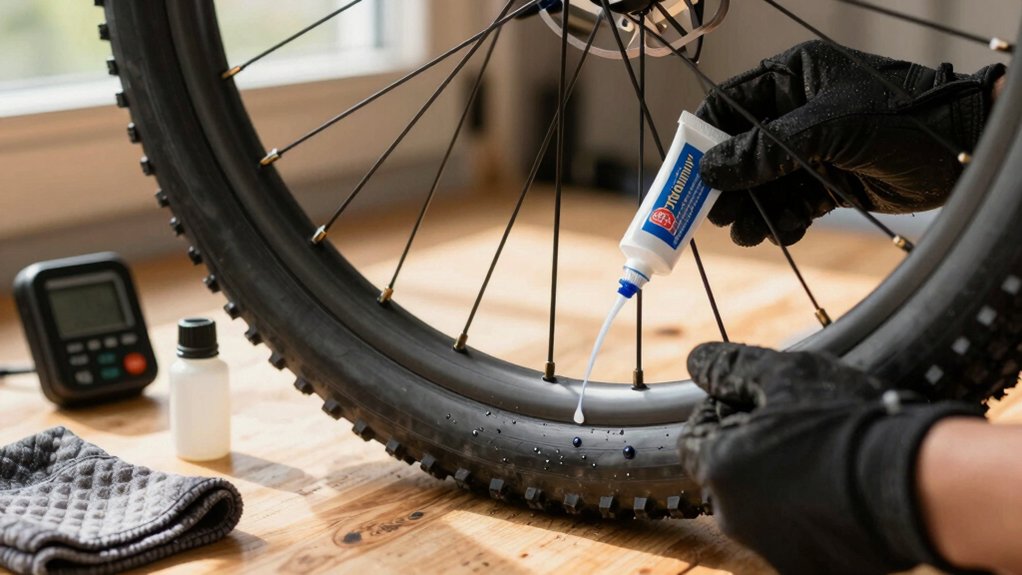
You should refresh tubeless sealant on a predictable schedule based on climate, tire volume and riding frequency: check low‑volume front tyres every 3 months (30–40 ml).
Check rear or high‑volume tyres monthly to bimonthly (40–60 ml).
Inspect mountain or tubed setups after heavy plugs or every 1–3 months (60–90 ml).
Water‑based brands last 2–6 months; hot/dry conditions dry sealant in 6–8 weeks.
Use removable cores and valve injectors for quick top‑ups and inspection.
More details follow.
What Is Tubeless Sealant Refresh?
- Inspect sealant condition and tyre performance every 1–3 months; frequency increases in hot, dry, or rarely ridden bikes.
- Front tyres: top 30–40 ml and check every ~3 months. Rear tyres: 40–60 ml and inspect at 1–2 months.
- In hot/dry storage, expect drying in 6–8 weeks. In regular riding, sealant often lasts 3–7 months.
- Use removable Presta valve cores and a valve injector for quick top-ups, cleaning, or core replacement.
- Choose core material compatible with your sealant (brass/aluminum/plastic) and log volumes and refill dates.
Sealant Drying Time Chart
How quickly will your tubeless sealant dry out? You’ll expect wide variation: hot, dry summers cut life to 6–8 weeks. Cool, ridden bikes can stretch to months. Check compatibility with original sealant to avoid reactions when topping up. Note tire pressures after refresh to seat beads and spread sealant.
| Condition | Typical dry time |
|---|---|
| Hot/dry summer | 6–8 weeks |
| Arid climates (storage) | 1–2 months |
| Regular riding (1–2x/week) | 3–7 months |
| Water-based brands | 2–6 months |
| Latex-free (stable) | 10+ years |
Use a valve dipstick, UV check, or rotate wheel. Avoid CO2 and store cool. Replace if coagulated or ineffective.
Sealant Volume & Refill Timing
Wondering how much sealant you really need and when to add it? You’ll base fill volumes on tyre volume, riding conditions and observed sealant lifespan. Start by aiming slightly above manufacturer minima; that margin preserves sealing after punctures and evaporation. Monitor consumption one month after install to refine refill timing.
- Front tyre (low volume): 30–40 ml; check every 3 months or sooner in dry climates.
- Rear tyre (higher volume): 40–60 ml; inspect at 1–2 months, top as needed.
- Mountain/enduro (thicker+tub): 60–90 ml; top after big plugs or every 1–3 months.
Use valve injection for quick top-ups. Log volumes and refill timing to optimize performance and avoid surprise failures.
Valve Core Compatibility
When you refresh sealant, check that your valve core material (brass, aluminum, or nickel-plated) is compatible with the sealant chemistry to avoid corrosion or chemical attack. Use removable cores for injector access and replacement. Confirm core size/standard matches your rim, and be aware some fixed cores can trap coagulated latex.
Tighten cores to proper torque; ensure correct seating to prevent leaks without damaging threads.
Core Material Compatibility
Why does valve core material matter for your tubeless sealant system? You need core compatibility because different alloys and plastics react with sealant chemistry, affecting thread seals and airtightness. Brass cores resist corrosion and abrasion from particles; aluminum cores save weight but can gall or pit with acidic latex blends. Plastic cores avoid galvanic issues but can swell or crack with certain solvents.
Choose cores that match your sealant type and service interval to limit sealant drying around the core and reduce clogging. Inspect cores during every refresh, clean with isopropyl, and replace if you see corrosion, rubber degradation, or blackened deposits.
Proper material choice maintains reliable bead seating, predictable leak paths, and easier injections during top-ups.
Removable Vs. Fixed Cores
How do you decide between removable and fixed valve cores for your tubeless setup? You’ll favor removable cores when you need regular sealant topping or injector access. They let you extract the core quickly, inject sealant through the valve, and clear clogs without breaking the bead.
Removable cores are also easier to clean or replace during routine maintenance, reducing downtime.
Fixed cores suit riders who want fewer parts and marginally lower leak risk; they’re simpler and less likely to loosen. However, fixed cores complicate sealant injection and require bead breaking or core replacement when clogged.
Choose based on your refresh frequency: If you top up every 3 to 6 months or ride in dry conditions, use removable cores. If you rarely service wheels, fixed cores may be acceptable.
Core Size Standards
Wondering whether your valve core will fit the injector or pump head? Check core sizing first: most bike tubeless valves use Presta cores (6mm thread), but some lightweight or presta-compatible designs alter length. Measure thread diameter and core length against injector specs.
Know your valve types: removable cores, fixed stems, and tapered hybrid cores. Match them to tools. Removable cores let you inject directly; fixed cores need bead-break or bead-off access or a compatible head. Use a caliper for accurate dimensions and confirm injector O‑ring seating depth to prevent leaks.
If you swap cores, choose matched alloy or brass materials to avoid galling. Keep spare compatible cores and label them by valve type for quick maintenance.
Sealant Corrosion Risks
Curious about whether your sealant can eat through valve cores? You’ll rarely see aggressive sealant corrosion on modern cores, but compatibility matters. Latex-based and particulate sealants can clog or chemically attack soft alloys and low-grade brass over long exposure.
Check core material compatibility: stainless steel and nickel-plated brass resist corrosion and embedment better than untreated brass or aluminum alloy cores. If you use acidic or high-solids formulas, choose corrosion-resistant cores and inspect cores during every refresh or when you detect slow leaks.
Replace suspect cores rather than try to clean them repeatedly. Keep spare stainless or nickel-plated cores in your kit, and document sealant type and refresh intervals so you can correlate any premature core degradation with specific products.
Torque And Seating
Why does valve core torque matter? You’ll prevent leaks and avoid damaging rim holes by applying correct torque guidance when installing cores. Too loose invites seepage; too tight strips threads or deforms the core seat. Use a calibrated torque driver or a small torque wrench set to manufacturer specs (typically low values) and tighten incrementally.
Seating methods matter for compatibility and longevity. Clean the valve bore, lubricate lightly with isopropyl-wetted sealant, and hand-start threads to ensure alignment before final torque. For removable cores, seat until finger-tight, then apply torque tool for the specified fraction of a turn. Check compatibility between core type and stem: Presta cores, removable cores, and tubeless-specific cores have different seating methods and thicknesses. Match parts and follow torque guidance to maintain a reliable seal.
How Often Should You Check Your Tubeless Sealant Refresh on a Bike?
You should inspect your tubeless sealant refresh at least once a month for routine riders and before every long ride if you commute daily or ride in wet or dusty conditions. Catching wear early keeps repair costs low and prevents the cascading damage that turns a small component issue into a full drivetrain or wheelset replacement.
Frequently Asked Questions
Can I Mix Different Sealant Brands Safely?
You can, but you shouldn’t mix brands without caution. Mixing brands can help short-term performance; yet compatibility concerns matter. Different chemistries (latex, particles, antifreeze) can coagulate or reduce sealing ability. If you must mix, match similar base types, test on one wheel, and monitor for clumping or reduced flow.
Prefer topping up with the same product or fully flushing and replacing when switching brands to avoid failures.
How to Dispose of Expired Sealant?
You should treat expired sealant disposal as a controlled waste stream to minimize environmental impact. Drain remaining liquid into a sealed container, label it, and absorb residues with paper towels. Bag and seal them. Don’t pour down drains or on soil.
Check local hazardous-waste or recycling centers for tube/container drop-off. Clean tools with isopropyl alcohol in a sealed container and dispose of waste per local regulations to avoid contamination.
Does Sealant Affect Tubeless Tyre Balancing?
Yes, sealant can affect tyre balancing impact. You’ll notice temporary imbalance when wet sealant sloshes, causing vibration at certain speeds.
As sealant evaporation and coagulation occur, imbalance becomes less dynamic but can create static heavy spots if it pools or dries unevenly. You should spin wheels after adding sealant, top up evenly, and check balance after significant sealing events or long storage to prevent handling issues.
Can Sealant Damage Carbon Rims?
Yes, sealant can harm carbon rims if you use incompatible products or neglect maintenance. You should check sealant compatibility with carbon-friendly rim finishes and adhesives. Avoid corrosive or solvent-based formulas, and clean sealant residue regularly.
Latex-based sealants are generally safe; however, they can coagulate and trap moisture. Replace and inspect rims regularly. If you see pitting, delamination, or bonded-tape failure, stop riding. Consult your rim manufacturer for guidance.
Is Sealant Usable in Bicycle Inner Tubes?
Yes, you can use sealant in some bicycle inner tubes, but you’ll prefer sealed tubes designed for it. You’ll avoid compatibility concerns by choosing tubes labeled compatible with liquid sealant or using tubeless-ready but inner-tube-specific designs.
Regular latex or tubeless sealants can coagulate, clog valves, or reduce tube life in incompatible tubes. Follow manufacturer guidance; use proper valve cores; and check levels frequently to prevent failures.
Which Tubeless Sealant Schedule Approach Is Right for Your Bike?
You’ll keep tubeless systems reliable by checking sealant regularly and refreshing based on drying rates and volume loss. Match sealant chemistry to core material and valve type. Prefer removable cores for easier maintenance. Use standard core sizes and proper torque to avoid leaks or damage.
Watch for corrosion signs and switch to corrosion-resistant cores or compatible sealants if needed. Schedule refills proactively; don’t wait for failures to maintain consistent sealing performance.