Hub Maintenance Basics
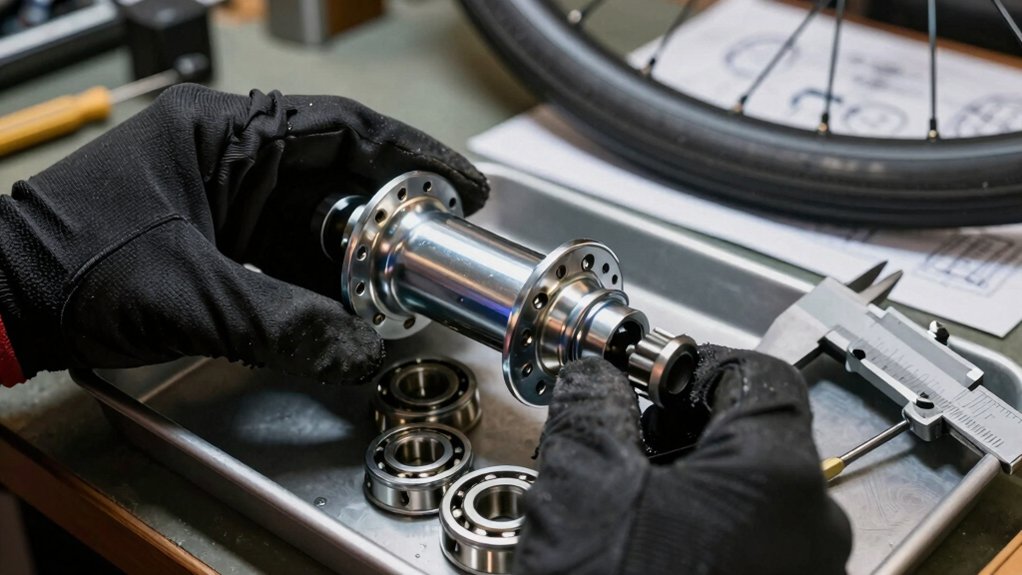
You should seat bearings at the specified torque while turning the hub. Back them off one full turn; then re-torque to the preload value while rotating and set the specified back-off. Verify end play is 0.001″–0.005″ before locking with a jam nut or cotter pin and torquing to the model’s final value with a calibrated wrench.
Log values, follow model-specific intervals (initial 50–100 hours, then scheduled checks), and watch for drift or heat. More practical steps follow.
Quick Overview
- Seat bearings by torquing to the specified seating value while rotating. Then, back off one full turn and re-torque for preload.
- Set final preload torque; verify end play is 0.001″–0.005″. Then, secure with jam nut or cotter pin.
- Use model-specific torque tables, calibrated wrenches, and hub tags/stickers to apply correct seating, preload, and final torques.
- Inspect torque and end play at initial break-in (50–100 hrs); again at 250 hrs; then quarterly or more often for heavy-duty service.
- Train operators, log torque readings and actions in CMMS, and budget for replacement parts, tools, and calibration.
Hub Bearing Torque Chart
How tight should you set your hub bearing? You torque the adjusting nut to seat the bearing, back it off, then set final preload. Following the chart and steps prevents over- or under-torque. Use a proper-capacity wrench, keep gear oil lubrication clean, and inspect seals before reassembly to avoid contamination.
Always finish with wheel nut safety checks and cotter pin or jam nut installation.
| Step | Initial Torque | Final Action |
|---|---|---|
| Seat bearing | 200 ft-lbs while rotating hub | Back off 1 full turn |
| Preload | Re-torque to 50 ft-lbs while rotating | Set specified back-off |
| Verify | Measure end play 0.001″–0.005″ | Install jam nut/cotter pin and torque accordingly |
Torque Settings by Model
Which torque values apply to your hub depends on the model, bearing type, and whether you’re doing initial seating, preload, or final verification. Consult the model-specific table below and follow the seating, back-off, and re-torque steps from the bearing chart exactly. You’ll set torque by model to protect bearings, prevent leaks, and ensure predictable wear. Use model tags, torque stickers, and a calibrated wrench.
Include maintenance budgeting and operator training in your plan so replacements, tools, and skill gaps are covered.
- Feel the resistance change as preload sets in.
- Watch for smooth spin after final torque.
- Note heat or noise during break-in.
- Record values for trend tracking.
Stick to specs, log actions, and retrain operators when procedures change.
Incorrect Torque Inspection Intervals
Check the recommended torque schedule for each hub model and follow it strictly, because incorrect inspection intervals cause problems you can avoid. Undertorquing can lead to loosened bearings and heat damage. Overtightening strips threads and stresses components; watch for signs of torque drift like unusual play, noise, or oil leaks.
If you see drift or operate in harsh conditions, shorten inspection intervals and document adjustments until readings stabilize.
Recommended Torque Schedule
When did you last verify torque intervals on your hub assemblies? You should set a clear recommended torque schedule based on manufacturer guidance, duty cycle, and operating conditions. Tie inspections to preventive maintenance windows: initial break-in check at 50–100 hours, follow-up at 250 hours, then quarterly or semiannually for normal service.
High-vibration or heavy-load applications need monthly checks. Always perform torque calibration of your tools before checks and document values in your CMMS. Include alignment verification during the same visit to catch shifting loads that affect torque retention.
Train technicians to use calibrated wrenches, record deviations, and escalate persistent loss of torque to corrective maintenance. A consistent schedule reduces surprises and keeps hubs serviceable without over-inspecting.
Effects Of Undertorquing
If you under-torque hub fasteners or stretch out inspection intervals, you’ll see accelerated wear, loosened bearings, and increased vibration that shorten service life and raise failure risk. You’ll notice hubs running hotter, seals failing sooner, and preload bleeding off as components shift under load.
Underspec torque lets parts move microscopically, fretting surfaces and producing debris that contaminates lubrication. Inconsistent fasteners, uneven torque across a flange, create misalignment and uneven load distribution that overloads individual bearings.
Inspect more frequently if operating conditions are harsh. Use a calibrated torque wrench and documented sequence to avoid variations. Replace damaged hardware, follow manufacturer torque and interval recommendations, and log each check so you catch early signs before they become costly failures.
Effects Of Overtorquing
Why does overtightening hub fasteners cause trouble? You’ll crack threads, warp bearings, and stress seals when you exceed specs. Over torque causes metal fatigue that shortens component life and creates hard-to-diagnose failures. You’ll also distort mating surfaces, leading to leaks and misalignment that amplify vibration.
Inspect torque tools and follow torque setting safety procedures every time you work on a hub. Use calibrated wrenches; apply torque in proper sequence; and recheck after short service runs. If you find stretched studs or damaged threads, replace them. Don’t try to reuse compromised parts.
Keep a simple log of torque values and inspection intervals so you can spot systemic issues and prevent repetitive damage from incorrect torque practices.
Signs Of Torque Drift
Noticing torque drift early saves you from blown seals, warped bearings, and sudden failures. You’ll spot signs of calibration slipping when lug nuts show uneven wear, you need repeated retorques, or torque wrench readings wander between checks. Check hubs after thermal cycles and heavy use; inconsistent torque readings across studs usually point to inspection intervals that are too long.
Listen and feel for vibration, steering pull, or looseness at low speeds. These are practical clues tied to hub alignment and fastener preload loss. Record torque values, compare to baseline, and flag any progressive drop beyond specified tolerance. Use a simple checklist: visual wear, wrench repeatability, ride symptoms, and documented trends.
Early detection keeps you in preventive maintenance and avoids corrective emergency work.
Adjusting Torque Intervals
When torque readings start drifting, you should re-evaluate how often you inspect and retorque studs. Incorrect intervals are a common root cause of recurring preload loss. Start by documenting current intervals and recent failures. Then apply a simple adjustment methodology: shorten intervals where drift appears, monitor for stabilization, and lengthen only after consistent correct readings.
Use bolted-joint condition, operating hours, and environmental factors to guide changes rather than arbitrary schedules. Log every change in your CMMS and flag patterns that suggest corrective or condition-based maintenance instead of time-based fixes. Also, check warranty implications before altering manufacturer-prescribed intervals; unauthorized changes can void coverage.
Finally, train technicians on the new intervals and verify torque with calibrated tools.
Frequently Asked Questions
How Often Should Hub Bearings Be Replaced Regardless of Torque?
You should replace hub bearings based on condition and mileage; typically every 85,000–100,000 miles or sooner if you detect noise, play, heat, or contamination. How often should hub bearings be replaced regardless of torque? Replace when inspection or sensors show deterioration; do not rely on torque alone.
Can different wheel materials affect hub maintenance procedures? Yes. Aluminum, steel, or composite wheels can change heat dissipation, corrosion risk, and fastening checks; therefore, adjust inspections accordingly.
Can Different Wheel Materials Affect Hub Maintenance Procedures?
Yes, different wheel material alters maintenance. You’ll adjust cleaning, lubrication, and inspection routines because wheel material affects corrosion, wear rates, and thermal transfer.
Check seal compatibility with rim and hub surfaces; incompatible seals swell or leak. Softer alloys or composites need gentler cleaners and frequent inspections, while steel demands corrosion control.
Match grease type to both bearing and wheel material. Document intervals based on observed deterioration, not just calendar time.
What Safety Gear Is Required for Hub Maintenance Tasks?
You need safety gloves and eye protection as basics. Steel-toe boots and hearing protection are necessary if pounding or using loud tools. Use respirators when dust, brake dust, or solvents raise environmental impact concerns.
Lockout/tagout, spill kits, and proper waste containers reduce contamination. Verify tool availability and condition before work so you won’t improvise. Keep high-visibility clothing and a first-aid kit nearby for quick response to injuries or spills.
How Do Environmental Conditions Impact Hub Longevity?
Environmental conditions directly shorten hub longevity by increasing environmental exposure and corrosion risk. You’ll see wear faster in wet, salty, or dusty settings. You should inspect seals, bearings, and coatings regularly. Schedule preventive maintenance and use condition-based checks (vibration, temperature).
Apply corrosion-resistant treatments; improve drainage and ventilation; and replace degraded parts promptly. Doing this reduces failures, lowers reactive repairs, and extends hub service life.
Are Specialized Tools Needed for Hub Seal Replacement?
Yes, you’ll often need specialized tools for seal replacement to avoid damage and ensure proper seating. Use seal drivers, pullers, and torque tools sized for the hub; a press or arbor may be required for tight fits.
If you don’t have those, you can sometimes improvise with sockets and a bench press, but you’ll risk leaks or premature wear. Invest in the right tools for reliable results.
Conclusion
You’ve now got the basics to keep hub bearings running right: follow the torque chart for your model, stick to recommended inspection intervals, and watch for signs of undertorquing or overtightening.
Check torque regularly and adjust intervals based on wear or conditions. When you spot torque drift, tighten or service immediately to prevent damage.
Stay consistent, use the right tools, and log each check; small, regular actions save time and parts.