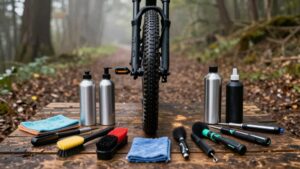
Bike Maintenance Schedule Template
You’ll keep your bike safe and smooth with a simple maintenance template:
check tire pressures before every ride (road 80–130 PSI, gravel/hybrid 25–70, MTB 20–35; adjust for rider weight and surface).
Inspect chain wear monthly and replace at ~0.75–1% elongation.
Clean and lube every 100–200 miles.
Verify stem bolt torque with a calibrated wrench and follow center‑to‑outside sequence.
Re‑torque after the first ride and quarterly.
Continue and you’ll find specific settings and tools.
Quick Overview
- Create a simple calendar with daily, weekly, monthly, and quarterly tasks tailored to ride frequency and conditions.
- Daily/Pre-ride: Check tire pressure, brakes, quick-release/skewer security, and chain cleanliness/lubrication.
- Weekly: Inspect tire tread/sidewalls, check chain wear, clean drivetrain, and verify headset/stem bolts for snugness.
- Monthly/Every 500–800 miles: Measure chain elongation, inspect cables/housing, and torque stem/faceplate to manufacturer specs.
- Quarterly/After 100–200 miles following service: Recalibrate torque wrench, re-torque critical bolts, and log maintenance and torque values.
Tire Pressure & Torque Chart
Wondering what pressure you should run? You’ll set tire pressure by bike type, tire width, and rider weight. Follow manufacturer sidewall limits and rim compatibility. Use the torque chart when tightening valves, crank bolts, and stem hardware to avoid damage.
Check pressures before rides; adjust for surface: higher on smooth pavement, lower on rough/gravel. Keep an inspection quick reference handy for pre-ride and monthly checks so you don’t skip tire checks or chain wear measurements. Below is a compact guide for common setups.
| Bike Type | Typical PSI |
|---|---|
| Road (23–28mm) | 80–130 PSI |
| MTB (2.3–2.8″) | 20–35 PSI |
| Hybrid/Gravel | 25–70 PSI |
Chain Wear & Inspection Quick-reference
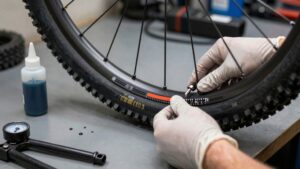
How worn is your chain and how often should you check it? Use this inspection quick reference to catch stretch before it wears chainrings and cassettes. You’ll measure with a ruler or a dedicated gauge. Check after 500–800 miles; monthly if you ride often or in wet conditions.
- Inspect for elongation and stiff links: 0.5%–0.75% stretch tolerable for 10/11-speed. Replace at ~0.75%–1.0% to protect drivetrain.
- Clean and lubricate: remove grit, apply lube, wipe excess. Recheck wear after 100–200 miles post-service.
- Fastener awareness: verify torque values on components and know bolt torque for stems are separate checks. Don’t skip stem bolts during quarterly inspections.
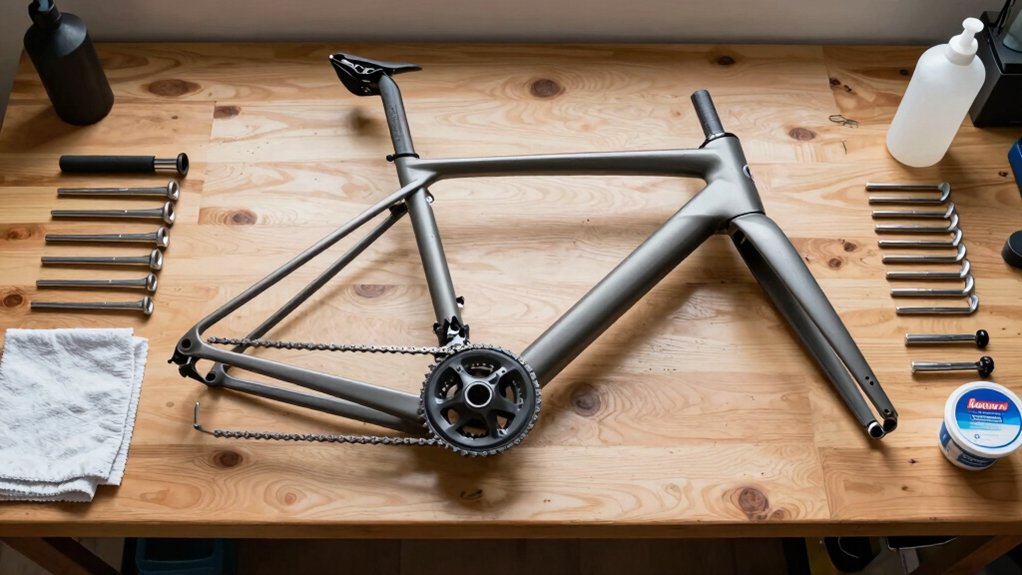
Bolt Torque for Stems
Check stem bolts to the manufacturer’s recommended torque and follow the proper sequence: center clamp then faceplate, tightening in a cross pattern. Use a calibrated torque wrench or preset bit for accuracy and choose settings based on bolt material (steel vs. titanium/aluminum) to avoid stripping or crushing carbon.
Re-torque after the first ride and at regular intervals listed in your maintenance schedule.
Recommended Torque Values
Why does correct stem torque matter? You rely on precise clamping to keep bars aligned and components safe; incorrect values risk slippage or stripped threads. Use the manufacturer‘s specified torque range: typically 5–8 Nm for modern alloy stems, 8–12 Nm for some oversized bolts, and higher only when specified for steel or special designs.
Always perform torque calibration on your wrench before use and recheck after initial rides. Tighten incrementally and evenly; watch for signs of deformation. Remember fastener safety: replace damaged bolts and use threadlocker only where recommended. If you lack a torque wrench, don’t guess: get the tool or visit a shop.
Correct torque preserves handling, prevents damage, and keeps you riding confidently.
Torque Sequence Order
When should you follow a specific torque sequence for your stem bolts? You should use it whenever you tighten or re-torque the stem clamp or faceplate, after crashes, or when assembling bars. Start at the center bolts (if applicable) and work outward in small, incremental steps to the final recommended value.
This ensures even clamp pressure, prevents stem or bar distortion, and avoids uneven loading that can loosen bolts or damage carbon. Use the manufacturer’s torque spec from the Recommended Torque Values section. Don’t skip sequence steps thinking one-pass tightening is fine.
Subtopic unrelated 1 and Subtopic unrelated 2 are irrelevant to torque order but may appear elsewhere in your maintenance notes. Follow sequence, increment, verify, and log the torque reading.
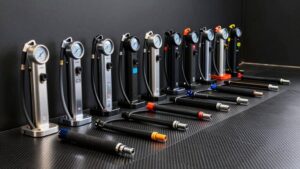
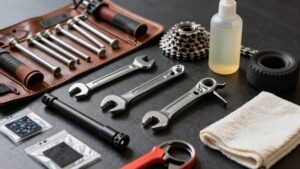
Torque Tool Types
Which torque tool should you reach for when tightening stem bolts depends on accuracy needs and material. Use a calibrated click-type torque wrench for carbon or precise aluminum assemblies; a torque screwdriver for low-torque faceplate bolts; and a preset or beam wrench only for quick checks. You should pick the smallest tool that gives required accuracy. Over-torquing can crush carbon or cause frame paint etching; under-torquing lets the stem slip.
Clean bolt threads and apply a thin film of bike grease where manufacturer allows, but avoid grease on carbon clamping faces unless specified. Calibrate your click wrench annually and store it uncompressed. When you need repeatable, workshop-grade results on stems, use a torque wrench. Use screwdrivers for light tasks and beam or preset tools for field checks.
Bolt Material Considerations
How tightly you torque stem bolts depends heavily on the bolt material, because different alloys and coatings change strength, stretch, and friction. You’ll treat steel, titanium, aluminum, and coated fasteners differently: steel bolts tolerate higher torque and return predictable clamp force. Titanium is stronger per weight but more prone to stretch; you’ll use lower torque limits. Aluminum fasteners strip more easily and often require conservative torque. Coated or anodized surfaces alter friction, changing the torque-to-clamp relationship.
Use published torque specs for your stem and follow manufacturer notes for bolt materials. Always verify torque wrench calibration before critical jobs so readings are accurate. When in doubt, err low and check clamp security by function rather than force alone.
Re-Torque Intervals
Because stem bolts settle and materials relax after initial installation, you should re-torque them after short, defined intervals rather than assuming the first wrench setting stays correct. Check and re-torque after the first ride (10–50 miles); again at 100–200 miles; and during quarterly inspections. Use a calibrated torque wrench, follow manufacturer torque specs, and tighten incrementally in a star or alternating pattern for multi-bolt stems.
Record values and note any torque errors so you can spot patterns tied to bolt brands or installation technique. If you see movement, creaks, or uneven clamp marks, stop riding and re-check torque. For carbon components, use a torque limiter and carbon paste as recommended. Regular re-torqueing prevents slippage, protects components, and keeps steering safe and predictable.
Frequently Asked Questions
How Often Should I Replace Brake Pads Under Heavy Commuting Use?
You should replace brake pads every 3–6 months under heavy commuting use. Commuting impact accelerates brake pad wear; therefore, inspect pads monthly and look for thinning to less than 1.5–2 mm, glazing, or embedded debris.
If you ride in rain or carry heavy loads, lean toward the 3-month interval. Keep records of mileage and replace sooner if braking performance drops. Do not wait until pads score the rim or rotors.
Can I Use Motorcycle Grease on Bike Bearings?
You shouldn’t. Motorcycle grease can be too heavy and contain additives that attract grit. Use proper bike bearing grease instead.
Don’t substitute motor oil or chain lube for bearings either. Motor oil lacks film strength, and chain lube is formulated for chains, not rolling elements. Use a light, water-resistant bearing grease specified for bicycles or consult your hub/headset manual.
That will protect bearings, reduce wear, and keep components running smoothly.
What’s the Best Lubricant for Wet Versus Dry Conditions?
For wet conditions, choose a water-resistant, viscous lube. For dry conditions, pick a low-viscosity, wax or dry-film lube. Your lubricant selection should match environmental conditions, equipment compatibility (chains, bearings, pedals), and maintenance timing. Apply wetter lubes less often but more thoroughly. Use dry lubes for cleaner, faster rides and reapply frequently.
Check manufacturer guidance to avoid incompatible greases on sealed bearings or plated surfaces.
How Do I Store a Bike Long-Term in Winter?
You winterize your bike by following clear long term storage steps: clean drivetrain and frame, fully lubricate chain and cables, deflate tires slightly, and remove battery if e-bike.
Store indoors on a rack or hang to avoid pressure on tires and bearings. Use a breathable cover, keep it dry and climate-stable, and periodically rotate wheels and re-lubricate pivot points.
These winterization tips prevent corrosion and preserve components for spring.
When Should I Replace Cassette Sprockets With the Chain?
Replace cassette sprockets when you see cassette wear signs or after fitting a new chain that lacks chain compatibility. If shifting stays sloppy, teeth look hooked or shark-toothed, or chain stretch measurement exceeds recommended limits, change cassette.
For routine upkeep, replace cassette every one to three chains depending on mileage, riding conditions, and chain material. Always match new cassette tooth profile and speed rating to ensure chain compatibility.
Conclusion
You’ve got the essentials to keep your bike safe and smooth: check tire pressure and chain wear, use the right torque for stems and bolts, follow torque sequence, and pick proper tools and torque values for bolt material. Re-torque critical fasteners after initial rides.
Stick to the quick-reference chart and inspect regularly; small, consistent checks prevent big problems and extend component life. Make this routine part of every ride prep.