Bike Travel Packing Checklist
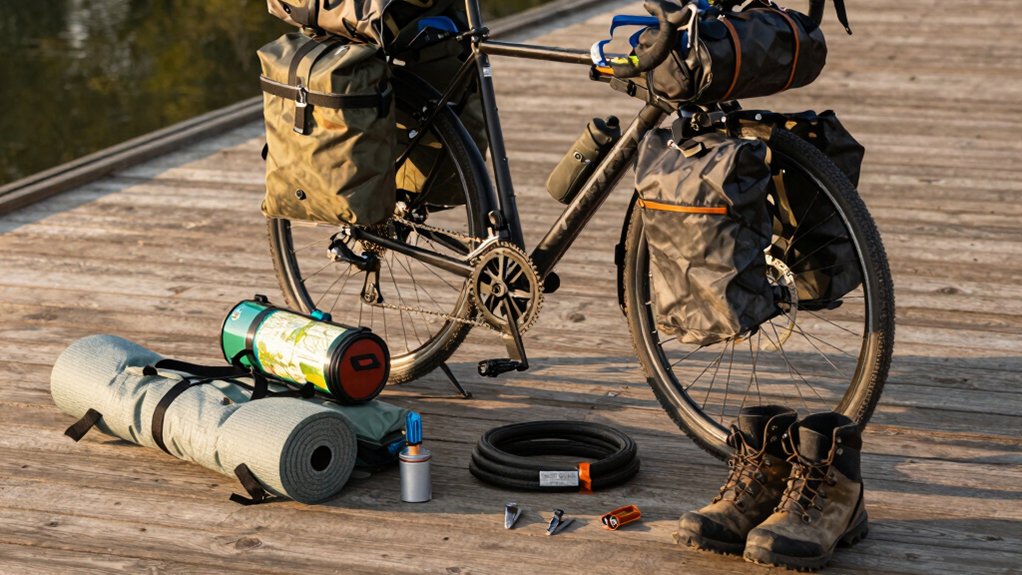
Match bag size to trip: extra-small (≤5L) for tools/snacks, small (5–10L) for day gear, medium (10–25L) for commutes or a 14L laptop, and large (25L+) or paired panniers for longer tours. Bikepacking combos hit ~40L. Aim for about one-third weight up front and two-thirds rear. Pack dense items low and centered, and use a compact handlebar roll for light bulks.
Seal stitched seams with seam tape and sealant; cure fully and test for leaks. More gear-specific tips follow.
Quick Overview
- Choose bag sizes to match trip length: extra small for tools, small for day trips, medium for commute, and large or panniers for extended tours.
- Distribute weight for stability: roughly one-third forward and two-thirds toward the rear. Then fine-tune balance after packing.
- Pack handlebar rolls with low-profile, lightweight items; keep dense gear low and centered to reduce steering sail.
- Waterproof seams and bags: clean seams, apply seam tape or sealer over stitch lines, and allow full cure before use.
- Carry a compact repair kit: multi-tool, spare tube, pump/CO2, patch kit, and basic first-aid for common roadside fixes.
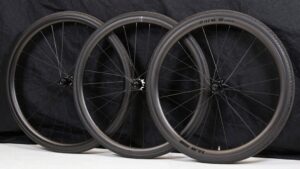
Bike Bag Size Comparison
Wondering which bag size fits your ride and route? You’ll match capacity to purpose: extra small (up to 5L) for tools and snacks; small (5–10L) for chargers and food; medium (10–25L) for commuting or a 14L laptop; and large (25L+) for multi-day gear. Large comes as paired panniers to protect balance.
Prioritize bike bag size to respect weight distribution. Put roughly one-third up front and two-thirds rear. Below is a quick reference to help you decide at a glance.
| Size | Best Use |
|---|---|
| Extra Small | Tools, tube, quick trips |
| Small | Essentials, day outings |
| Medium | Commute, lightweight trips |
| Large | Extended trips, paired panniers |
| Bikepacking Combo | Saddle + frame + bar (≈40L) |
Handlebar Roll Capacity
After you’ve balanced weight between front and rear packs, think about what the handlebar roll will carry and how its volume affects steering and comfort. You’ll want a compact handlebar roll with measured packing capacity so steering stays predictable and shoulders don’t tire on long days.
Use it for lightweight, low-profile gear: sleeping pad straps, wind layer, or food you need quick access to. Pack dense items low and center; soft items outward; and compress to avoid sail effect. Check attachment security and test ride with full load to feel handling changes.
- You’ll feel relief when loads are stable.
- You’ll worry less about steering quirks.
- You’ll enjoy smoother, more confident miles.
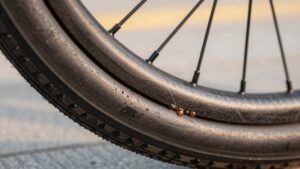
Waterproof Seam-Sealing Instructions
You’ll want a compact kit of materials and tools: seam sealer, a small brush or syringe, seam tape, and alcohol wipes. You’ll prep by cleaning and flattening seams so the sealer bonds. Use tight, consistent stitching or stitch-taping techniques where applicable. Then apply sealer in a thin, continuous bead over the needle holes and tape edges.
Allow the recommended drying and full curing time in a warm, ventilated spot before packing the shelter or rain gear.
Materials And Tools
How do you make seams on your tent, jacket, or pack reliably waterproof? Start with the right materials: factory seam tape, single-component seam sealant (silicone or urethane-based), a small brush, lint-free cloth, and a heat source (hairdryer or iron on low with cloth barrier).
Don’t confuse this with an unrelated topic like general fabric repair; seam sealing is specific. Work methodically: clean and dry the seam, apply tape or a thin sealant bead, then smooth with the brush. If using tape, heat briefly to activate adhesive. For sealant, let cure per instructions.
Carry a tiny tube of sealant and a 2–3 cm tape patch on trips for quick fixes. Avoid extraneous pairing of products that react chemically.
Preparing The Surface
Seam sealing works only if the fabric and stitching are clean, dry, and free of old sealant or dirt. So start by inspecting the seam closely under good light and feeling for grit or hardened residue. For preparation basics, remove dust with a soft brush, lift loose threads with tweezers, and cut away any frayed ends; don’t skip this.
Clean synthetic fabrics with isopropyl alcohol on a lint-free cloth. Avoid detergents that leave film. Let the area dry completely; humidity ruins adhesion. Mark repair zones with masking tape to keep sealant neat. Test a small inconspicuous patch if unsure how the fabric reacts.
Good surface prep saves time and prevents leaks later. Work methodically and don’t rush.
Seam Stitching Techniques
Want waterproof seams that last? You’ll get reliable results by pairing proper seam stitching with attention to fabric durability. Use a tight stitch length and a polyester or bonded nylon thread to minimize needle holes and resist abrasion. Backstitch at ends and trim thread tails close.
For high-stress seams, employ a double row or bar-tack reinforcement to prevent seam creep under load. Keep stitch tension balanced to avoid puckering, which weakens waterproofing. Test on scrap fabric first to confirm stitch settings and needle size match material weight. Clean and dry seams thoroughly before any sealing step.
When you stitch with these techniques, your pack and rain gear will stay stronger, more weatherproof, and longer-lasting on the road.
Applying Seam Sealer
Curious about the quickest way to keep stitched seams watertight? You’ll want a small tube of seam sealer, a clean brush or applicator, and masking tape. Work on a flat, clean surface; remove loose threads and brush the seam inside and out.
Tape a straight line to protect fabric, then apply a thin, even bead of sealer along the stitch line, forcing it into needle holes. Smooth with a wet finger or brush to ensure coverage without excess buildup. Repeat on both sides for critical seams.
Use waterproofing methods compatible with your fabric: silicone for silnylon, urethane for coated nylons; and follow manufacturer instructions. Test a hidden patch first to confirm adhesion and colorfastness.
Drying And Curing
After you’ve applied sealer to both sides and smoothed it into the needle holes, let the coating begin to set by keeping the item flat and protected from dust and insects. Work in a well-ventilated, dust-free area and avoid touching seams during initial drying steps.
Keep temperature steady: ideally 60–75°F (15–24°C) and out of direct sunlight to prevent skinning over. Check tack after one hour; if still wet, wait longer. Follow manufacturer curing times: many sealants need 24–72 hours for full strength, longer in cool or humid conditions.
Rotate or re-tension fabric gently after 12–24 hours to ensure even penetration. Before packing, inspect seams, perform a small water test, and trim excess sealer. Pack only when fully cured to maintain waterproof integrity.
Frequently Asked Questions
Can I Bring My Dog on a Bikepacking Trip?
Yes, you can bring your dog on a bikepacking trip if you plan carefully. Use dog friendly gear like a pet trailer, pannier-safe harness, and reflective vest. Practice short rides first.
Prioritize water and waste planning: carry extra water, collapsible bowls, purification options, poop bags, and odor-proof storage. Account for terrain, rest breaks, temperature, and your dog’s fitness. Pack first-aid supplies and ID tags for emergencies.
What Are Local Regulations for Wild Camping Near Roads?
You’ll need to check local camping laws and roadside camping permissions before stopping. Contact land managers or local authorities; review national park and county websites; and look for posted signs. Some roads allow short rest stops but prohibit overnight stays.
Obtain permits where required, avoid protected habitats, and camp out of sight from traffic. Respect fire and waste rules, use durable surfaces, and be prepared to move if enforcement or weather requires.
How Do I Safely Carry Lithium Batteries on Flights?
You must pack lithium batteries safely by carrying them in your carry-on. Protect terminals with tape or individual pouches. Keep spare batteries in original packaging or a protective case.
Check airline battery regulations for watt-hour limits (typically under 100 Wh) and per-passenger allowances; declare batteries if required. You shouldn’t stow spares in checked luggage. You’ll want to power devices off and isolate batteries to prevent accidental activation.
Which Universal Bike Locks Resist Common Theft Methods?
U-locks and hardened chain locks are the universal lock types that resist common theft methods. You’ll choose a thick-shackle U-lock (double deadbolt) or a case-hardened, hex-bolted chain with a robust padlock to thwart leverage, bolt cutters, and hacksaws.
Add a secondary cable or folding lock to discourage quick grabs. You’ll lock the frame and wheel to immovable objects, keep locks off the ground, and vary parking locations for extra security.
How Do I Handle Food Allergies While Resupplying on Route?
Carry allergy meds and a translated card, and plan resupplies carefully. Read labels every time; watch for hidden ingredients. Ask staff about cross contamination risks in kitchens and bakeries. Pack shelf-stable safe staples as backups.
Use apps or photos of safe brands. Two discussion ideas are local ingredient sourcing and emergency evacuation plans. Two more ideas are community food sharing and portable allergy testing. Stay proactive and document reactions.
Conclusion
You’ve now got the key facts to choose the right bike bags, size your handlebar roll, and seal seams so your load stays dry. Trust tested materials and the right tools; prep surfaces thoroughly, stitch cleanly, and apply sealer in thin, even coats. Let seams cure fully before riding.
Pack smart, balance weight, and maintain gear after trips. Those small, careful steps keep your bike comfortable, your kit protected, and your rides worry-free.
Related: How to Choose a Bike Bag