How to Choose the Right Saddle Width
Measure your sit bones center-to-center while sitting upright on a thin-clothed surface. Then add the manufacturer’s padding allowance so your sit bones rest fully on the usable supportive surface.
Choose shell stiffness and padding thickness for your posture: thicker, softer for upright; thinner, firmer for aggressive forward positions. Prefer denser foam when bones are narrow or wider; firmer layers for broader bones.
Verify on-bike movement and thigh clearance. Keep adjustments to a few millimeters to fine-tune and learn more about testing fit.
Quick Overview
- Measure your sit-bone center-to-center distance while sitting upright on a firm surface. Then round up to the nearest millimeter.
- Add the manufacturer’s recommended allowance to your sit-bone measurement to determine the saddle’s usable width.
- Check the saddle’s usable seating surface. Ignore edges that drop more than about 10 mm from the support area.
- Match padding thickness and firmness to your riding posture: thicker/softer for upright, thinner/firmer for aggressive positions.
- Test the saddle on-bike in riding position. Adjust width/padding in 2–3 mm steps until contact and pressure feel balanced.
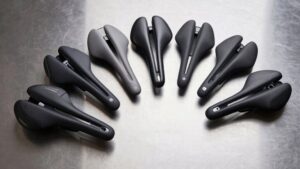
Saddle Width Comparison Chart
How do manufacturers translate your sit-bone measurement into a saddle size? You take a measured center-to-center sit-bone distance, then add a manufacturer-specific allowance so the saddle supports bone without pinching soft tissue.
Consider material and balance padding: leather needs the full +20mm to avoid frame contact. Modern foams adjust padding distribution for balance. Use this compact comparison table to decide quickly:
| Maker | Add-on | Typical Range |
|---|---|---|
| Specialized | +20–25mm | 130–168mm options |
| Rivet | +20mm | 150–170mm options |
| SQlab | +area/use | multiple widths, round up |
Pick a width where your sit-bone plus add-on lands within the usable surface. Test on-bike for dynamic fit and thigh clearance.
Measure Sit Bone Spacing
Want a reliable starting point for saddle selection? Measure your sit bone spacing precisely to inform fit decisions. Use a consistent posture and thin clothing, mark centers, and measure center-to-center in millimeters. Consider sit bone biomechanics: how load transfers through the ischial tuberosities affects width choice and pressure distribution.
Sit upright at a ~90° spine angle for repeatable impressions. Use cardboard, gel pad, or manufacturer tools to capture centers. Measure center-to-center; round up if between sizes and record in mm. Add manufacturer-recommended allowance to account for saddle edge clearance. Verify usable seat surface; discard edges that drop more than 10mm.
This measured value becomes your objective baseline for selecting saddle width.
Recommended Padding Thickness
Match padding to how you ride: thicker cushioning can help short, upright rides while firmer, thinner layers suit long or aggressive positions. Consider saddle material and shell stiffness because foam, gel, or leather interact differently with sit bone spacing and soft-tissue clearance.
Balance thickness and support so the padding cushions without letting your sit bones sink past the usable width. Adjust based on personal fit and riding style.
Match Padding To Riding
Why does padding thickness matter as much as saddle shape? You need padding thickness matched to riding posture because it changes where your sit bones contact the shell. Upright riders benefit from thicker, softer padding that spreads load over a larger area and cushions gluteal tissues.
Aggressive forward-leaning cyclists need thinner, firmer padding so sit bones sit solidly on the shell and perineal pressure is minimized. Medium-distance or mixed-position riders often choose medium-density padding for balanced support and shock absorption.
Measure sit bone contact in your typical position and test saddles on the bike. A pad that compresses completely under load fails to support bones; one too firm creates pressure peaks. Adjust padding choice to posture, distance, and comfort, not aesthetics.
Consider Saddle Material
Material choices affect how much padding you actually need, so consider shell stiffness, cover elasticity, and foam density together when choosing thickness. When you pick a saddle material, remember a stiff carbon or nylon shell transfers more load to foam; you’ll need greater padding thickness over contact points to protect sit bones. Softer shells permit thinner foam but rely on cover elasticity to distribute pressure. Choose denser foam if you ride long hours.
Leather molds to anatomy but needs moderate padding thickness initially as it shapes over time. Measure how the saddle material interacts with your pelvis angle and riding posture. Thicker padding can hide poor support, so prioritize materials that match your sit bone width and intended use rather than adding unnecessary bulk.
Balance Padding And Support
How much padding do you actually need under your sit bones depends on shell stiffness, riding duration, and pelvis angle. Choose thickness that supports bone contact without isolating pressure points. You want thin-to-moderate foam or gel that transfers load to the shell while cushioning soft tissue; overly plush tops let your sit bones sink and create focal pressure.
For mixed riding, aim for 8–15mm effective compressible layer; stiffer shells need slightly more, flexible shells less. Check that padding maintains anatomical contact across the measured sit bone width and doesn’t shift with movement. When comparing models, factor pricing alignment and any sponsorship exposure claims into value; however, prioritize measured support over marketing. Test in your riding position before committing.
Thickness For Riding Style
Which padding thickness suits your riding style depends on how you position your pelvis and how long you stay in the saddle. If you sit more upright for commuting or touring, choose moderate thickness with softer padding density to distribute load across the sit bones and reduce pressure spikes.
If you ride aggressively with a forward-tilted pelvis, prefer thinner padding and firmer density so your bones contact the shell correctly and do not sink into foam. This can cause chafing or instability. For mixed use, select medium thickness with graduated density—firmer under the sit bones and softer at edges—to balance comfort and support.
Use thickness guidance relative to your ride duration: longer rides need slightly thicker, anatomically zoned padding.
Adjust For Personal Fit
You’ve already matched padding thickness to riding posture and duration; now refine that choice around your individual anatomy and comfort cues. Measure sit bone spacing and compare to the saddle’s usable width. Then choose padding that keeps bone contact on supportive foam while avoiding excess compression into soft tissue.
If your sit bones are wider, slightly thicker, firmer padding preserves lateral support. Narrower sit bones suit thinner, denser layers to prevent slide. Test for numbness, hotspots, or sliding after 20–40 minutes and tweak thickness in 2–3 mm increments.
Consider how saddle color and branding aesthetics affect perceived comfort only; don’t let style trump fit. Prioritize anatomical contact, pressure distribution, and reproducible testing over looks when finalizing thickness.
Frequently Asked Questions
How Often Should I Replace My Saddle for Comfort?
You should replace your saddle when comfort degrades or structural saddle wear becomes evident. Typically, this occurs every 2–4 years for regular riders. Monitor fit consistency: if your sit-bone support shifts, padding compresses, or stitching fails, shorten the replacement cadence.
Also, swap sooner after injury or persistent numbness. For comfort longevity, track miles, inspect rails and cover, and test replacements in your riding position to confirm anatomical support before committing.
Can Saddle Width Affect Bike Handling or Balance?
Yes, saddle width can affect your bike handling and balance. Correct saddle geometry aligns your sit bones, so seat pressure distribution stays even and predictable. That stability helps you shift weight and control steering.
A too-narrow saddle forces pelvic tilt and lateral sway; this undermines balance. A too-wide saddle restricts thigh movement and alters stance. Match sit bone measurements to saddle width and test on-bike to confirm neutral handling.
Do Men’s and Women’s Saddles Differ Besides Width?
Yes, men’s vs women’s saddles differ beyond width. You’ll notice saddle anatomy changes: women’s models often have wider sit-bone shells, shorter noses, and different cutout placement to protect soft tissue. Men’s shapes tend toward narrower shells and longer noses for aggressive posture.
Cushioning, channel shape, and shell flex are tailored to typical pelvic tilt and soft-tissue pressure patterns. Therefore, try gender-specific designs but test fit in your riding position.
Will a Wider Saddle Cause Chafing on Long Rides?
Yes, a wider saddle can cause chafing on long rides if your sit bones aren’t fully supported or your seat height and fore-aft position force excess rubbing.
Choose a saddle material that reduces friction and breathes. Confirm the usable width matches your sit bone span plus approximately 20mm. Adjust seat height so pelvis is stable; test rides reveal hotspots.
Change shorts, chamois, or trim edges before condemning width.
Can I Change Saddle Width Without Altering Bike Fit?
Yes, you can change saddle width without altering bike fit. However, you’ll notice differences in saddle geometry and weight distribution. Choose a width based on sit bone measurements plus approximately 20mm. Then, test riding in your usual position.
A wider saddle shifts lateral load and may alter pelvic tilt; a narrower one concentrates pressure. Adjust fore-aft and tilt minimally for comfort. Retest to confirm the new width works with your anatomy.
Conclusion
You’ve measured your sit bones, compared widths, and considered padding, material and riding style. Now trust the fit. Choose the saddle that aligns with your sit bone spacing, provides firm support where bones contact, and uses padding thickness matched to ride duration and terrain.
Prioritize stable pelvic alignment over plushness. Test for comfort on a short ride, adjust position or rails if needed, and repeat measurements if pain or numbness persists.
Related: How to Reduce Numbness on a