How to Set Up an Indoor Bike Trainer for Your First Ride
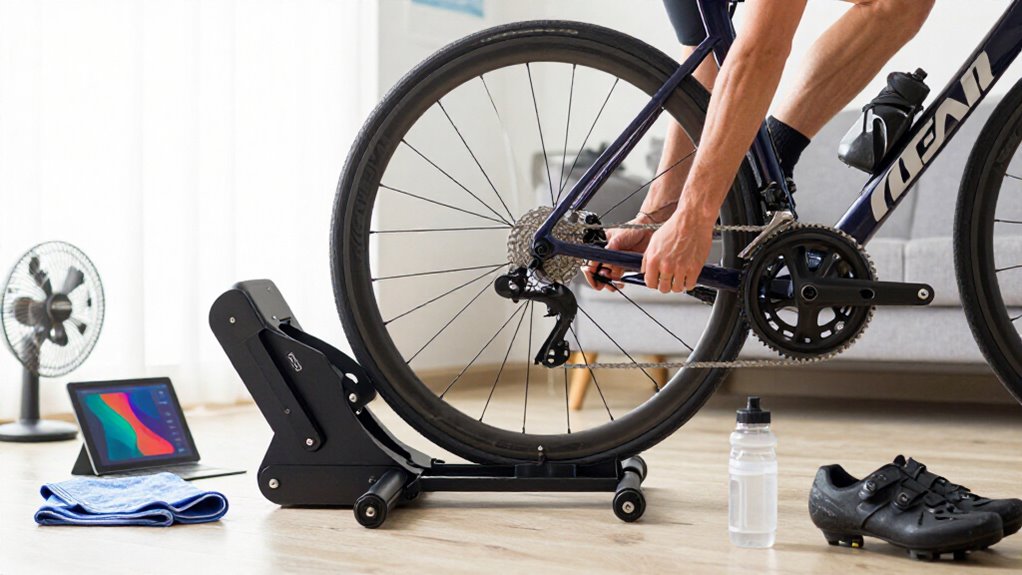
Confirm your rear axle, trainer fit, and correct end caps before clamping the bike. Clear a stable, slip-resistant two-square-metre area. Route cables at its edge, and place a fan, bottle, and towel nearby.
Pair the trainer to your app, select its exact model, verify the green status light, and complete an easy 10-minute test. Start smoothly, hold a comfortable effort, then cool down.
You’ll also find simple fixes for cadence dropouts and cassette care below.
Beginner-Friendly 45-Minute Trainer Setup
For a smooth first indoor ride, set up a ready-to-ride station before you start: mount the bike securely on a trainer mat, pair it with your app or device, and place a bottle and towel within easy reach. Place a powerful fan in front so airflow cools as much of your body as possible. It helps you stay comfortable and hold consistent effort.
Choose a beginner TrainerRoad or ROUVY workout and follow its resistance or power targets. Ride easily for five to 10 minutes, maintain a comfortable effort for 30, then cool down at intensity for five to 10. Pedal smoothly, don’t force heavy gears, and stop if the bike wobbles. Drink from your bottle; use a gel or sports drink mid-session if needed.
Verify Rear Axle Compatibility
Before you mount the bike, confirm its rear axle and match it to the trainer’s mounting system. A mismatch can shift the bike, so don’t clamp it until parts agree.
- A quick-release axle uses a slim skewer; spacing is often 130 or 135 mm.
- A thru-axle is a solid, threaded rod, usually 12 mm; check its spacing, length, and thread pitch.
- For wheel-on trainers, look for an open dropout exit hole and confirm your wheel size is supported.
Use labeled end caps or a compatible thru-axle adapter. On compatible wheel-on models, fit a steel trainer skewer, not the bike’s lightweight one. Direct-drive trainers need correct end caps and cassette. Tighten to maker’s torque specification, then ensure bike sits centered with no lateral play.
Step 1: Clear Two Square Meters
Clear about 2 square metres, roughly 1.4 m × 1.4 m, for the bike and trainer, keeping doors, furniture, and walkways outside the footprint. Choose a stable, slip-resistant surface, and remove loose items from the 360-degree area. You need space to step off or back safely if you lose balance.
Leave extra clearance for a fan stand or oscillating fan, positioned so it cools you without being easy to knock over. Set your water bottle and towel within arm’s reach of your riding position; you won’t need to twist or scramble mid-session.
If you’ll use equipment, choose a spot near an outlet. Run cables along the edge of the clear area, secure the length, and keep every lead out of your stepping path.
Step 2: Mount Bike on Trainer
With your space prepared, mount the bike exactly as your trainer specifies. For a direct-drive model, remove the rear wheel and seat the bike fully on the trainer axle. For a wheel-on trainer, keep the wheel fitted, position it at the guide marks, and clamp it firmly. Use the supplied trainer skewer or correct thru-axle adapter, then tighten every clamp or strap to spec.
Check that the cassette or rear wheel sits centered and the chainline runs straight. Turn the cranks by hand; stop and correct any rubbing, skipping, or misalignment. Confirm the bike doesn’t rock, then adjust the trainer’s foot levelers or roller height if needed.
Finally, perform a 30–60-second low-resistance spin-up test. Hold the handlebars, listen for operation, and recheck all fasteners before riding.
Step 3: Pair Trainer With Cycling App
Next, pair your trainer to your cycling app through Bluetooth or ANT+ so it can receive power and cadence data and, for smart trainers, control resistance. With your bike securely mounted, open ROUVY, TrainerRoad, or your chosen app, then use its device screen to select your trainer’s exact model. Confirm the displayed device name and firmware to prevent connecting to a nearby trainer or old signal.
Keep your phone, tablet, or computer close to the trainer during setup to reduce dropouts. If you use a wheel-on trainer, install the required speed or power sensor, or choose the app’s VirtualPower-style option, so it can estimate speed or power correctly. Run the app’s connection check and recommended calibration before beginning. Stop and reconnect if readings are missing, erratic, or assigned to the wrong device.
Step 4: Complete a 10-Minute Test Ride
Start your 10-minute test ride at a very easy, seated pace to confirm that the bike, trainer, fan, and Bluetooth or ANT+ connection all remain stable.
During the first few minutes, check your app: power and cadence should display consistently and match your effort. Maintain a comfortable handlebar reach and spin a steady cadence.
Notice whether resistance responds smoothly.
Stay seated while you assess floor stability. The trainer should remain centered, without excess wobble, vibration, slipping, or unusual noise in its six-by-four-foot space. Don’t increase effort until everything feels secure.
Drink water throughout, aiming to finish at least one bottle. When you stop, note any discomfort, screen glare, or desk distractions. Use these observations to refine your bike fit and workspace before your next ride.
Step 5: Angle Fan at Chest Height
Before your next ride, place a strong fan at chest height and aim it slightly upward toward the center of your upper body. This directs steady air where hard efforts build the most heat: across your chest and torso, rather than mainly at your legs. Set the fan close enough to feel a consistent breeze without placing its cord, stand, or blades where they could interfere with pedaling or dismounting. If it oscillates, use a setting that still keeps airflow on you; otherwise, point it directly at your upper body for maximum coverage.
Turn the fan on before you pedal. During your first session, adjust it higher or move it closer as soon as you feel too warm. Chest-level airflow helps you stay comfortable and manage intervals with better control.
Step 6: Wipe Sweat From Trainer Frame
After your first ride, wipe down the trainer frame immediately with a dry microfiber cloth so sweat doesn’t dry into corrosive residue. Focus on areas near the rear axle and roller housing, where moisture often collects. Keep the cloth away from openings, bearings, power sensors, cables, and other electronics. If you spot grime, apply a small amount of mild cleaner to the cloth rather than spraying the trainer directly.
Wipe the area, then dry it again with a clean section of microfiber.
Leave the bike mounted and let the trainer air-dry before storing it or moving it. Check around the flywheel, roller, and cable openings for trapped moisture. Keep a towel within reach during future rides, especially for hard intervals. Quick wipe-downs reduce corrosion and buildup, helping your trainer maintain smooth, reliable resistance.
Verify Green Status Light
With the trainer clean and dry, check its status indicator before you ride. A solid green light usually confirms that it has power and is ready to pair. Don’t begin pedaling until the light and your app’s connection screen agree.
If no green light appears, check that the external power adapter is fully seated. Then power-cycle the trainer: unplug it, wait briefly, and reconnect it.
A blinking red or yellow indicator signals that you should resolve the connection before riding.
Open ROUVY, or TrainerRoad, and confirm it identifies the trainer as connected. Use the wireless method your model requires: Bluetooth or ANT+. If green still won’t appear, follow the manual’s recommended USB, Bluetooth, or ANT+ pairing order and repeat the connection check before riding.
Cadence Dropout: Replace Battery
If cadence freezes, drops to zero, or appears intermittently, replace the cadence sensor battery before troubleshooting the app. Remove the sensor or open its battery door and note the orientation mark.
| Check | Correct action |
|---|---|
| Battery | Fit specified battery, usually CR2032, with “+” matching diagram. |
| Alignment | Re-seat sensor 5–10 mm from magnet or crank area. |
| Test | Power-cycle, spin cranks, and confirm immediate app reading. |
Don’t start a full ride until the number responds smoothly. If it still cuts out, inspect battery contacts for corrosion, tighten the sensor mount or strap, and confirm the magnet hasn’t rotated or slipped from its marked position.
A secure sensor prevents misleading data and helps you maintain a controlled, comfortable pedaling rhythm. Check it before you raise resistance or begin your ride.
Inspect Cassette Wear Monthly
Each month, inspect your trainer cassette for teeth that look flattened, hooked, chipped, or missing, as worn cogs can make the chain skip and create drivetrain noise under load. Secure the bike, then turn pedals and check each cog for shiny patches, rough edges, grime, or metal debris between the teeth. Clean it, then check alignment before riding.
Shift through every gear; if the chain won’t climb or stay on a cog when resistance increases, replace the cassette rather than forcing efforts. For wheel-on setups, inspect the trainer tire’s tread and sidewalls, since tire wear can hide engagement problems. Record riding hours and replacement dates. Reviewing that log monthly helps you catch unusually rapid wear early and prevents an unexpected skip during a workout.
Conclusion
Before your first ride, check the axle fit, trainer stability, and green status light one more time. Clear your space, secure the bike, and pair the app before you start pedaling.
Keep a towel nearby, wipe sweat from the frame, and stop if you notice wobbling, rubbing, or connection issues. Afterward, inspect the setup and recharge or replace sensors as needed. With these habits, you’ll ride safely, smoothly, and confidently indoors every time you clip in.