Disc Brake Maintenance Basics
You should check rotor thickness regularly with calipers at several radial points and compare readings to the manufacturer minimum. Replace rotors that meet or fall below the spec.
Inspect pads for wear marks, thin-spot cutouts, or metal tabs. Listen for grinding or squeal that signals contamination or severe wear. Clean rotors and new pads with isopropyl alcohol; bed pads gently, and log measurements and dates so you can spot trends.
Keep going for step‑by‑step procedures and tips.
What Is Disc Brake Maintenance?
- Regularly measure rotor thickness at 3–4 radial points with calipers and compare to the manufacturer’s minimum specification.
- Replace rotors that meet or fall below stamped minimums or show excessive run-out, warping, or contamination.
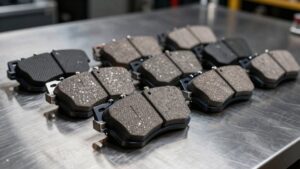
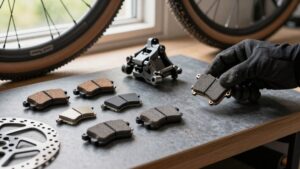
- Inspect Brake Pads for wear indicators, uneven thinning, glazing, or metal tabs. Replace when minimum thickness or symptoms appear.
- Clean rotors and new pads with isopropyl alcohol; avoid contamination. Bed new pads with gradual braking cycles.
- Log rotor and pad measurements, replacement dates, and mileage to track wear trends and schedule maintenance.
Rotor Thickness Comparison Chart
Why does rotor thickness matter? You need correct thickness to keep braking predictable: thin rotors save weight but risk warping and piston tilt; thick rotors give stiffness and heat capacity. Focus on matching brand specs to prevent problems.
| Rotor Type | Typical Thickness |
|---|---|
| Lightweight road/MTB | 1.8 mm |
| Standard MTB/large | 2.0–2.3 mm |
| High-heat/vented | 2.5–3.3 mm |
| Special (riveted/floating) | Effective +1 mm sides |
When you inspect, perform rotor thickness checks with a caliper and note contamination. How to avoid rotor thickness mismatches: follow manufacturer tables, check caliper clearance, and compare diameters.
Keep discs clean of oil and skin. Contamination and rotor thickness checks are routine to prevent uneven wear and brake failure.
Minimum Rotor Thickness Spec
After you’ve checked rotor types and measured thickness with calipers, you should compare readings to the minimum spec stamped by the manufacturer or the general ranges you’ve noted (1.8–2.0 mm for lightweight rotors; 2.0–2.3 mm for standard MTB, etc.). You’ll discard rotors worn to or below the minimum. SRAM and Shimano commonly advise replacement around 1.5 mm. Measure at several points, note run-out, and log readings.
Don’t conflate pad wear checks with rotor spec; those’re a separate, unrelated subtopic. Keep two word discussion ideas handy when documenting service decisions.
- Measure at 3–4 radial points with a digital caliper.
- Replace if any reading is at or below the stamped minimum.
- Record date, mileage, and measured thickness for future reference.
Pad Wear Indicators
You’ll learn How to spot pad wear indicators: visual markings, thin-spot cutouts, and metal tabs. Each type tells you about remaining life. Measure pad thickness across the pad; compare inside vs outside. Listen for grinding or squeal noises that indicate metal-on-rotor contact or glazing.
When pads hit minimum thickness or make indicator noise, replace them promptly to protect the rotor and restore braking performance.
Recognizing Wear Indicators
How can you tell when pads need replacing? You’ll spot thinning material, uneven wear between inner and outer pads, or a glazed, shiny surface that signals reduced friction. Check thickness visually: at least a quarter-inch is required. Measure with calipers when uncertain.
Listen for new noise and note ride quality feedback: spongy levers, fading power, or grabbing can indicate pad or contamination issues. Unexpected contamination from oil, chain lube, or skin oils shows as dark, soaked spots; contaminated pads often squeal and should be replaced.
Compare pad faces end-to-end and watch for metal backing contact or embedded debris. If you see any of these signs, swap pads promptly and clean rotors before installing new ones.
Types Of Indicators
What tells you a pad is worn: visual cues, built-in markers, or ride feedback? You rely on three clear indicator types: visual wear, mechanical markers, and performance symptoms. Visual wear shows pad backing plate close to the rotor or uneven material. Note subtopic relevance when comparing inside and outside pads.
Mechanical markers include factory grooves, stamped lines, or metal tabs that contact the rotor and make noise. Learn indicator terminology so you identify grooves versus wear limits. Performance symptoms are grabby brakes, reduced modulation, or squeal and glazing signs during inspection. Use a flashlight and mirror for checks; avoid touching surfaces, and record which indicator appeared first.
Replace pads when any reliable indicator confirms excessive wear or contamination.
Measuring Pad Thickness
When checking pad wear, measure thickness at several points across each pad and compare the inside and outside faces so you catch uneven wear or tapering. Use a caliper or ruler to record remaining material; pads should show at least a quarter-inch visually and follow manufacturer minimums.
Note differences between inner and outer pads. Significant variance suggests caliper alignment or piston issues. While you’re measuring, perform a quick rotor inspection for scoring, glazing, or thickness loss that could accelerate pad wear.
Mark pads that approach minimum thickness and replace them as a pair to maintain balanced braking. Keep measurements in your maintenance log so you can spot unusual wear trends and schedule corrective actions before performance degrades.
Indicator Noise Signals
Ever wondered why your brakes start squealing or chirping under light use? Those sounds are indicator noise signals telling you the pads are approaching service limits or have glazing or contamination. You’ll hear a high-pitched chirp when pad wear indicators contact the rotor or when a hardened, glazed surface vibrates.
Listen for consistent tones during easy braking. Intermittent squeals often mean debris or uneven deposits; constant buzzing usually points to thin pads. During inspection, confirm pad thickness visually and compare inside and outside faces. If pad wear indicators are touching or glazing is evident, act.
Clean rotors and pads with isopropyl alcohol and remove contamination first. Use these noises as an early warning to avoid compromised braking performance.
Replacing Worn Pads
Those squeals and chirps are your cue to inspect and, if needed, replace the pads. Don’t ignore them. Check pad thickness visually; you need roughly a quarter-inch minimum. Measure across each pad end-to-end, comparing inside and outside.
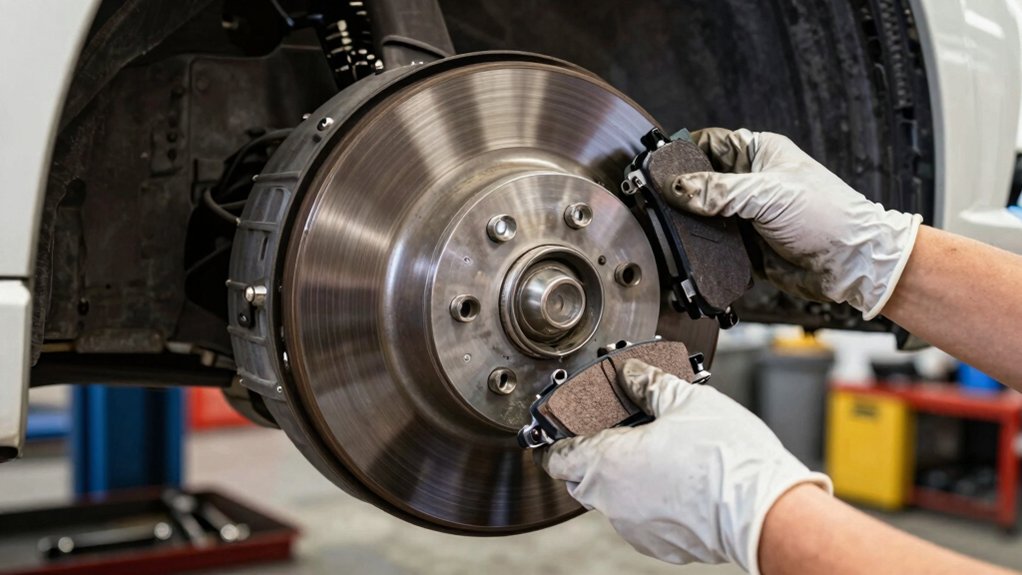
Look for glazing, contamination, uneven wear, and any embedded debris. If pads hit minimum or wear unevenly, perform pad replacement promptly to avoid increased rotor wear. Remove the wheel, retract pistons, swap pads, and reinstall hardware to manufacturer torque.
After fitting new pads, clean the rotor with isopropyl alcohol. Bed the pads gently and recheck alignment. Note that chronic uneven wear or rapid rotor wear means you need to check calipers and piston movement. Consider professional service if bleeding or truing is needed.
How Often Should You Check Your Disc Brake Maintenance on a Bike?
You should inspect your disc brake maintenance at least once a month for routine riders and before every long ride if you commute daily or ride in wet or dusty conditions. Catching wear early keeps repair costs low and prevents the cascading damage that turns a small component issue into a full drivetrain or wheelset replacement.
Frequently Asked Questions
How Often Should I Clean My Rotors and Pads?
Clean rotors and pads after every muddy or oily ride. Do a routine rotor inspection and pad wear check every 1–2 months or every 500–1,000 miles. You’ll also clean them whenever you hear squeal, feel reduced power, or see glazing or contamination.
Use isopropyl alcohol on rotors; avoid touching braking surfaces. Inspect pads for even wear. Schedule professional service for persistent issues or if bleeding is needed.
Can Oil Contamination Be Fully Removed From Pads?
No, oil contamination usually can’t be fully removed from pads. You should perform brake pad replacement. You can attempt cleaning with isopropyl alcohol and gentle sanding to reduce glazing; however, soaked fibers and embedded oil often remain, causing noise and reduced stopping power.
For safety and reliable braking, replace contaminated pads. Clean the rotor thoroughly and prevent future contamination by keeping chain lube and sprays away from calipers.
When Should I Bleed Hydraulic Brakes for Best Performance?
You should bleed hydraulic brakes when lever feel soft, lever pulls closer to the bar, braking power fades on descents, or you hear gurgling. Those are clear bleed timing cues.
Do a performance bleed annually or after any repair that opens the system, contamination, or long storage. Regularly check fluid condition; schedule a performance bleed every couple of years or sooner if symptoms appear to keep braking consistent and safe.
How Do I Realign a Caliper After Wheel Reinstallation?
Immediately loosen the caliper mounting bolts. Squeeze the brake lever to center the caliper over the rotor. Then hold the lever and retighten the bolts evenly.
After wheel installation, check wheel installation concerns: ensure rotor sits true and axle is fully seated. Spin the wheel, listen for rub, and fine-tune by loosening bolts slightly and nudging caliper laterally. Repeat until rotor clears pads with minimal lateral run-out.
Are There Safe DIY Steps for Minor Rotor Truing?
Yes, you can safely true minor rotor wear at home. You’ll remove the wheel, spin the rotor, and locate the wobble. Use a clean, adjustable rotor truing fork or a padded C-clamp to gently bend the high spot toward center in small taps.
Clean the rotor first to remove dust contamination with isopropyl alcohol and a lint-free rag. Reinstall the wheel, recheck run-out, and repeat until the wobble’s within safe tolerance.
Which Disc Brake Maintenance Routine Approach Is Right for Your Bike?
Keep checking rotor thickness against the chart and the minimum spec. If a rotor’s below spec, replace it to avoid heat damage and poor braking.
Watch pad wear indicators and learn their types: mechanical tabs, electronic sensors, or simple visual cues. This knowledge will help you spot wear early. Measure pad thickness regularly; listen for indicator noises, and swap pads before they hit the minimum.
Staying proactive keeps braking reliable and safer. It also prevents costlier repairs down the road.
Related reading: How to Choose Disc Brake Pads Material — a closer look at this topic.