Tubeless vs Tubed Bike Tires: Which Should You Ride?
Choose tubeless if you ride gravel, race, or regularly meet thorns and glass: sealant can close small punctures, lower rolling resistance, and let you use lower pressures without tube pinch flats.
Confirm that your rims, tape, valves, and tires are compatible, especially with hookless rims, and carry plugs, a pump, tube, and tire boot for major cuts.
Choose tubes if you want the simplest, lowest-maintenance system.
Your terrain, mileage, and repair skills make the choice clearer ahead.
Rim Tape and Valve Differences
Rim tape and valves serve fundamentally different roles in tubed and tubeless wheels. In a tubed wheel, a rim strip covers spoke holes, protecting your tube, while the tube’s Presta or Schrader valve seals the rim hole.
In a tubeless-ready wheel, airtight tape seals the spoke bed and a dedicated valve must seat firmly against the rim.
| System | Tape/strip job | Valve requirement |
|---|---|---|
| Tubed | Covers spoke holes | Tube-mounted Presta/Schrader |
| Tubeless | Creates airtight spoke bed | Removable-core tubeless valve |
| Check | Match width and stem depth | Inspect leaks before riding |
Choose tape that matches rim width and install it without wrinkles or lifted edges. Select a valve stem long enough for rim depth, tighten its retaining nut only finger-tight to avoid damaging the gasket.
Recheck pressure before riding.
Inner Tube vs. Sealant System
Once the rim tape and valve create a reliable seal, the key difference is how each system holds air and responds to damage.
Tubed tires trap air in an inner tube positioned between the tire and rim. A puncture usually deflates that tube, so you must patch or replace it before riding safely.
Tubeless tires use a tubeless-ready tire-and-rim interface and sealant to retain air. The sealant can close small holes as you ride, but inspect it and replenish it about every three to six months, as latex dries or escapes.
At low pressure, a tubed setup can pinch its tube between rim and obstacle, causing a snakebite flat. If tubeless sealant can’t seal larger damage, fit an inner tube, accepting a sealant mess.
Rolling Resistance and Punctures
Tubeless setups can lower rolling resistance, sometimes by roughly 5% versus comparable tubed clinchers, because they eliminate friction between the tube and tire casing. This benefit is most useful when you match tire width, rim, and pressure to your load and surface. You can run lower pressures, often around 20–22 PSI on suitable road or gravel tires, without the pinch-flat risk that rises quickly with tubes below about 25 PSI.
Sealant also closes many small thorn or glass holes as you ride, reducing interruptions and air loss. Some tubeless models claim roughly 30% better puncture protection than equivalent tubed tires. Check pressure regularly: too little pressure can compromise handling or damage a rim on hard impacts. Large cuts may overwhelm sealant, so don’t assume tubeless makes you puncture-proof.
Trailside Repair Learning Curve
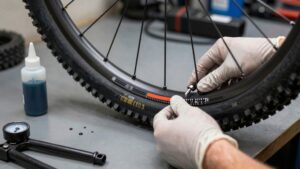
Although sealant handles many small holes automatically, tubeless repairs demand more trailside preparation than simply swapping a tube. Practice at home before relying on it: remove the object, locate leak, insert a plug, trim it if needed, and reinflate promptly. Carry plugs and their insertion tool, a valve-core tool, and a reliable high-volume pump or inflator.
These supplies address punctures that sealant can’t close on its own.
Expect mess when a plug fails or a larger leak sprays sealant. Wear gloves if possible, protect your eyes, and keep sealant off brake rotors and pads. Learn to seat a bead and diagnose slow leaks before your ride; roadside conditions make both jobs harder. Carry a tube and tire boot for sidewall cuts and large oversized holes.
Hookless Rim and Tire Matching
Your repair kit also needs to match the wheel system you ride: hookless rims require tires explicitly approved for that rim type. Don’t assume a tire labeled tubeless will fit safely. Check the wheel and tire manufacturers’ compatibility charts before mounting.
A compatible tire uses the bead profile and casing strength to seat, create an airtight tubeless seal, and remain secure. Use tubeless tape and a proper tubeless valve, and inspect the rim’s bead seat condition. Incorrect bead-seat geometry can make inflation difficult, cause recurring leaks, or compromise retention. Follow both pressure limits and never exceed the lower number. This matters on hookless rims, where overinflation can increase risk. If documentation doesn’t approve the pairing, choose a listed tire or a hooked rim instead.
Sealant Refresh and Replacement Costs
Sealant turns tubeless puncture protection into a recurring maintenance cost: top it up about every 3–6 months before it dries and loses its ability to seal small holes. Check each tire before longer rides and during routine pressure checks; shake the wheel and inspect for pooled liquid or dried residue.
If sealant has thickened or disappeared, add the manufacturer-recommended amount or remove the tire and replace it fully. Debris-prone routes, wet weather, and long gaps between rides can justify more frequent service.
Budget for refills, not merely the initial setup. A puncture that won’t seal may spray sealant and force tire removal or reinstallation, adding cleanup and labor. Tubes avoid this recurring expense: you patch or replace the inner tube only after a puncture.
Cold-Weather Sealant Performance
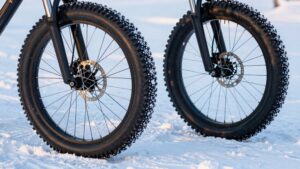
Cold weather adds another variable to tubeless upkeep: most water- and latex-based sealants thicken as temperatures fall, so they may flow into a puncture and form a plug more slowly. You may see less consistent sealing or a slower pressure drop after a small puncture. Before winter rides, check inflation pressure and replenish sealant on schedule, especially if the tire shows dried residue.
Near freezing, sealant can become slushy or develop ice crystals, reducing its ability to seal reliably. Very cold conditions can also make beads harder to seat and limit dried sealant’s ability to re-knead. If you ride regularly below freezing, choose a cold-weather-rated sealant. Carry a tubeless plug kit and spare tube, then stop and assess any pressure loss before riding on.
Sidewall Cuts and Tire Boots
A sidewall cut demands more than tubeless sealant, which rarely seals damaged casing reliably.
You can install a tire boot inside the tire to cover the cut and protect a tube or support a tubeless emergency repair. Don’t continue riding if cords show, the boot won’t stay centered, or the sidewall bulges; replace or professionally repair the tire.
Handling Sidewall Cuts
Sidewall cuts demand more caution than ordinary tread punctures because they damage the tire’s structural casing, not just its air chamber. Stop riding and inspect inside and out. Remove any debris, then assess the cut’s size and whether casing threads are exposed or separated.
On a tubeless setup, don’t assume sealant will close it: larger cuts can reopen as the sidewall flexes under load, causing pressure loss. If the tire won’t hold a safe pressure, install an inner tube as an emergency measure and ride gently to a destination. Check that no sharp edges remain inside the casing before fitting the tube.
Avoid cornering, high speeds, rough terrain, and heavy loads. Replace an appreciably cut sidewall; a tube doesn’t fully restore original casing strength.
Using Tire Boots
When a sidewall cut is small enough to manage temporarily, a tire boot can reinforce the damaged casing and keep a tube or tubeless sealant from forcing through the tear. It’s a roadside measure, not a permanent repair.
- Clean the inside of the tire, then center the boot over the cut.
- With tubes, install a patched or replacement tube; the boot limits bulging.
- With tubeless, mount carefully; sidewall flex can defeat sealant and plugs.
- Inflate cautiously and use only enough pressure to reach safety.
- Stop riding if the cut grows, the casing bulges, or air escapes.
Afterward, inspect the tire closely and replace it before your next demanding ride. A boot protects the casing briefly; it can’t restore sidewall strength. Don’t trust it indefinitely.
Commuter, Gravel, and Race Picks
For daily commuting, you may prefer tubeless sealant to close small glass or thorn punctures, but carry a spare tube for larger failures. On gravel, tubeless lets you use lower pressures for traction and pinch-flat resistance; confirm that your rims and tires are tubeless-ready before setup.
For race day, tubeless can lower rolling resistance and improve cornering confidence, provided you check sealant, pressure, and bead seating before you ride.
Daily Commuter Priorities
Your daily route should drive the choice: tubeless suits commuters who regularly encounter road grit, glass, thorns, or rough pavement because sealant can close many small punctures before they force a stop.
Use this practical checklist:
- Choose tubeless if preventing unplanned roadside stops protects your arrival time on debris-heavy streets.
- Check that your rims, tape, valves, and tires are tubeless-ready before conversion.
- Set pressure carefully; lower pressure improves comfort, but maintain stable handling and rim protection.
- Carry a spare tube, tire lever, and inflation tool for cuts sealant cannot repair.
- Choose tubes when $5–10 replacements, easy repairs, and no periodic sealant top-ups matter most.
Whatever you choose, inspect tire condition before each commute; dependable inflation and tread integrity meaningfully reduce crash risk in traffic.
Gravel Puncture Protection
Tubeless tires give gravel riders the strongest everyday puncture defense: liquid sealant can close many small thorn and glass holes before they cause a pressure loss or roadside stop. A tubed tire can puncture or pinch-flat after a rock strike. With a compatible tubeless-ready tire, rim, tape, and valve, you can use lower pressure—about 70–80 PSI on 700c setups—while reducing snakebite flats associated with tubes.
Check pressure before every ride and inspect the bead and rim tape for leaks. Sealant isn’t a guarantee: top it up every three to six months, and carry plugs, a boot, and a spare tube or patch kit for cuts or sidewall tears. Don’t run a non-compatible rim/tire combination; poor bead retention can create a safety hazard.
Race-Day Speed Considerations
On race day, choose tubeless when uninterrupted speed, lower pressures, and traction outweigh setup complexity. For commuters, sealant can close small glass or thorn punctures before they interrupt your pace. On gravel, lower pressure improves grip and reduces harsh impacts that bleed speed. A 2021 Bicycling Magazine study reported up to 5% lower rolling resistance than clinchers, a meaningful margin over long, rough courses.
- Pick tubeless for debris-prone commutes.
- Run gravel pressures around 20–22+ PSI, matched to tire and rim size.
- Confirm TLR/UST tires, compatible rims, tape, and valves before racing.
- Test bead seating and pressure retention before the start.
- Carry CO₂ and a spare tube; use it after a large puncture or sidewall tear.
Choose tubes for simplicity, but don’t run unsafe pressures.
Choose by Weekly Mileage
Weekly mileage helps determine whether tubeless benefits outweigh its maintenance. If you ride fewer than three or four times monthly, tubes usually make more sense. You avoid sealant that can dry out and needs replenishing every three to six months.
On smooth roads, a $5–$10 replacement tube keeps repairs inexpensive and straightforward.
At roughly 30–100 miles per week, tubeless often earns its setup work: sealant can close small punctures before they stop your ride. Above 100 weekly miles, fewer flat-related interruptions become more valuable during endurance rides.
If your mileage includes gravel or broken pavement, favor tubeless at nearly any volume. Lower pressures, about 70–80 PSI versus 90–100 PSI with tubes on 700c road tires, improve comfort, grip, and pinch-flat resistance. Check compatibility and carry a spare tube.
Conclusion
Choose tubeless when you want lower pressures, fewer small puncture stops, and you’ll maintain sealant, rim tape, and valve hardware. Choose tubes when you prioritize simple roadside fixes, cold-weather predictability, or compatibility with older rims and tires. Check hookless tire approval, inflation limits, and sidewall condition before every ride. Carry a tube, plug kit, pump, and tire boot regardless.
Match your setup to weekly mileage, terrain, and your repair skills, not marketing claims alone in practice.