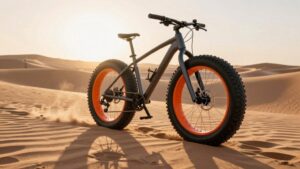
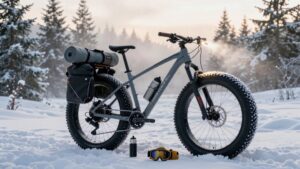
Studs Vs Non-Studded Fat Bike Tires Explained
You need studs when hard ice or frequent freeze-thaw turns traction into the limiting factor. Studs bite into ice and shorten stopping distances.
Skip studs when trails are soft powder, groomed singletrack, or rarely icy to save weight, rolling resistance, and cost.
Consider studdable tires or mixed front/rear studding for variable surfaces.
Factor in stud density, compound softness, and expected wear for fleet ROI.
Continue for setup, maintenance, and procurement specifics.
Quick Overview
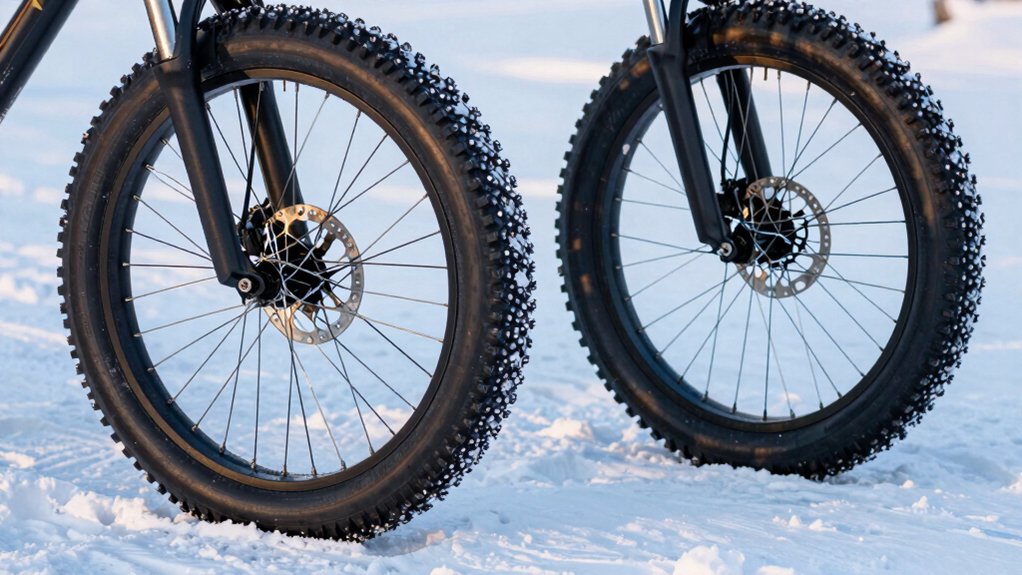
- Studded tires bite into hard ice for superior braking and cornering, while non-studded tires rely on rubber compound and tread for soft snow grip.
- Choose studs if you regularly encounter ice or freeze-thaw surfaces. Prefer non-studded for deep, soft snow or groomed singletrack.
- Use studded front tires to improve steering and stability; use studded rear tires or both for mixed ice and powered riding balance.
- Studs increase weight, rolling resistance, and wear on pavement. Expect higher costs and more frequent maintenance.
- Consider studdable tires or dual wheelsets for flexibility across changing winter conditions and terrain.
Should You Choose Studded or Non‑Studded Fat‑Bike Tires? (Short Answer)
Unsure which to buy? You should pick based on climate, riding frequency, and budget. If you face regular ice or freeze-thaw cycles, choose studded tires for superior ice control. If you see mostly soft snow or groomed trails, non-studded gives adequate grip with lower cost, weight, and rolling resistance.
Factor in your style preference: aggressive commuters and cautious riders may prioritize studs. Performance tolerance for noise and extra effort matters for long rides. Consider dual sets: studded for icy months and non-studded for deep-snow or dry conditions; that optimizes cost per use and extends tire life.
Buy studdable models if you want flexibility to upgrade later without replacing the tire carcass.
How Studs Improve Traction on Ice and Packed Snow
If you ride where ice or firm-packed snow shows up, studs change how the tire contacts the surface and how your bike responds. You get metal contact points that engage ice microstructure instead of relying solely on rubber adhesion. Penetration into microscopic surface asperities converts slip potential into shear resistance.
Optimized stud distribution across the tread balances bite and stability: dense placement at the shoulder aids cornering while staggered center studs improve straight-line braking. That engineered pattern reduces slip events and shortens stopping distances on hard, glazed surfaces. Expect higher rolling resistance on non-icy pavement; however, in targeted winter markets, studded systems deliver measurable performance gains.
For product decisions, weigh stud count, placement, and expected ice prevalence against cost and weight.
Where Non‑Studded Fat‑Bike Tires Are Perfectly Fine
When your local winters deliver deep, fluffy snow or maintained paths with minimal ice, non-studded fat-bike tires give you the traction and float you need without the cost, weight, or drag of studs. You’ll benefit when routes are dominated by soft snow, groomed trails, or urban corridors cleared to wet slush rather than sheets of ice.
Non-studded compounds and aggressive treads maintain bite in compressible media and preserve rolling efficiency on dry pavement during mixed-season use. For bike shops and fleet managers, they’re a practical SKU: lower upfront spend, simpler inventory, and broad applicability across commuter, fat-tour, and recreational segments.
Choose non-studded when ice risk is low and predictable. Prioritize operational flexibility and rider comfort.
Cost, Weight, and Pedaling Trade‑Offs
Choosing studded tires means paying a clear premium and accepting measurable penalties in weight and rolling resistance. You’ll face cost tradeoffs: factory studded tires run substantially higher than non-studded units, impacting upfront budgeting and lifecycle cost analysis. You’ll also absorb weight tradeoffs; hundreds of studs and reinforced carcasses add grams per tire, altering climb and acceleration metrics.
| Factor | Studded | Non‑Studded |
|---|---|---|
| Unit cost | High ($250–$300) | Low–Moderate |
| Weight | Increased | Lighter |
| Rolling resistance | Higher | Lower |
Quantify expected cadence and power changes when specifying tires for winter fleets. For market-driven buying, model cost per winter-hour and expected stud wear to decide if studdable options or seasonal swaps meet your ROI.
When to Stud Both Tires : Front, Rear, or Just One?
Why stud the front, the rear, or both? You’ll decide based on terrain, risk tolerance, and performance targets. Studding the front improves steering bite and reduces washouts. Studding the rear preserves drive traction and rear balance under power. In mixed conditions, you’ll often want both for predictable handling.
Front-load the front tire when ice dominates and you prioritize cornering control. Add studs to the rear for traction-intensive climbs or loaded touring to maintain rear balance. Stud both when surfaces combine hard ice and packed snow; safety and repeatable braking matter.
You’ll trade weight and rolling resistance for control. Market choices vary by stud profile and placement; match your setup to typical winter conditions.
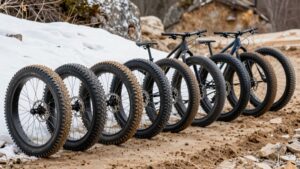
Where to Get Studs: Factory Studs, Aftermarket, or Studdable Tires
After deciding whether to stud one tire or both, you’ll need to pick how studs get onto your rims: factory-installed, aftermarket kits, or studdable tires that accept inserts later. Factory studs offer integrated fit and predictable performance. Pricing sources include OEM retailers and specialized dealers; you’ll pay a premium for low-profile installs.
Aftermarket kits give more aggressive choices (carbide, concave) and lower upfront cost; however, check compatibility options for tread pattern, bead type, and installation tools. Studdable tires let you delay expense and source studs later, balancing initial affordability with modular upgrades.
Evaluate total cost, vendor warranties, and compatibility options with rims, rims’ width, and intended winter terrain before you buy.
Seasonal Setup and Maintenance for Longer Stud Life
When you prep a studded setup for the season, prioritize mounting, pressure, and storage procedures that extend stud life and preserve tire integrity. You’ll mount to correct bead seating, torque any aftermarket studs to spec, and set pressures for expected surface conditions. Track stud depth and wear; rotate tires front-to-rear to equalize wear.
Control storage temperature to prevent rubber hardening. Store tires clean, dry, and elevated off concrete. Use seasonal labeling on each wheel/tire pair for installation date and intended use.
Inspect studs and sidewalls weekly during heavy use. Maintain recommended PSI ranges; avoid pavement-heavy rides. Clean with mild solvent, then lubricate exposed stud bases.
These steps maximize ROI and reduce premature stud replacement.
Quick Decision Checklist for Your Local Winter Conditions
Because winter conditions vary street-by-street, use a short checklist-driven approach to match tire choice to local risks: assess average ice frequency, typical snow depth and compaction, daily freeze–thaw cycles, and surface maintenance (plowing/sanding). Then decide: studded tires for regular ice or freeze–thaw slush; non-studded fat tires for deep, soft snow or well-maintained routes; or a dual-set seasonal swap if both conditions occur.
Now run the checklist: quantify ice days/month, measure median snow depth and compaction, log pavement temperature trends, and freeze window length. Note municipal maintenance schedules. Factor in tire inflation strategy for traction and rolling resistance. Choose studded when ice incidence or pavement temperature swings create slick surfaces. Select non-studded for persistent, soft snow lanes.
Frequently Asked Questions
You’ll get clear answers on traction differences, winter handling tips, tire wear trade-offs, and how to choose based on terrain. Expect concise comparisons of studded versus non-studded grip on ice, packed snow, and dry surfaces. You will also find setup and pressure tips for control.
Use these FAQs to match tire choice to your local conditions and riding priorities.
Traction Differences Explained
How does traction actually differ between studded and non-studded fat bike tires? You assess traction by stud pattern and tire compound interaction with the surface. Studded tires give discrete hard contact points that bite ice. Non-studded tires rely on rubber deformation and tread to evacuate snow.
Studded tires are superior on hard ice; they have higher rolling resistance, weight, and noise trade-offs. Non-studded tires are better on soft snow; they have lower resistance, longer range, and a quieter ride. In mixed conditions, you should choose studdable tires or optimized compounds for compromise.
For a market-focused decision, prioritize stud pattern density for frequent icy routes. Select a softer tire compound for cold-temperature grip. Match deployment to terrain: ice-heavy routes demand studs. Deep, non-icy snow favors non-studded options.
Winter Handling Tips
Now that you know how studs versus rubber generate grip, let’s cover practical handling and setup tips that keep you safe and efficient in winter conditions. You’ll lower tire pressure to increase footprint; balance flotation with steering responsiveness; and choose studded rubber when ice is present.
Calibrate your pedals for predictable release force. Inconsistent pedal calibration increases fall risk on uneven ice. Layer for dexterity: maintain glove warmth without bulk to preserve lever feel and quick modulation. Use a slightly higher cadence to avoid traction-sapping stalls, and favor smooth power application in climbs and corners.
Position weight over the rear for traction; shift forward for firm braking; and scan ice changes early to plan lines. Inspect studs and sidewalls pre-ride; replace or retorque as needed.
Tire Wear Considerations
When riding winter tires, expect wear patterns to differ dramatically from summer rubber because studs, low pressures, and abrasive ice accelerate tread and stud loss. You should monitor tread depth, stud retention, and sidewall condition after each season to plan replacements and avoid sudden failures. You’ll want a measured inspection routine focused on metrics that matter to resale and safety.
Measure tread durability by tracking tread depth, pattern flattening, and compound hardening. Log stud wear rates and retention percentage after mixed-ice versus pure-ice use. Inspect sidewalls for cuts, cord exposure, and bead-seat deformation.
Compare studded vs non-studded lifecycle costs using cost-per-season and expected kilometers. Prioritize tires with documented tread durability and predictable stud wear for fleet and retail buyers.
Choosing Based On Terrain
Which terrain you are riding most often determines whether studded or non-studded fat tires deliver the best value and safety trade-offs. If you ride on hard-packed ice, freeze-thaw trails, or urban winter surfaces, choose studded tires for superior grip. Expect higher rolling resistance and plan tire inflation to balance traction and comfort.
For deep, soft snow or groomed singletrack without ice, non-studded tires offer lower cost, lighter weight, and better rolling efficiency. Adjust tire inflation downward for flotation.
Assess trail compatibility: map common trail surfaces, frequency of icy sections, and maintenance levels. If routes mix ice and soft snow, consider a studdable tire or two-wheel stud configuration.
Make procurement decisions based on local climate data, expected use, and lifecycle cost.
Conclusion
If your winter rides hit ice or hard-packed snow regularly, choose studded fat-bike tires for predictable braking and cornering. They’re a performance investment despite higher cost, weight, and slightly slower rolling resistance.
For soft, deep snow or groomed trails without ice, high-volume, aggressive-tread non-studded tires deliver efficient flotation and lower power demand. Consider front-only studs for steering control; shop factory or quality aftermarket studs, and rotate/inspect monthly to maximize lifespan.