Road Cycling Safety Basics

You’ll stay safer by doing five quick pre-ride checks: tires, brakes, chain, helmet fit/straps, and lights/reflectors.
Wear a snug, certified helmet and replace it after any crash.
Set saddle and handlebars for a slight knee bend and comfortable reach.
Keep tires properly inflated; pads contacting evenly; and driveline lubed.
Use bright front/rear lights and reflective clothing.
Signal clearly, scan often, and control speed.
Keep going for practical setup, signaling, and crash-response tips.
Quick Overview
- Wear a properly fitted helmet with snug straps. Replace after any crash or every few years.
- Check tire pressure, tread, brakes, chain, and lights before every ride.
- Use bright front/rear lights and reflective clothing for daytime and night visibility.
- Signal clearly, scan traffic, and plan routes that favor low-traffic or protected bike lanes.
Call emergency services immediately for serious injury, uncontrolled bleeding, or suspected head, neck, or back trauma.
Pre-Ride Checklist for Bike Safety
Before you roll, run a quick pre-ride checklist to catch mechanical issues and confirm your safety gear: check tire pressure and tread, verify brakes engage firmly, test quick-releases and wheel alignment, confirm the chain is clean and lubricated, adjust saddle and handlebars to a comfortable height, and secure lights and reflectors.
Next, inspect cables and shifters for smooth shifts; listen for unusual noises. Make sure pedals and cleats are tight. Pack basic tools: spare tube, pump, multi-tool, and patch kit. Stash a lightweight layer and rain gear if conditions could change. Confirm phone, ID, and emergency contact info are accessible.
Do a short test ride to make sure everything feels right. If anything seems off, fix it before you head into traffic.
Pick the Right Helmet & Protective Gear
Choose a helmet that fits snugly, sits level on your head, and meets a recognized safety standard (CPSC in the U.S. or EN 1078 in Europe). Check retention straps: they should form a V under each ear and fasten comfortably under your chin. Try different helmet types: road, commuter, and multi-impact urban to match your riding style. Look for MIPS or similar rotational-impact protection if available.
Inspect for cracks, proper foam compression, and a secure visor if used. Wear protective pads for knees and elbows on aggressive or mixed-surface rides. Use lightweight, low-profile pads for road training only if you prefer extra protection. Replace helmets after any crash or every five years, and keep straps clean and functional.
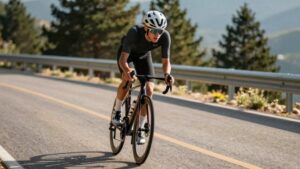
Bike Setup: Fit, Brakes & Tires
After you’ve picked the right helmet and protective gear, make sure your bike fits you and its brakes and tires are in top working order.
Check seat position first: You should have a slight bend in the knee at the bottom of the stroke and be able to reach controls comfortably. Adjust saddle fore/aft so your knee stacks over the pedal spindle when cranks are horizontal.
Test brakes before every ride: Squeeze levers, listen for grinding, and confirm pads contact rims or rotors evenly. Inspect tire tread for cuts, embedded glass, and wear; replace tires with bald centers or visible cords.
Maintain correct tire pressure for weight and conditions. Tighten quick releases, true wheels if they wobble, and address any rubbing immediately.
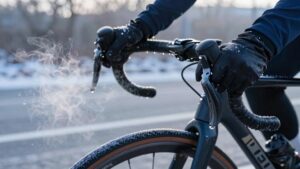
Be Seen: Lights, Clothing & Reflectors
Want drivers to spot you early and clearly? Position bright front white and rear red lights so they’re visible from car height: handlebar or helmet for the front; seatpost or rack for the rear. Use steady beams in daylight and flashing at dawn or dusk to increase noticeability.
Check lighting placement often; aim lights outward and unobstructed.
Wear high-contrast clothing and layer reflective fabrics on limbs and torso to catch headlights from multiple angles. Add reflective tape to your helmet, pedals, and frame. Ankle reflectors are especially effective for moving visibility.
Mount side reflectors or spoke lights for lateral visibility at intersections. Keep batteries charged and lenses clean. If you ride in low light, combine active lights with reflective fabrics to maximize detection without compromising comfort.
Ride Predictably: Signal, Scan, Control Speed
When you ride predictably, other road users can anticipate your moves and give you space. So signal clearly, scan continuously, and control your speed to match traffic and road conditions.
Use consistent hand signals well before turns or lane changes, and keep signals until the maneuver is complete. Scan patterns should include mirrors, shoulder checks, and quick sweeps of the road ahead and to the sides so you spot vehicles and hazards early.
Modulate your speed to fit flow and sightlines; avoid sudden accelerations or stops. Watch braking cues from traffic ahead and communicate your intent with a light tap of the rear brake before stronger input. Smooth, visible actions reduce surprises and make cycling safer for you and others.
Avoid Hazards: Potholes, Doors & Intersections
How do you spot and avoid common road hazards like potholes, opening car doors, and intersection conflicts? Scan far and near, using quick head checks and a focused gaze to prioritize pothole detection early. Shift your line gently around defects when safe; avoid sudden swerves.
Keep a safe buffer from parked cars to maintain dooring awareness. Ride a door’s width out when traffic allows. At intersections, make eye contact, read drivers’ intentions, and anticipate turns or stops. Slow before complex junctions; pick visible lanes and assert position when you’ll be going straight.
Use signals and audible cues to communicate. Practice these habits until they’re automatic so you reduce surprise maneuvers and stay safer on every ride.
Ride predictably and assertively when you’re sharing the road with cars and trucks: hold a steady line, signal early, and make your position visible to drivers so they can judge and adjust safely. Use clear hand signals and verbal cues when needed, and avoid sudden swerves.
Keep enough space from parked cars to prevent dooring, and take the lane if it’s too narrow for a vehicle to pass safely. Wear bright clothing and use lights to boost visibility in low light.
Practice road etiquette: don’t weave between lanes, yield when required, and acknowledge courteous drivers. Expect limited motorist awareness; assume drivers may not see you and position yourself defensively to reduce risk.
Plan Safer Routes: Low-Traffic and Protected Lanes
If you want to minimize risk, pick routes that favor low traffic and continuous, protected bike lanes so you can avoid fast-moving vehicles and unpredictable interactions. Use mapping apps and local bike maps to identify protected corridors and streets with traffic calming measures like curb extensions, speed cushions, and raised crossings.
Prioritize routes that keep you separated from vehicle lanes for long stretches; short protected segments don’t eliminate exposure. Scout alternatives that trade a few extra minutes for safer infrastructure, and plan daylight rides on quieter streets. When you can’t find protected lanes, choose roads with low traffic volume, lower speed limits, and visible sightlines.
Regularly update your preferred routes as city improvements and lane changes occur.
After a Crash: Immediate Steps, Reporting & Recovery
Even with careful route choices and protected lanes, accidents can still happen; so know what to do next. First, assess yourself and others: check breathing, consciousness, and bleeding. Move only if you’re safe from traffic. Stabilize neck or spine if there’s a head injury. Call emergency services for serious injuries. Photograph the scene, vehicle damage, and injuries; get witness contact info.
Seek medical attention even for minor symptoms to document injuries for medical recovery and later care. Report the crash to police if required and file detailed notes while memories are fresh.
Notify your insurer promptly and begin insurance claims with copies of medical records, photos, and police reports. Follow healthcare provider instructions, track expenses, and rest; recovery is part of riding smart.
Frequently Asked Questions
Before you roll, check tires, brakes, chain, lights, and helmet fit so the bike and gear won’t fail you on the road. Make sure your helmet sits level, snug, and is buckled every ride. Use clear hand signals for turns and stops so drivers know your intentions.
If you or someone else is injured, call emergency services immediately and report the location and severity of injuries.
Common Pre-Ride Checks
While a quick, consistent pre-ride check can cut your crash risk, focus on five essentials: tire pressure and tread, brake function, chain and drivetrain condition, helmet fit and straps, and lights/reflectors for visibility. You should verify each item every ride. Do not rely on maintenance myths or brand loyalty to excuse skipping checks.
Quick steps: squeeze tires, spin wheels for rubbing, pull brakes for pad contact, shift through gears, and confirm lights work.
| Item | What to do | Pass/fail |
|---|---|---|
| Tires | Inflate, inspect tread/cuts | |
| Brakes | Squeeze, check pads | |
| Drivetrain | Lubricate, check chain wear | |
| Lights/Reflectors | Test on/off, clean lenses |
Helmet Fit And Use
How should your helmet fit and feel to actually protect you? It should sit level on your head, low on the forehead, and not rock when you shake your head. Center the helmet so the front edge sits about two finger-widths above your eyebrows.
Use strap adjustment to form a V under each ear and buckle snugly under the chin; you should be able to fit one or two fingers between the strap and your chin. Tighten the rear retention dial or pads until the helmet feels secure but comfortable.
Perform fit testing before every ride: fasten straps, tilt your head, and try to move the helmet side-to-side. If it shifts, re-adjust or replace the helmet.
Replace after impact or every few years.
Hand Signals Explained
With your helmet fitted correctly, your next focus should be communicating clearly with drivers and other cyclists: hand signals do that without words. You’ll use clear, exaggerated arm timing so others see your intent well before you turn or stop.
Extend your left arm straight out for a left turn. Extend your right arm straight out for a right turn; or use the left arm up for right if you prefer traffic-law conformity. Point with a straight arm to indicate lane changes; keep fingers together and avoid waving.
For stopping, drop your hand down with palm open, fingers together, showing a steady motion: not a twitch. Practice hand positioning and timing on quiet streets until it feels natural and precise.
When To Call For Help
When should you call for help after a cycling crash? If you’re injured, disoriented, bleeding heavily, can’t move a limb, or suspect head, neck, or back trauma, call immediately. Emergency timing matters: don’t wait to see if pain worsens. If a vehicle is involved, there’s severe damage, or someone else is hurt, call right away.
Follow a simple call protocol: Move to safety if you can. Dial local emergency services (911 in the U.S.), state your location, describe injuries, and note how many people need help. If you can’t speak, leave the line open or use text-to-911 where available. For minor bumps, exchange info and seek medical attention within 24 hours to document injuries.
Conclusion
You’ve covered the essentials to ride safer every time you head out.
Do a quick pre-ride check, wear a well-fitted helmet and visible gear, and keep your bike tuned; especially brakes and tires. Ride predictably: signal, scan, and manage your speed. Use lights and reflectors; choose lower-traffic or protected routes when possible.
Know what to do after a crash. Stay alert, practice these habits, and you’ll reduce risk and enjoy more confident rides.